Hardware Installation (continued)
11. You can now power up all of your computers simultaneously. The first computer will show up on the monitor. Check to see if the keyboard and mouse work, as well as the image displayed on the screen. If this is okay, press the SELECT button and check the functionality of the other computers. If you find any errors,
NOTE: Avoid pressing any keys on the keyboard or moving the mouse if the currently selected port has a computer that is in the process of booting up. This may cause the computer to not detect, or initialize the keyboard or mouse drivers properly.
Daisy-Chained Operation
(SKIP IF YOU HAVE ONLY ONE OmniView™ SE)
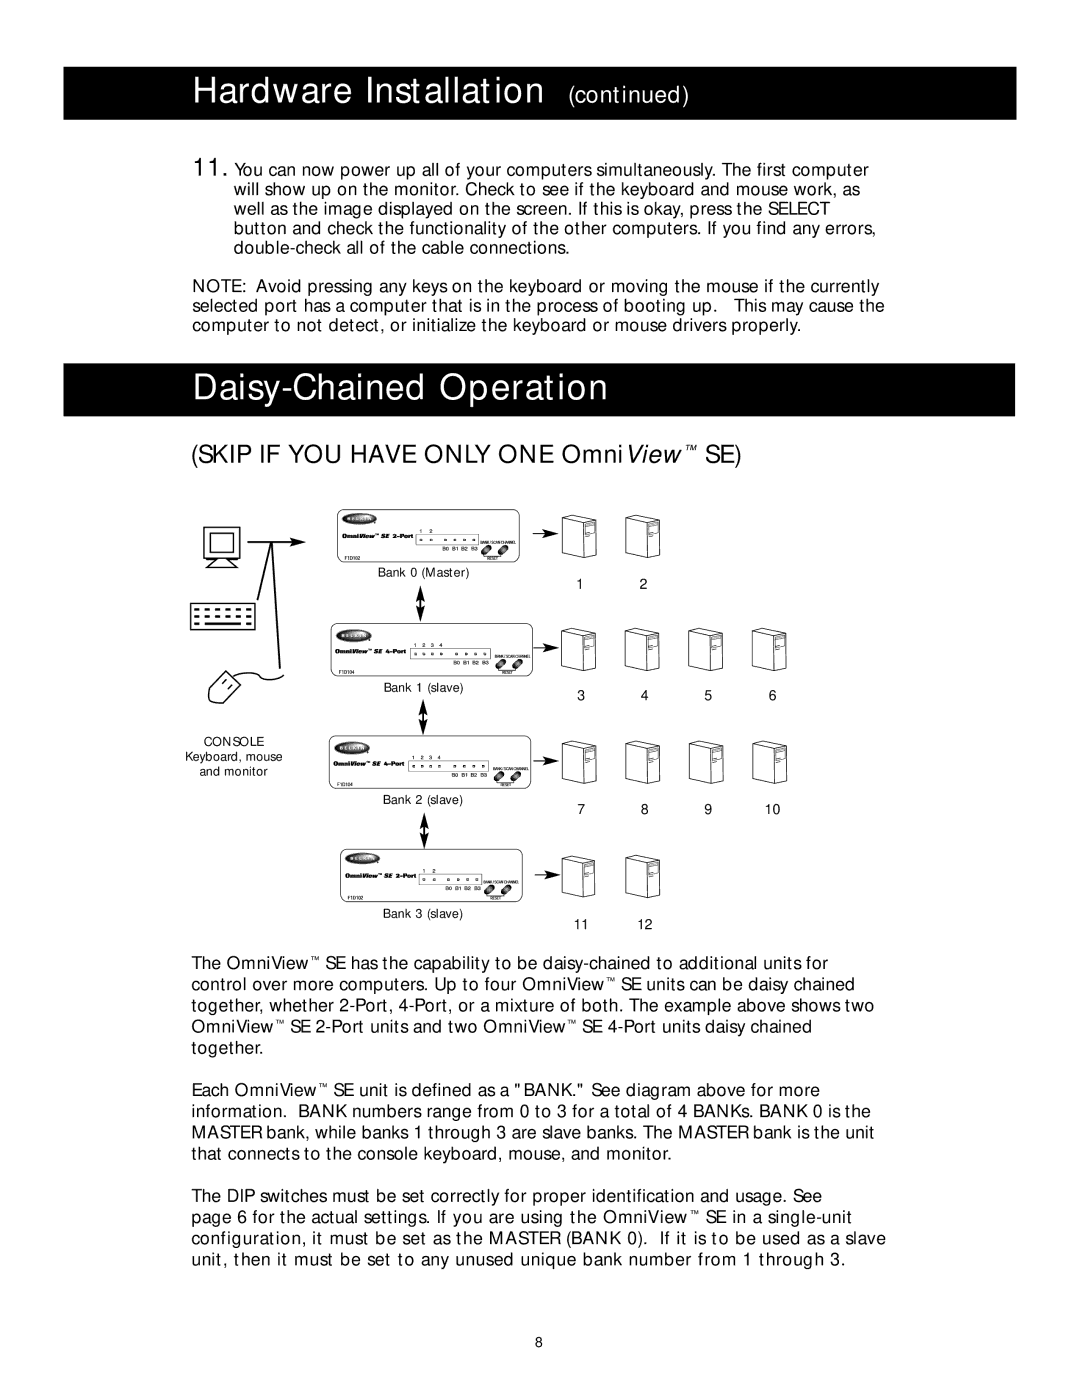
Bank 0 (Master)
1 2
Bank 1 (slave)
3 4 5 6
CONSOLE
Keyboard, mouse
and monitor
Bank 2 (slave)
Bank 3 (slave)
7 8 9 10
11 12
The OmniView™ SE has the capability to be
Each OmniView™ SE unit is defined as a "BANK." See diagram above for more information. BANK numbers range from 0 to 3 for a total of 4 BANKs. BANK 0 is the MASTER bank, while banks 1 through 3 are slave banks. The MASTER bank is the unit that connects to the console keyboard, mouse, and monitor.
The DIP switches must be set correctly for proper identification and usage. See page 6 for the actual settings. If you are using the OmniView™ SE in a
8
