P73778-C-SOHO-man-9_02.qxd 9/18/02 5:17 PM Page 10
INSTALLATION
Single-Switch Installation
This section provides complete instructions for the hardware setup of a single KVM Switch. (F1DS102P, F1DS104P, F1DS102T, or F1DS104T)
Important Note:
Before attempting to connect anything to the KVM Switch or into
your computer(s), make sure that everything is powered off. Plugging and unplugging cables while computers are powered on may cause irreversible damage to the computers and KVM Switch. Belkin Corporation will not be responsible for damage caused by these actions.
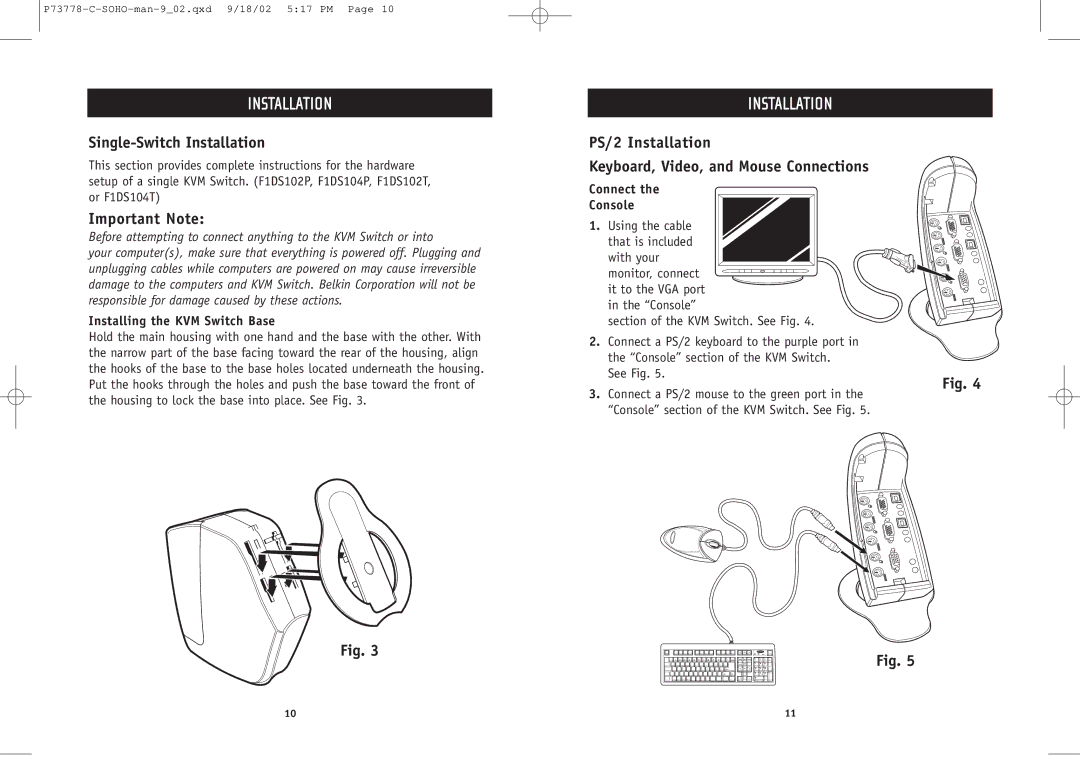
Installing the KVM Switch Base
Hold the main housing with one hand and the base with the other. With the narrow part of the base facing toward the rear of the housing, align the hooks of the base to the base holes located underneath the housing. Put the hooks through the holes and push the base toward the front of the housing to lock the base into place. See Fig. 3.
Fig. 3
INSTALLATION
PS/2 Installation
Keyboard, Video, and Mouse Connections
Connect the
Console
1. Using the cable that is included with your
monitor, connect it to the VGA port
in the “Console”
section of the KVM Switch. See Fig. 4.
2. Connect a PS/2 keyboard to the purple port in the “Console” section of the KVM Switch.
See Fig. 5.
Fig. 4
3.Connect a PS/2 mouse to the green port in the “Console” section of the KVM Switch. See Fig. 5.
Fig. 5
10 | 11 |