OVERVIEW
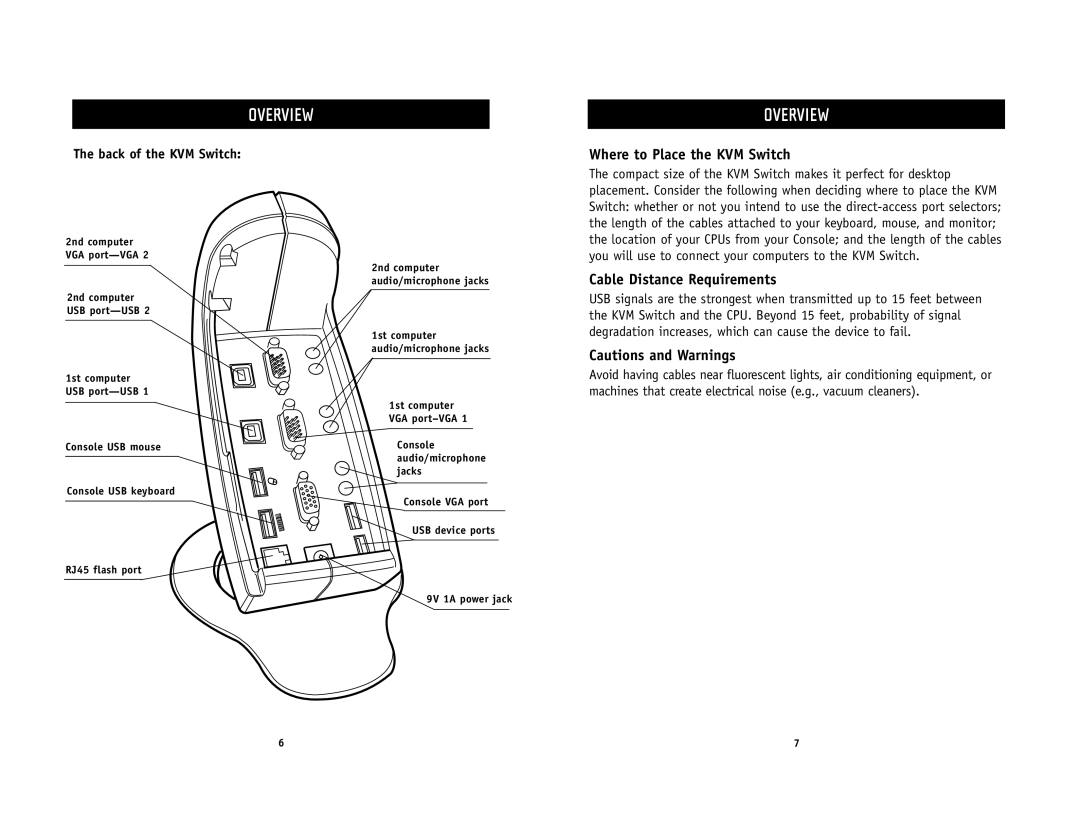
The back of the KVM Switch:
OVERVIEW
Where to Place the KVM Switch
2nd computer VGA
2nd computer USB
1st computer USB
Console USB mouse
Console USB keyboard
RJ45 flash port
2nd computer audio/microphone jacks
1st computer audio/microphone jacks
1st computer VGA
Console audio/microphone ![]() jacks
jacks
![]() Console VGA port
Console VGA port
USB device ports
9V 1A power jack
The compact size of the KVM Switch makes it perfect for desktop placement. Consider the following when deciding where to place the KVM Switch: whether or not you intend to use the
Cable Distance Requirements
USB signals are the strongest when transmitted up to 15 feet between the KVM Switch and the CPU. Beyond 15 feet, probability of signal degradation increases, which can cause the device to fail.
Cautions and Warnings
Avoid having cables near fluorescent lights, air conditioning equipment, or machines that create electrical noise (e.g., vacuum cleaners).
6 | 7 |
