Belkin F1DW216C, F1DW116C user manual Connect the Console, Installation, NOTE 2x16 model shown

Models: F1DW216C F1DW116C

1 47
Download 47 pages 20.7 Kb
Page 13
Image 13
Connect the Console

INSTALLATION

6.Repeat steps 1 through 5 for each additional computer you wish to connect.
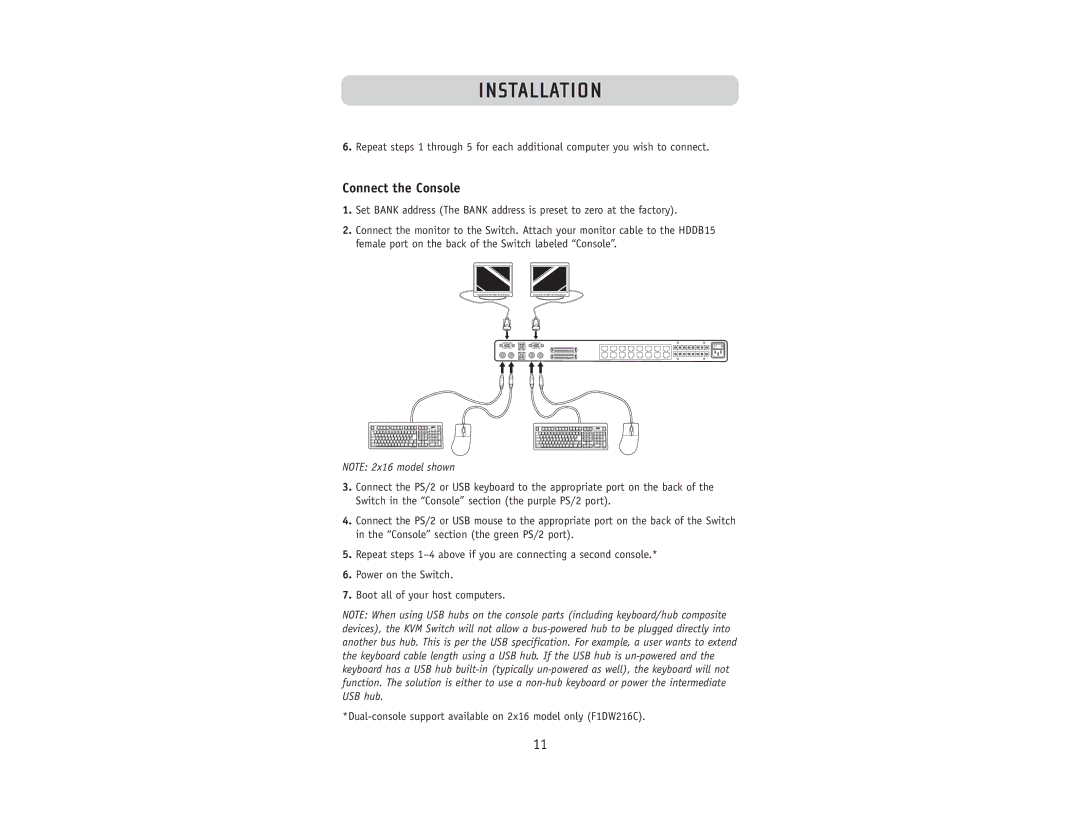
Connect the Console

1.Set BANK address (The BANK address is preset to zero at the factory).

2.Connect the monitor to the Switch. Attach your monitor cable to the HDDB15 female port on the back of the Switch labeled “Console”.

NOTE: 2x16 model shown

3.Connect the PS/2 or USB keyboard to the appropriate port on the back of the Switch in the “Console” section (the purple PS/2 port).

4.Connect the PS/2 or USB mouse to the appropriate port on the back of the Switch in the “Console” section (the green PS/2 port).

5.Repeat steps 1–4 above if you are connecting a second console.*

6.Power on the Switch.

7.Boot all of your host computers.

NOTE: When using USB hubs on the console parts (including keyboard/hub composite devices), the KVM Switch will not allow a bus-powered hub to be plugged directly into another bus hub. This is per the USB specification. For example, a user wants to extend the keyboard cable length using a USB hub. If the USB hub is un-powered and the keyboard has a USB hub built-in (typically un-powered as well), the keyboard will not function. The solution is either to use a non-hub keyboard or power the intermediate USB hub.

*Dual-console support available on 2x16 model only (F1DW216C).

11

Page 13
Image 13
Belkin F1DW216C, F1DW116C user manual Connect the Console, Installation, NOTE 2x16 model shown