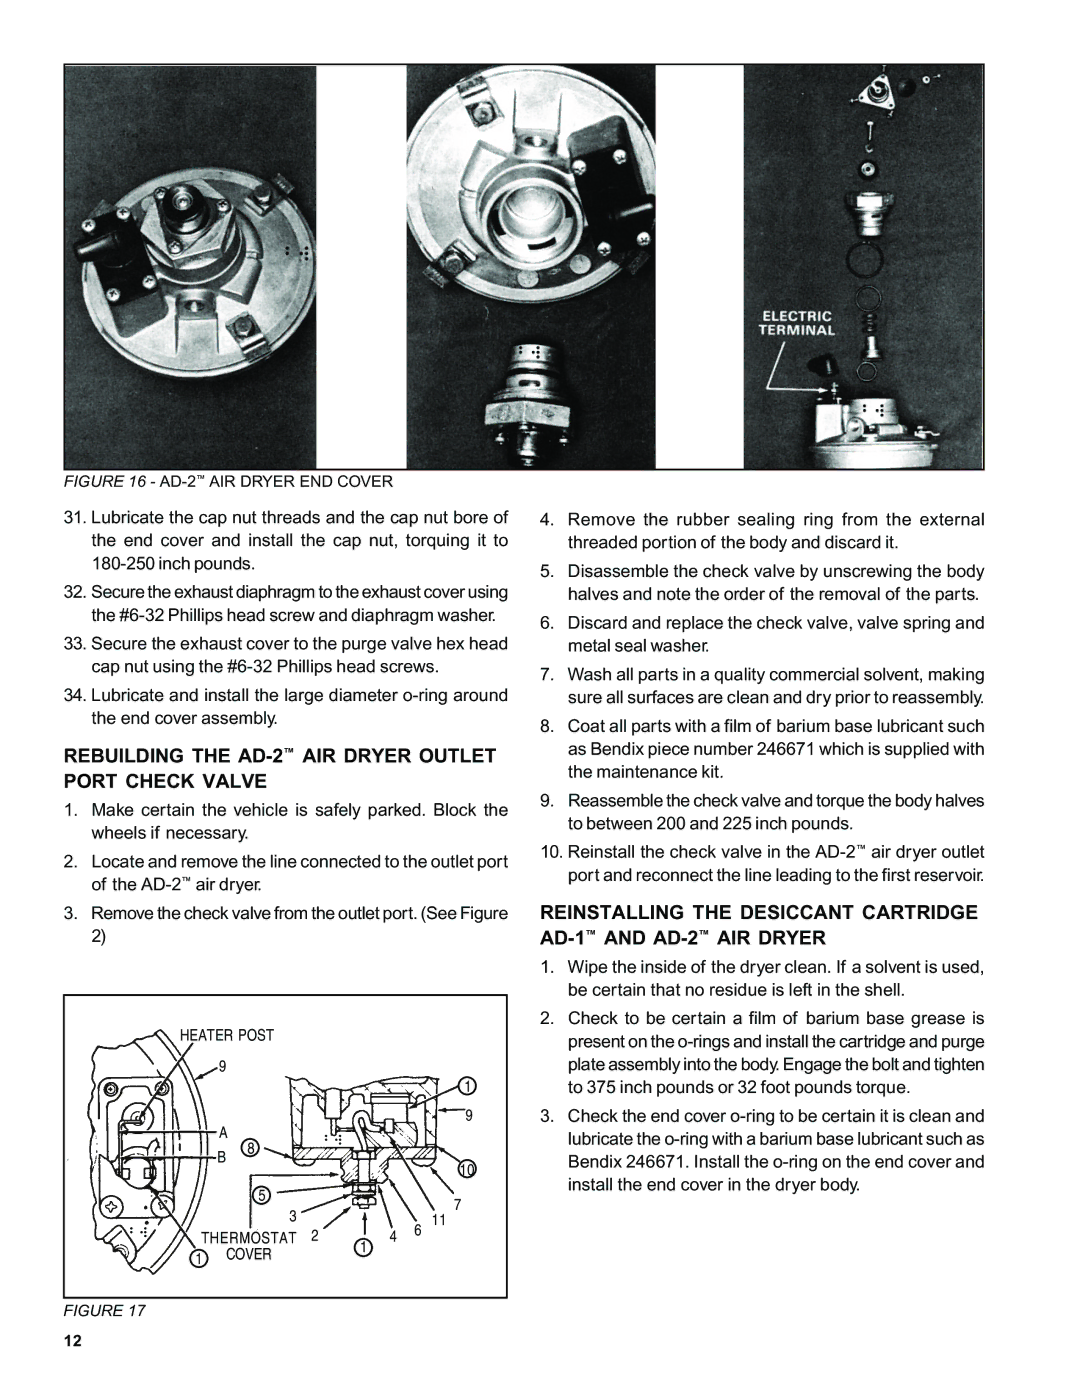
FIGURE 16 - AD-2™ AIR DRYER END COVER
31.Lubricate the cap nut threads and the cap nut bore of the end cover and install the cap nut, torquing it to
32.Secure the exhaust diaphragm to the exhaust cover using the
33.Secure the exhaust cover to the purge valve hex head cap nut using the
34.Lubricate and install the large diameter
REBUILDING THE AD-2™ AIR DRYER OUTLET PORT CHECK VALVE
1.Make certain the vehicle is safely parked. Block the wheels if necessary.
2.Locate and remove the line connected to the outlet port of the
3.Remove the check valve from the outlet port. (See Figure 2)
HEATER POST
9
1
9
A
4.Remove the rubber sealing ring from the external threaded portion of the body and discard it.
5.Disassemble the check valve by unscrewing the body halves and note the order of the removal of the parts.
6.Discard and replace the check valve, valve spring and metal seal washer.
7.Wash all parts in a quality commercial solvent, making sure all surfaces are clean and dry prior to reassembly.
8.Coat all parts with a film of barium base lubricant such as Bendix piece number 246671 which is supplied with the maintenance kit.
9.Reassemble the check valve and torque the body halves to between 200 and 225 inch pounds.
10.Reinstall the check valve in the
REINSTALLING THE DESICCANT CARTRIDGE AD-1™ AND AD-2™ AIR DRYER
1. | Wipe the inside of the dryer clean. If a solvent is used, |
| be certain that no residue is left in the shell. |
2. | Check to be certain a film of barium base grease is |
| present on the |
| plate assembly into the body. Engage the bolt and tighten |
| to 375 inch pounds or 32 foot pounds torque. |
3. | Check the end cover |
| lubricate the |
B
8
5
10
7
Bendix 246671. Install the |
install the end cover in the dryer body. |
3 |
|
| 6 | 11 | |
THERMOSTAT | 2 | 4 | |||
|
| ||||
|
| 1 |
|
|
1 | COVER |
|
FIGURE 17
12