English
•Locked: Enable Child Lock. Once enabled, the locked channels (Refer to "Locking (Preventing a Channel from Selection)/Unlocking a Channel" on page 27 for how to lock a channel) will be locked.
•UnLocked: Disable Child Lock.
4. Press the MENU button to close menus.
Changing Password
1. In the TV Menu, press the or buttons to select Child Lock and then press the OK but- ton.
2. Press the button to select Change Password and then enter a new
3.Enter the new password again using the channel selection buttons.
4.Press the MENU button to close the menu.
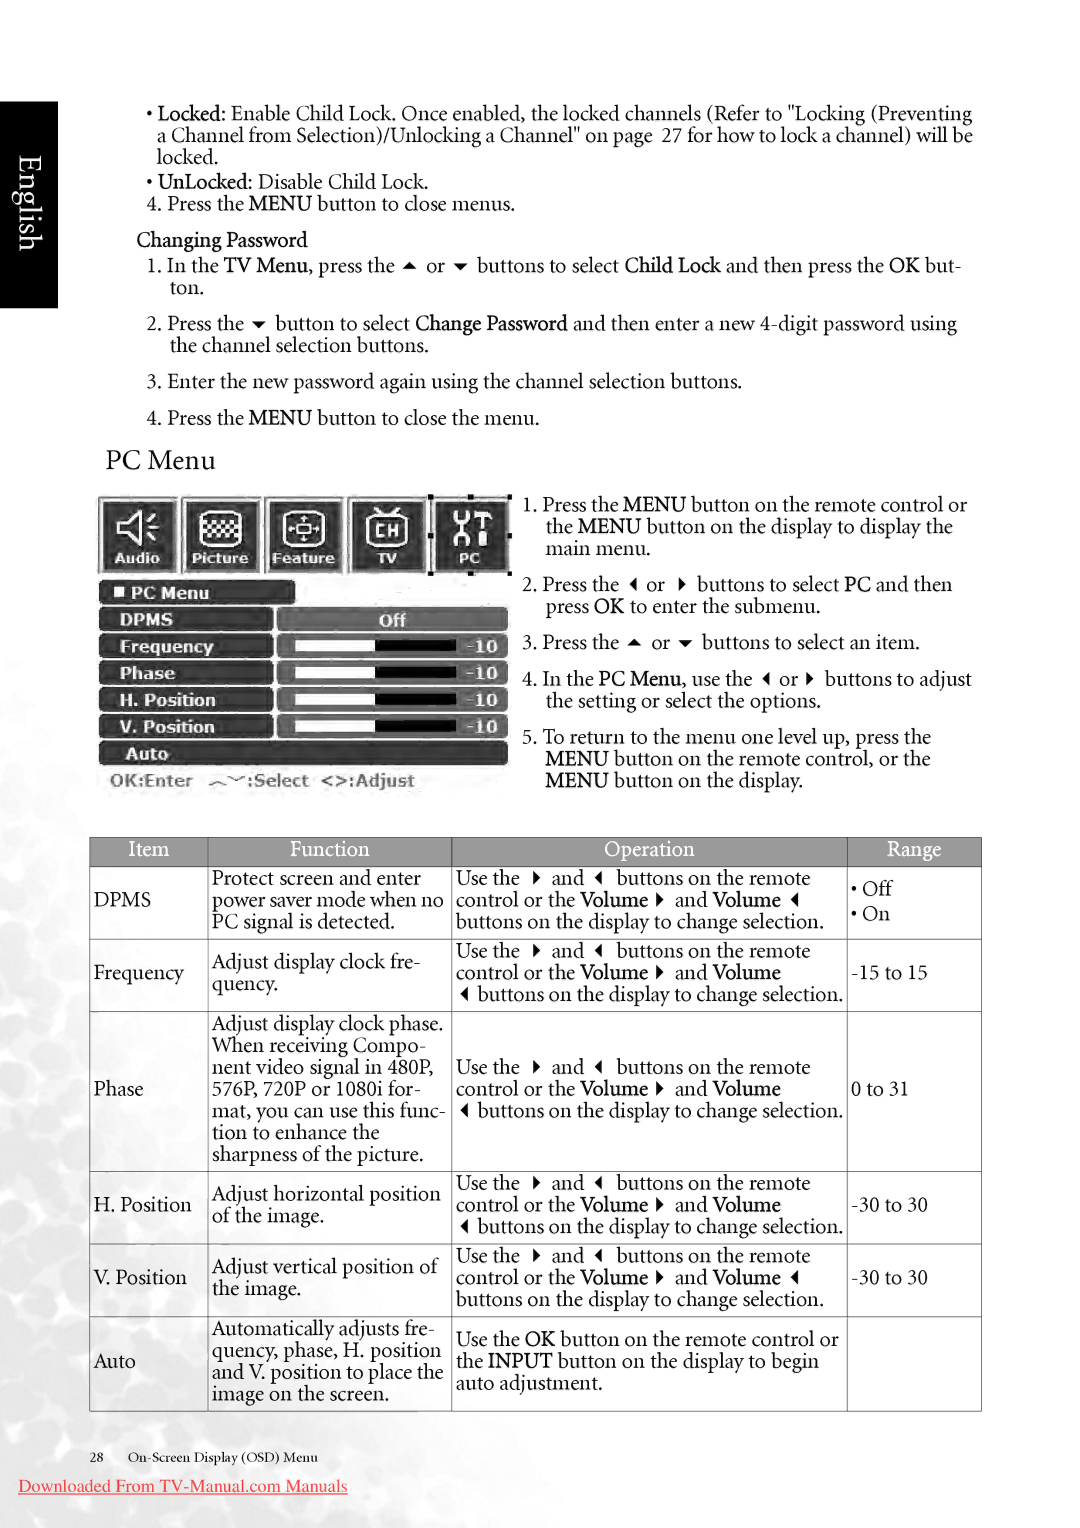
PC Menu
1.Press the MENU button on the remote control or the MENU button on the display to display the main menu.
2. Press the | or | buttons to select PC and then |
press OK to enter the submenu. | ||
3. Press the | or | buttons to select an item. |
4. In the PC Menu, use the or buttons to adjust the setting or select the options.
5.To return to the menu one level up, press the MENU button on the remote control, or the MENU button on the display.
Item | Function |
|
| Operation | Range | ||
|
|
|
|
|
| ||
| Protect screen and enter | Use the | and | buttons on the remote | • Off | ||
DPMS | power saver mode when no | control or the Volume | and Volume | ||||
• On | |||||||
| PC signal is detected. | buttons on the display to change selection. | |||||
|
| ||||||
|
|
|
|
|
| ||
| Adjust display clock fre- | Use the | and | buttons on the remote |
| ||
Frequency | control or the Volume | and Volume | |||||
quency. | |||||||
| buttons on the display to change selection. |
| |||||
|
|
| |||||
|
|
|
|
|
|
| |
| Adjust display clock phase. |
|
|
|
|
| |
| When receiving Compo- |
|
|
|
|
| |
| nent video signal in 480P, | Use the | and | buttons on the remote |
| ||
Phase | 576P, 720P or 1080i for- | control or the Volume | and Volume | 0 to 31 | |||
| mat, you can use this func- | buttons on the display to change selection. |
| ||||
| tion to enhance the |
|
|
|
|
| |
| sharpness of the picture. |
|
|
|
|
| |
|
|
|
|
|
| ||
| Adjust horizontal position | Use the | and | buttons on the remote |
| ||
H. Position | of the image. | control or the Volume | and Volume | ||||
|
| buttons on the display to change selection. |
| ||||
| Adjust vertical position of | Use the | and | buttons on the remote |
| ||
V. Position | control or the Volume | and Volume | |||||
| the image. | buttons on the display to change selection. |
| ||||
|
|
| |||||
|
|
|
| ||||
| Automatically adjusts fre- | Use the OK button on the remote control or |
| ||||
Auto | quency, phase, H. position | the INPUT button on the display to begin |
| ||||
| and V. position to place the | auto adjustment. |
|
|
| ||
| image on the screen. |
|
|
|
|
| |
28
Downloaded From