Using the menus
The projector is equipped with
There are 17 different OSD menu languages. See "System setup: Basic menu" on page 50 for details.
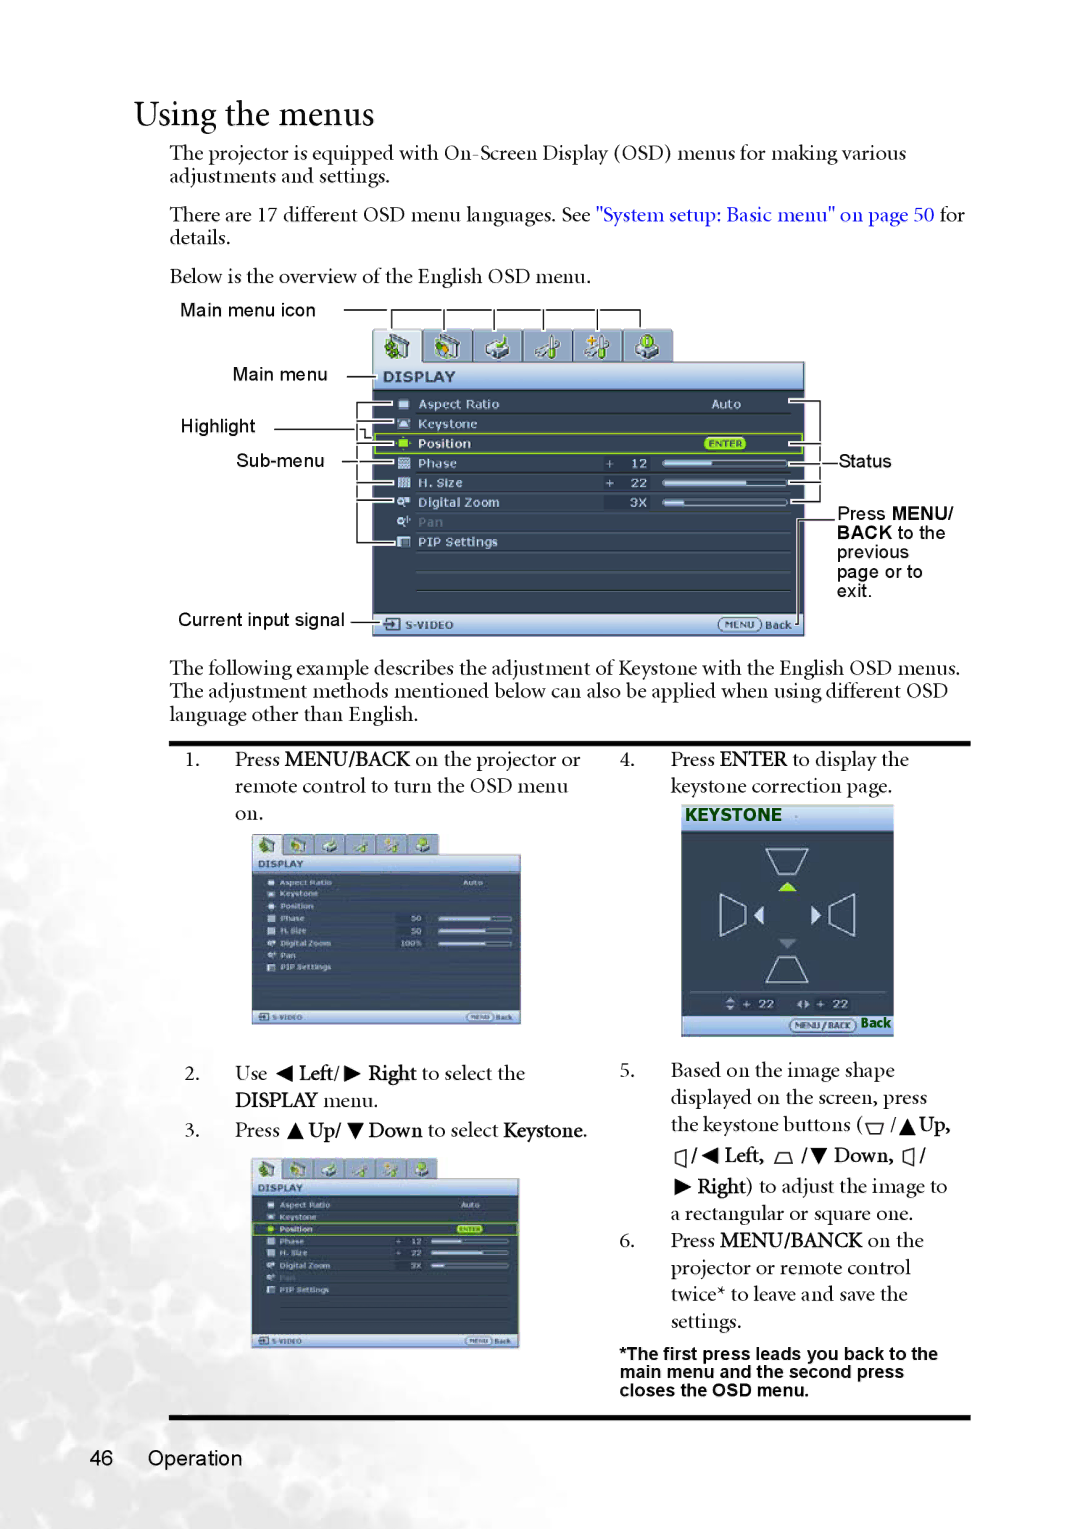
Below is the overview of the English OSD menu.
Main menu icon
Main menu
Highlight |
Current input signal ![]()
![]()
![]() Status
Status
Press MENU/ BACK to the previous page or to exit.
The following example describes the adjustment of Keystone with the English OSD menus. The adjustment methods mentioned below can also be applied when using different OSD language other than English.
1. Press MENU/BACK on the projector or | 4. Press ENTER to display the |
remote control to turn the OSD menu | keystone correction page. |
on. | KEYSTONE |
Back
2.Use  Left/
Left/  Right to select the DISPLAY menu.
3.Press ![]() Up/
Up/ ![]() Down to select Keystone.
Down to select Keystone.
5.Based on the image shape displayed on the screen, press the keystone buttons (![]() /
/![]() Up,
Up, ![]() /
/ ![]() Left,
Left, ![]() /
/![]() Down,
Down, ![]() /
/
![]() Right) to adjust the image to a rectangular or square one.
Right) to adjust the image to a rectangular or square one.
6.Press MENU/BANCK on the projector or remote control twice* to leave and save the settings.
*The first press leads you back to the main menu and the second press closes the OSD menu.