Remote control
1 |
|
2 | 12 |
| 13 |
3 | 14 |
4 |
|
| 15 |
5 | 16 |
6 |
|
| 15 |
7 | 17 |
8 | 18 |
9 | 19 |
| 20 |
10 |
|
11 | 21 |
| |
| 22 |
| 23 |
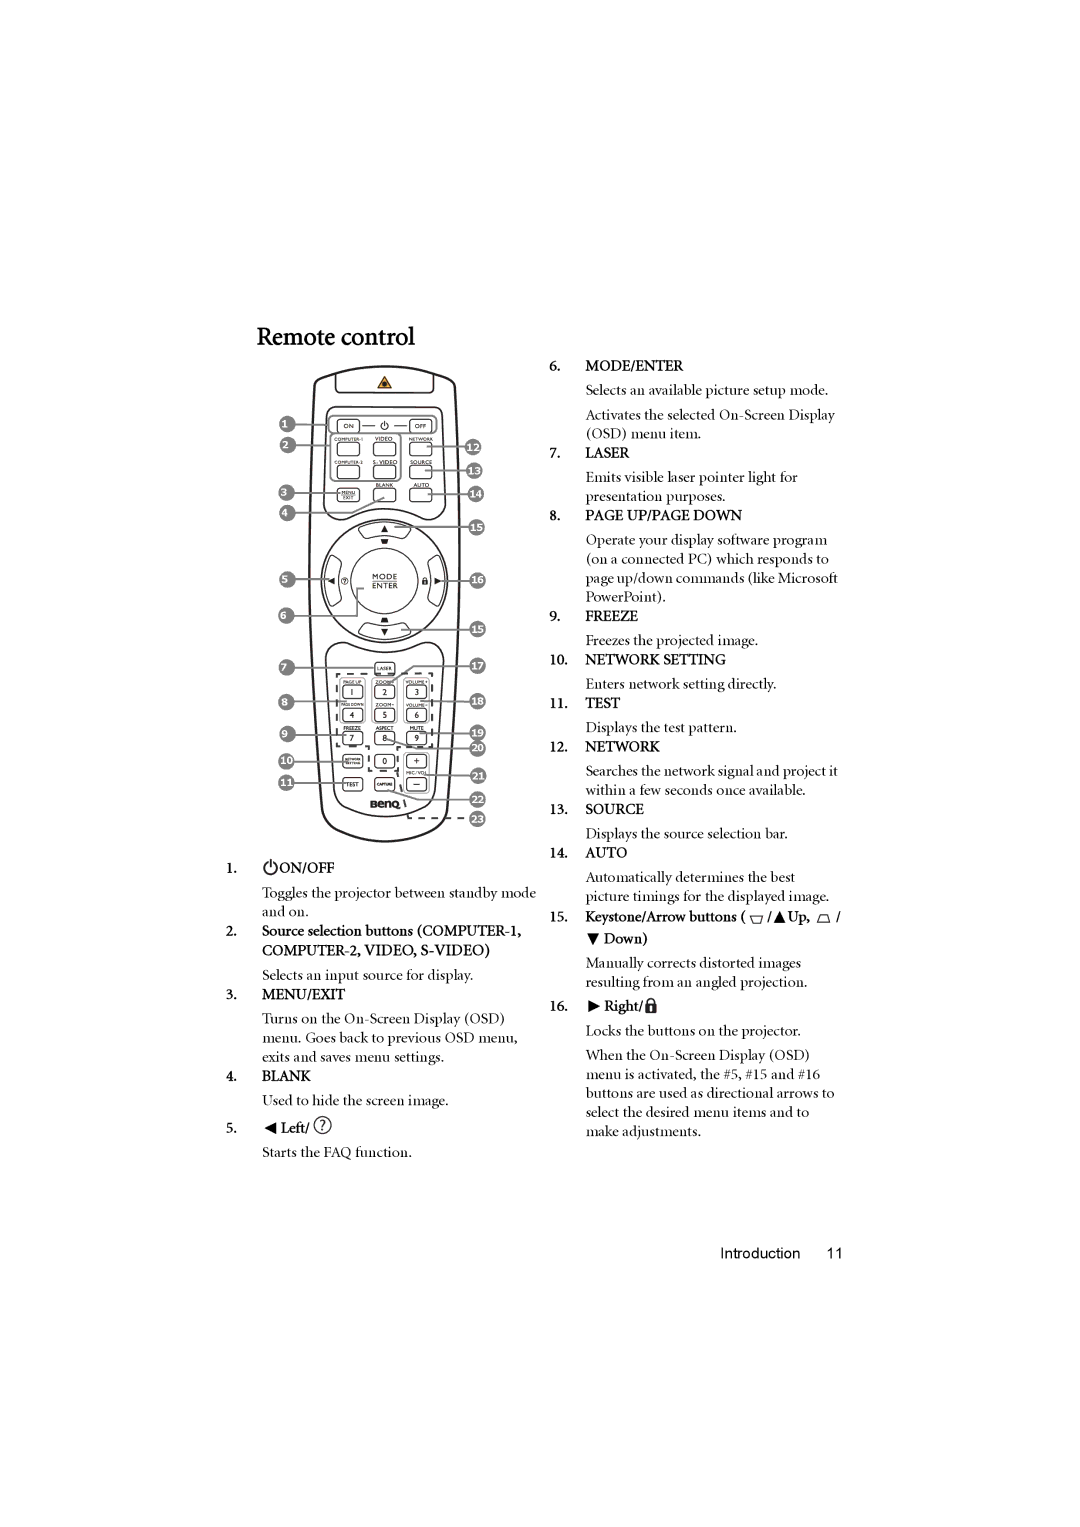
1. ON/OFF
Toggles the projector between standby mode and on.
2.Source selection buttons
Selects an input source for display.
3.MENU/EXIT
Turns on the
4.BLANK
Used to hide the screen image.
5.![]() Left/
Left/ ![]()
Starts the FAQ function.
6.MODE/ENTER
Selects an available picture setup mode.
Activates the selected
7.LASER
Emits visible laser pointer light for presentation purposes.
8.PAGE UP/PAGE DOWN
Operate your display software program (on a connected PC) which responds to page up/down commands (like Microsoft PowerPoint).
9.FREEZE
Freezes the projected image.
10.NETWORK SETTING
Enters network setting directly.
11.TEST
Displays the test pattern.
12.NETWORK
Searches the network signal and project it within a few seconds once available.
13.SOURCE
Displays the source selection bar.
14.AUTO
Automatically determines the best picture timings for the displayed image.
15.Keystone/Arrow buttons (  /
/ Up,
Up,  /
/
 Down)
Down)
Manually corrects distorted images resulting from an angled projection.
16. Right/
Locks the buttons on the projector.
When the
Introduction 11