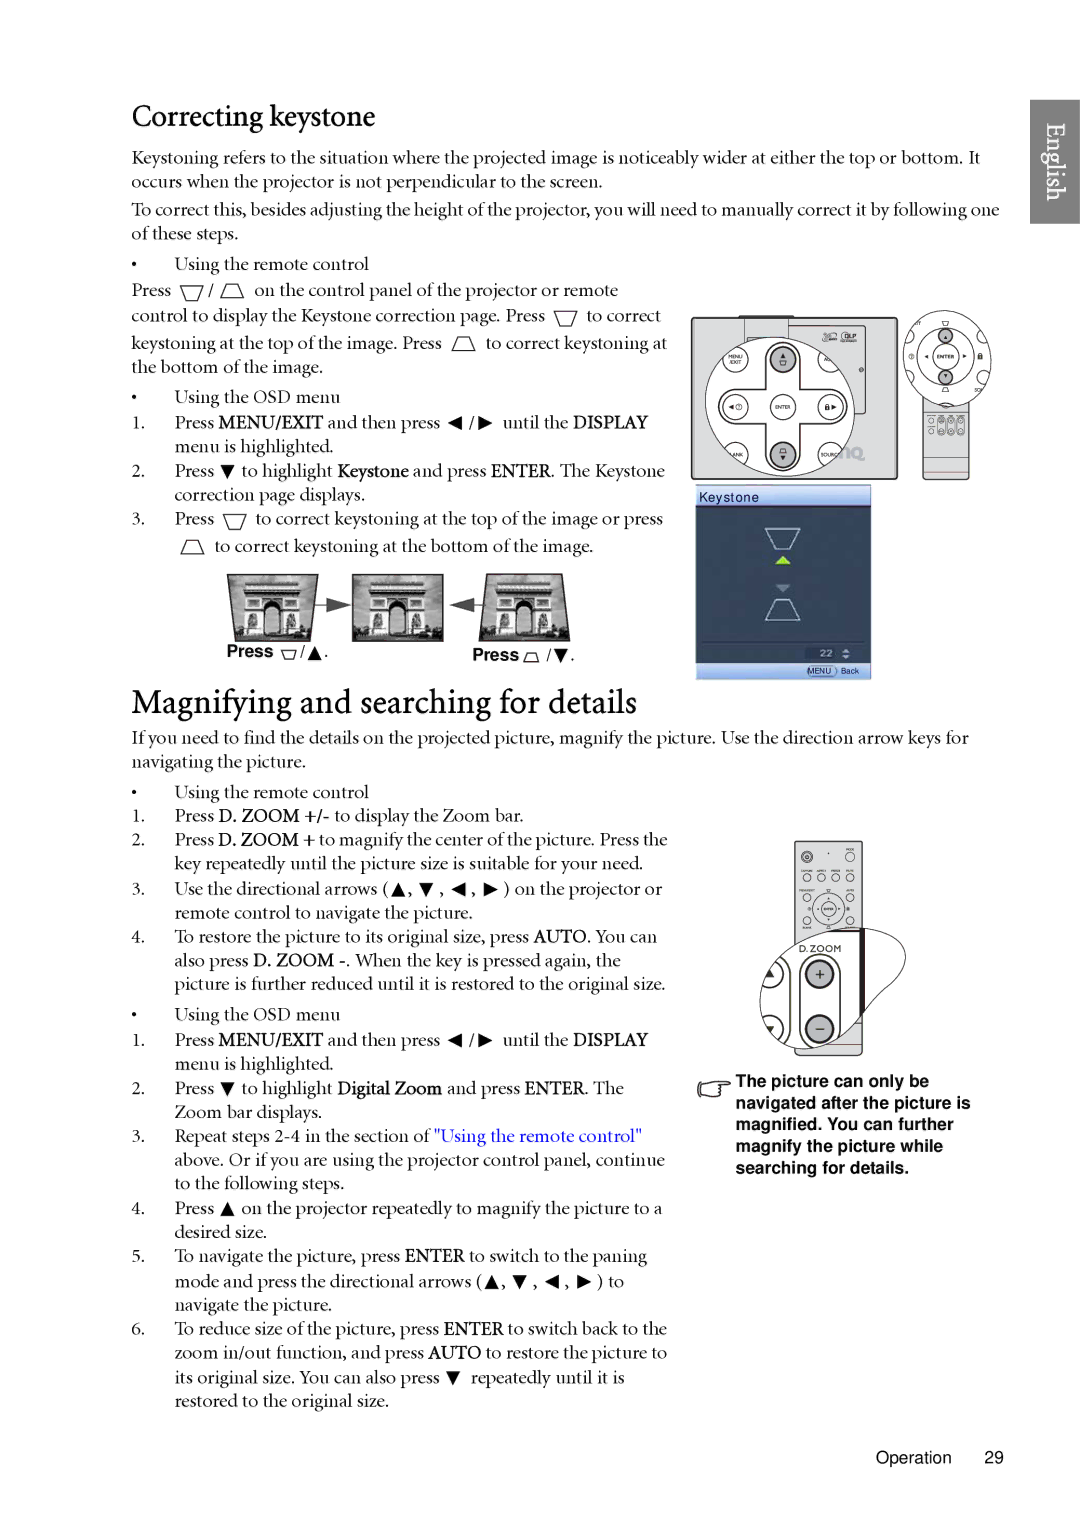
The picture can only be navigated after the picture is magnified. You can further magnify the picture while searching for details.

Correcting keystone

Keystoning refers to the situation where the projected image is noticeably wider at either the top or bottom. It occurs when the projector is not perpendicular to the screen.

To correct this, besides adjusting the height of the projector, you will need to manually correct it by following one of these steps.

Using the remote control

Press / on the control panel of the projector or remote

control to display the Keystone correction page. Press to correct

keystoning at the top of the image. Press to correct keystoning at the bottom of the image.

• Using the OSD menu

1. Press MENU/EXIT and then press / until the DISPLAY menu is highlighted.

2.Press to highlight Keystone and press ENTER. The Keystone

correction page displays.

Keystone

3.Press to correct keystoning at the top of the image or press

to correct keystoning at the bottom of the image.

Press / .

Press / .

MENU Back

Magnifying and searching for details

If you need to find the details on the projected picture, magnify the picture. Use the direction arrow keys for navigating the picture.

Using the remote control

1.Press D. ZOOM +/- to display the Zoom bar.

2.Press D. ZOOM + to magnify the center of the picture. Press the

key repeatedly until the picture size is suitable for your need.

3.Use the directional arrows ( , , , ) on the projector or

remote control to navigate the picture.

4. To restore the picture to its original size, press AUTO. You can also press D. ZOOM -. When the key is pressed again, the picture is further reduced until it is restored to the original size.

Using the OSD menu

1. Press MENU/EXIT and then press / until the DISPLAY menu is highlighted.

2. Press to highlight Digital Zoom and press ENTER. The Zoom bar displays.

3. Repeat steps 2-4in the section of "Using the remote control" above. Or if you are using the projector control panel, continue to the following steps.

4.Press on the projector repeatedly to magnify the picture to a desired size.

5.To navigate the picture, press ENTER to switch to the paning

mode and press the directional arrows ( , , , ) to navigate the picture.

6.To reduce size of the picture, press ENTER to switch back to the zoom in/out function, and press AUTO to restore the picture to

its original size. You can also press repeatedly until it is restored to the original size.

English

Operation 29

Page 29
Image 29
BenQ SP920 user manual Magnifying and searching for details, Correcting keystone

SP920 specifications

The BenQ SP920 is a sophisticated projector designed for a variety of professional and educational applications. As a versatile option, it stands out due to its impressive imaging capabilities, robust connectivity features, and user-friendly operation, making it a reliable choice for presentations, lectures, and even home entertainment.

One of the key features of the BenQ SP920 is its remarkable brightness, boasting an output of 5,000 ANSI lumens. This powerful lumen rating ensures that images remain vivid and clear even in well-lit environments, making it ideal for large conference rooms or classrooms. The projector’s resolution is another highlight, with a native WUXGA resolution of 1920 x 1200 pixels. This high-definition quality supports detailed visuals, ensuring that text is legible and images are sharp, enhancing the overall viewing experience.

The SP920 employs advanced DLP technology, known for producing high contrast ratios and vibrant colors. The combination of 10,000:1 contrast ratio and BrilliantColor technology allows for a broader color spectrum and improved white balance. This results in stunning image quality, showcasing deep blacks and bright whites, as well as rich, color-accurate visuals suitable for a multitude of content types.

Connectivity is another area where the BenQ SP920 excels. It features multiple input options, including HDMI, VGA, and USB, allowing it to easily connect to various devices such as laptops, Blu-ray players, and gaming consoles. The built-in speaker enhances its convenience, providing decent audio quality without the need for additional external sound systems.

User-oriented features include a simple setup process with easy-to-navigate menus, making it accessible for individuals with varying levels of technical expertise. The projector supports vertical and horizontal keystone correction, enabling easy adjustments for an even and properly aligned image when projecting at angles.

In terms of longevity and maintenance, the BenQ SP920 is equipped with a lamp life of up to 4,000 hours in normal mode and an impressive 6,000 hours in Eco Mode. This extends the time between replacements, reducing operational costs in the long run.

Overall, the BenQ SP920 is an excellent choice for professionals and educators seeking a reliable, high-performance projector that delivers exceptional image quality and versatile functionality for various applications. Its combination of brightness, clarity, and connectivity options make it a valuable tool for any presentation setup.