
53Y8, 75Q3 specifications
The Bissell 53Y8,75Q3,29H3 is a remarkable vacuum cleaner designed to deliver exceptional cleaning performance with user-friendly features and advanced technologies. Bissell has long been a trusted name in home cleaning, and this model epitomizes their dedication to innovation and efficiency.One of the standout features of the Bissell 53Y8,75Q3,29H3 is its powerful suction capability. Equipped with a high-performance motor, this vacuum effortlessly lifts dirt, dust, and debris from both carpets and hard floors. Users will appreciate how the suction power can be adjusted depending on the surface being cleaned, allowing for a tailored cleaning experience.
Another noteworthy characteristic is its multi-surface cleaning capability. The vacuum comes with specialized attachments and tools designed for various surfaces, including upholstery, stairs, and tight corners. The flexible hose provides reach in hard-to-access areas, ensuring a thorough cleaning throughout the home.
The Bissell 53Y8,75Q3,29H3 also showcases advanced filtration technology. It incorporates a high-efficiency particulate air (HEPA) filter that captures allergens and small particles, promoting a healthier living environment. This feature is particularly beneficial for households with pets or individuals with allergies, as it helps reduce allergens in the air.
Ease of use is a fundamental aspect of this vacuum. It features a lightweight design, making it easy to maneuver around furniture and transport from room to room. The ergonomic handle boosts user comfort during long cleaning sessions.
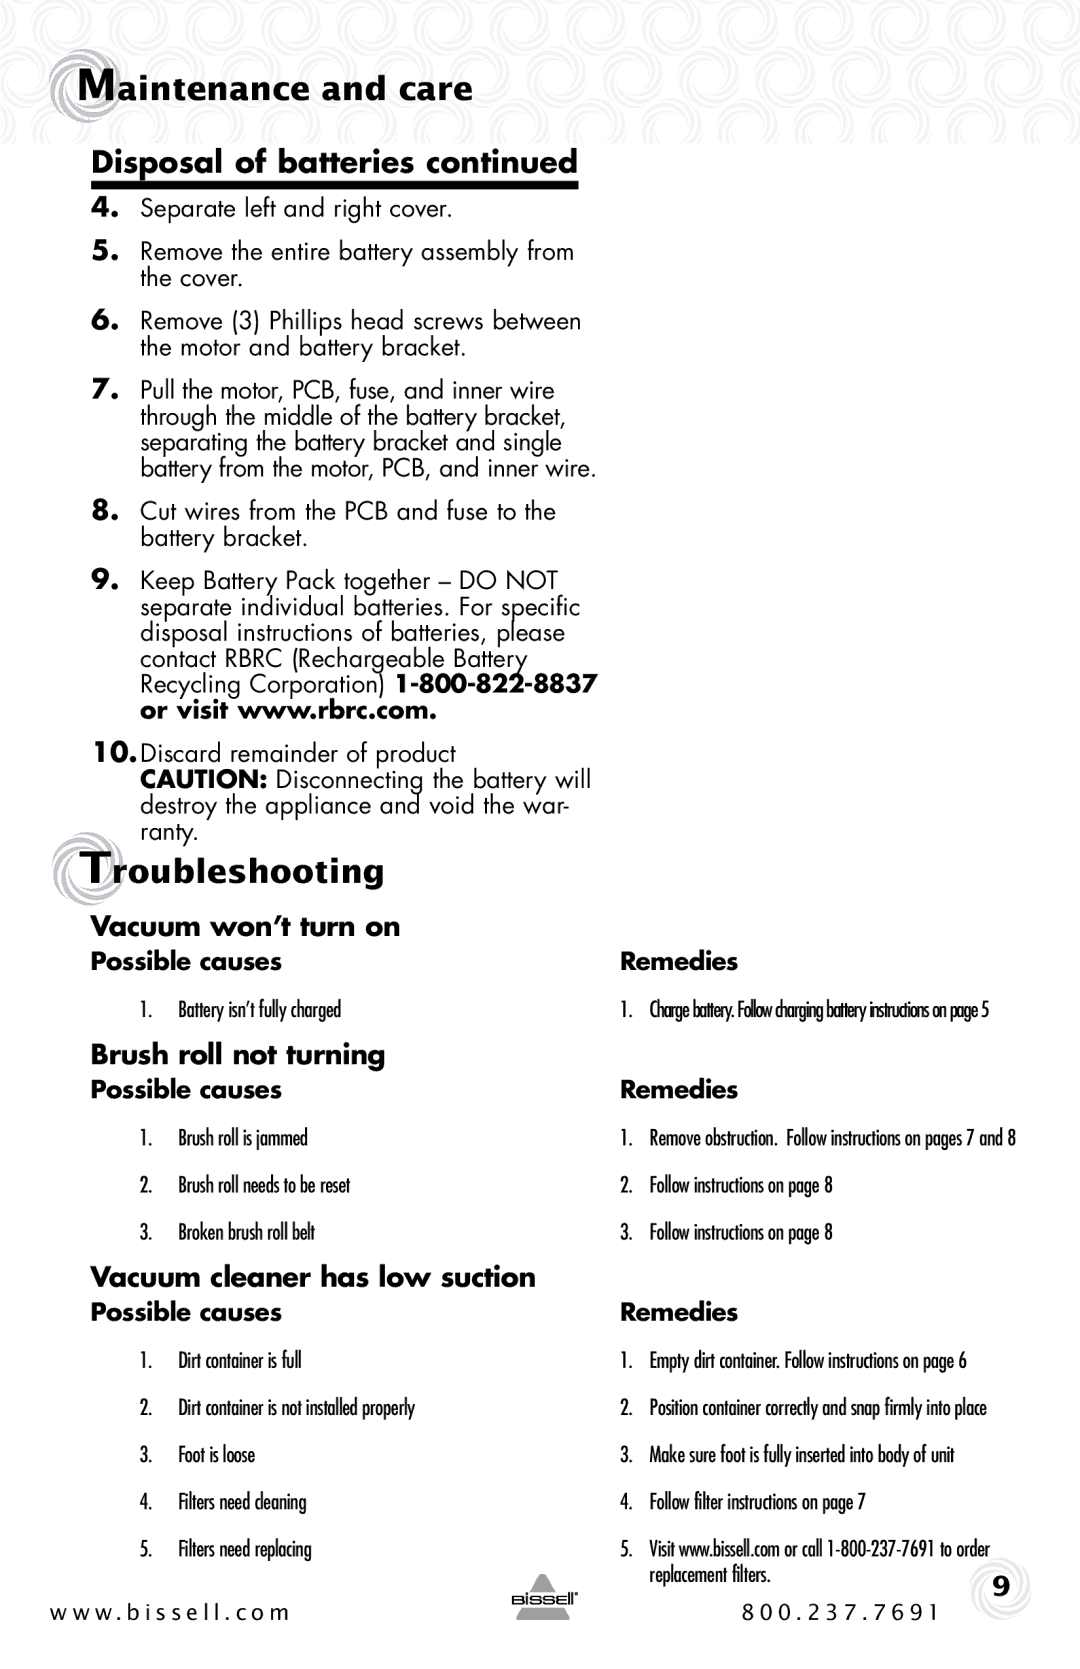
Maintenance is straightforward with the Bissell 53Y8,75Q3,29H3. The dustbin is easy to empty, and the filters are washable, allowing for cost-effective upkeep. The vacuum is also equipped with a tangle-free brush roll, which prevents hair and debris from wrapping around the brush, reducing maintenance time.
In terms of storage, the vacuum features a compact design with a convenient cord wrap system, ensuring that it occupies minimal space when not in use.
Overall, the Bissell 53Y8,75Q3,29H3 stands out with its powerful performance, versatility, advanced filtration, and user-friendly design, making it an excellent choice for anyone seeking an efficient and reliable cleaning solution for their home.