AS202Pub1000003006 5/18/06 3:34 PM Page 4
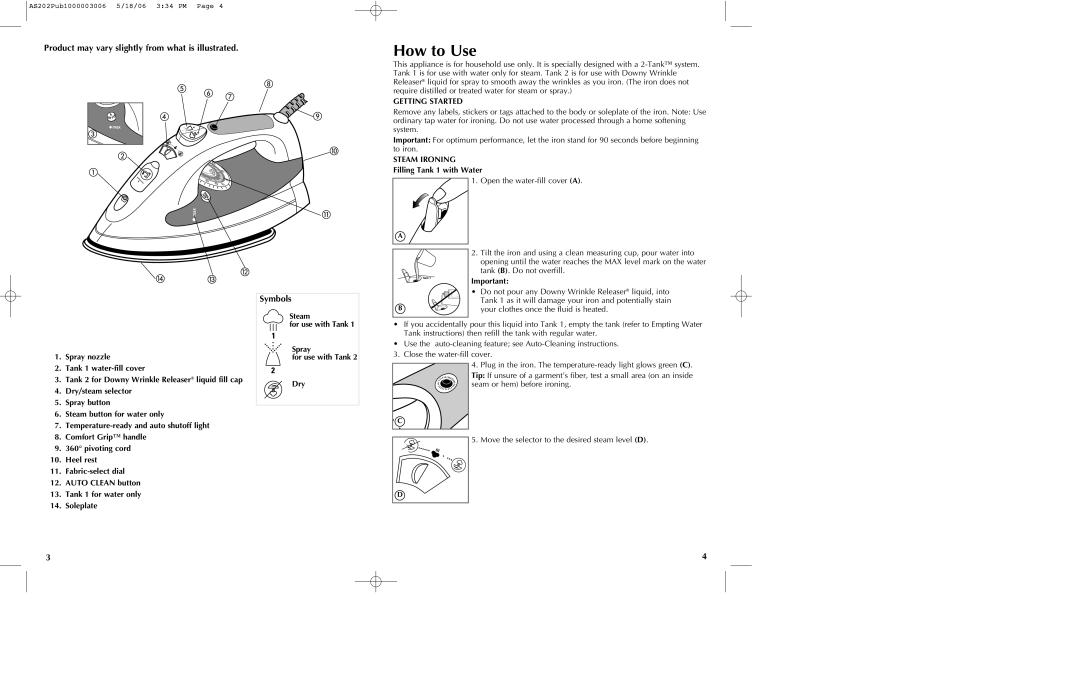
Product may vary slightly from what is illustrated.
How to Use
This appliance is for household use only. It is specially designed with a
GETTING STARTED
Remove any labels, stickers or tags attached to the body or soleplate of the iron. Note: Use ordinary tap water for ironing. Do not use water processed through a home softening system.
Important: For optimum performance, let the iron stand for 90 seconds before beginning to iron.
STEAM IRONING
Filling Tank 1 with Water
Symbols
Steam
A |
B |
1. Open the
2.Tilt the iron and using a clean measuring cup, pour water into opening until the water reaches the MAX level mark on the water tank (B). Do not overfill.
Important:
•Do not pour any Downy Wrinkle Releaser® liquid, into Tank 1 as it will damage your iron and potentially stain your clothes once the fluid is heated.
1. Spray nozzle |
for use with Tank 1
Spray
for use with Tank 2
•If you accidentally pour this liquid into Tank 1, empty the tank (refer to Empting Water Tank instructions) then refill the tank with regular water.
•Use the
3. Close the
2. | Tank 1 |
3. | Tank 2 for Downy Wrinkle Releaser® liquid fill cap |
4. | Dry/steam selector |
5. | Spray button |
6. | Steam button for water only |
7. | |
8. | Comfort Grip™ handle |
9. | 360° pivoting cord |
10. | Heel rest |
11. | |
12. | AUTO CLEAN button |
13. | Tank 1 for water only |
14. | Soleplate |
Dry
C |
D |
4. Plug in the iron. The
Tip: If unsure of a garment’s fiber, test a small area (on an inside seam or hem) before ironing.
5. Move the selector to the desired steam level (D).
3 | 4 |