ASSEMBLY INSTRUCTIONS
Before assembling your Cordless String Trimmer,check that you have received the following in the shipping carton.
See Figure 1.
A. Trimmer/Edger.
B. Guard.
C. Charger and Charger Bracket.
D. Hardware Bag with (2) screws and (2) plastic anchors.
The guard must always be on the tool to protect the userWARNING:. Use of the unit without the guard will overheat the motor, and void the warranty.
NEVER OPERATE TOOL WITHOUT GUARD FIRMLY IN PLACE.
1. Position the open center of the guard |
| |
2 | ||
over the line feed head (Figure 2). | ||
2. Hinge the guard on the hook located |
| |
on the lower motor housing. Ensure |
| |
the line is free, and not tucked under |
| |
the guard. Once hooked, lightly pull |
| |
on the back edge of the guard and |
| |
push the guard down until the 2 |
| |
latches snap into place on the motor |
| |
housing. (Figure 2) |
| |
|
|
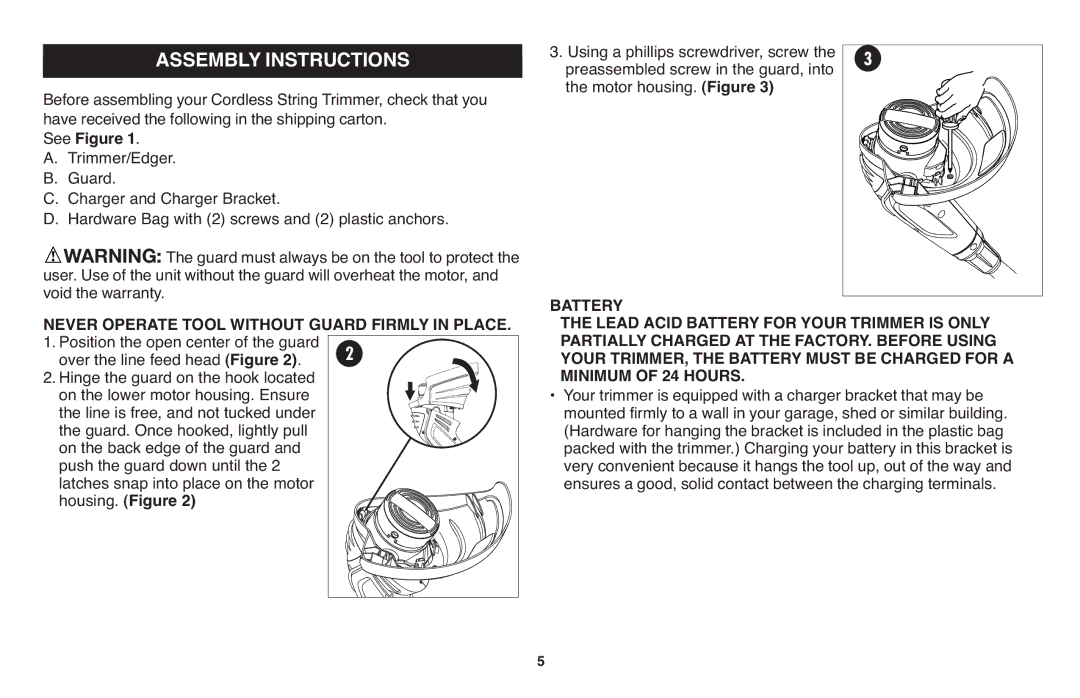
3. Using a phillips screwdriver, screw the preassembled screw in the guard, into 3 the motor housing. (Figure 3)
BATTERY
THE LEAD ACID BATTERYFOR YOUR TRIMMER IS ONLY PARTIALLYCHARGED AT THE FACTORY.BEFORE USING YOUR TRIMMER, THE BATTERYMUST BE CHARGED FOR A
• MINIMUM OF 24 HOURS.
Your trimmer is equipped with a charger bracket that may be mounted firmly to a wall in your garage, shed or similar building. (Hardware for hanging the bracket is included in the plastic bag packed with the trimmer.) Charging your battery in this bracket is very convenient because it hangs the tool up, out of the way and ensures a good, solid contact between the charging terminals.
5