Installations
ENGLISH |
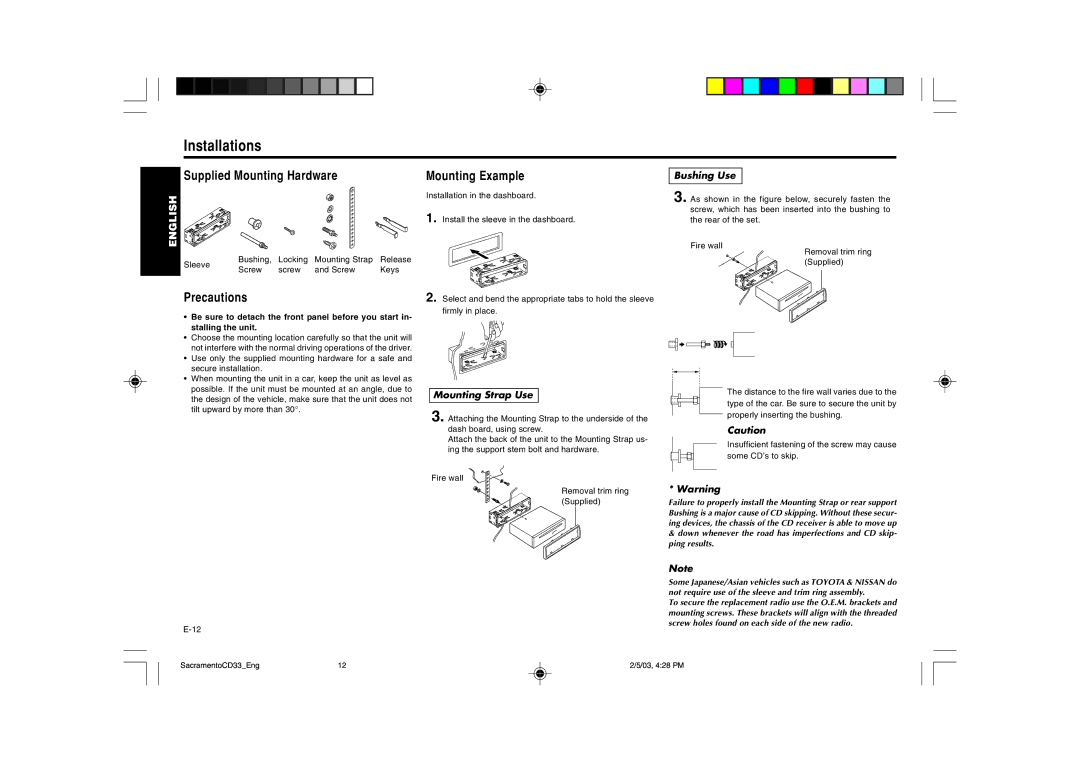
Supplied Mounting Hardware
Sleeve | Bushing, | Locking | Mounting Strap | Release | |
Screw | screw | and Screw | Keys | ||
|
Mounting Example
Installation in the dashboard.
1. Install the sleeve in the dashboard.
Bushing Use
3. As shown in the figure below, securely fasten the screw, which has been inserted into the bushing to the rear of the set.
Fire wall
Removal trim ring (Supplied)
Precautions
•Be sure to detach the front panel before you start in- stalling the unit.
•Choose the mounting location carefully so that the unit will not interfere with the normal driving operations of the driver.
•Use only the supplied mounting hardware for a safe and secure installation.
•When mounting the unit in a car, keep the unit as level as possible. If the unit must be mounted at an angle, due to the design of the vehicle, make sure that the unit does not tilt upward by more than 30°.
2. Select and bend the appropriate tabs to hold the sleeve firmly in place.
Mounting Strap Use
3. Attaching the Mounting Strap to the underside of the dash board, using screw.
Attach the back of the unit to the Mounting Strap us- ing the support stem bolt and hardware.
Fire wall
Removal trim ring (Supplied)
The distance to the fire wall varies due to the type of the car. Be sure to secure the unit by properly inserting the bushing.
Caution
Insufficient fastening of the screw may cause some CD’s to skip.
* Warning
Failure to properly install the Mounting Strap or rear support Bushing is a major cause of CD skipping. Without these secur- ing devices, the chassis of the CD receiver is able to move up
&down whenever the road has imperfections and CD skip- ping results.
Note
Some Japanese/Asian vehicles such as TOYOTA & NISSAN do not require use of the sleeve and trim ring assembly.
To secure the replacement radio use the O.E.M. brackets and mounting screws. These brackets will align with the threaded screw holes found on each side of the new radio.
SacramentoCD33_Eng | 12 | 2/5/03, 4:28 PM |