Installation
Note: Take the mixer out of the box and inspect for shipping damage. If there is obvious physical damage to the outside of the mixer, contact the supplier of the mixer before you begin installation.
Rack Mounting:To mount CAM8 and CAM8PRO to a 19” rack, lift the unit up to the front of the rack and secure it to the front of the rack with the necessary screws (not included with this unit).
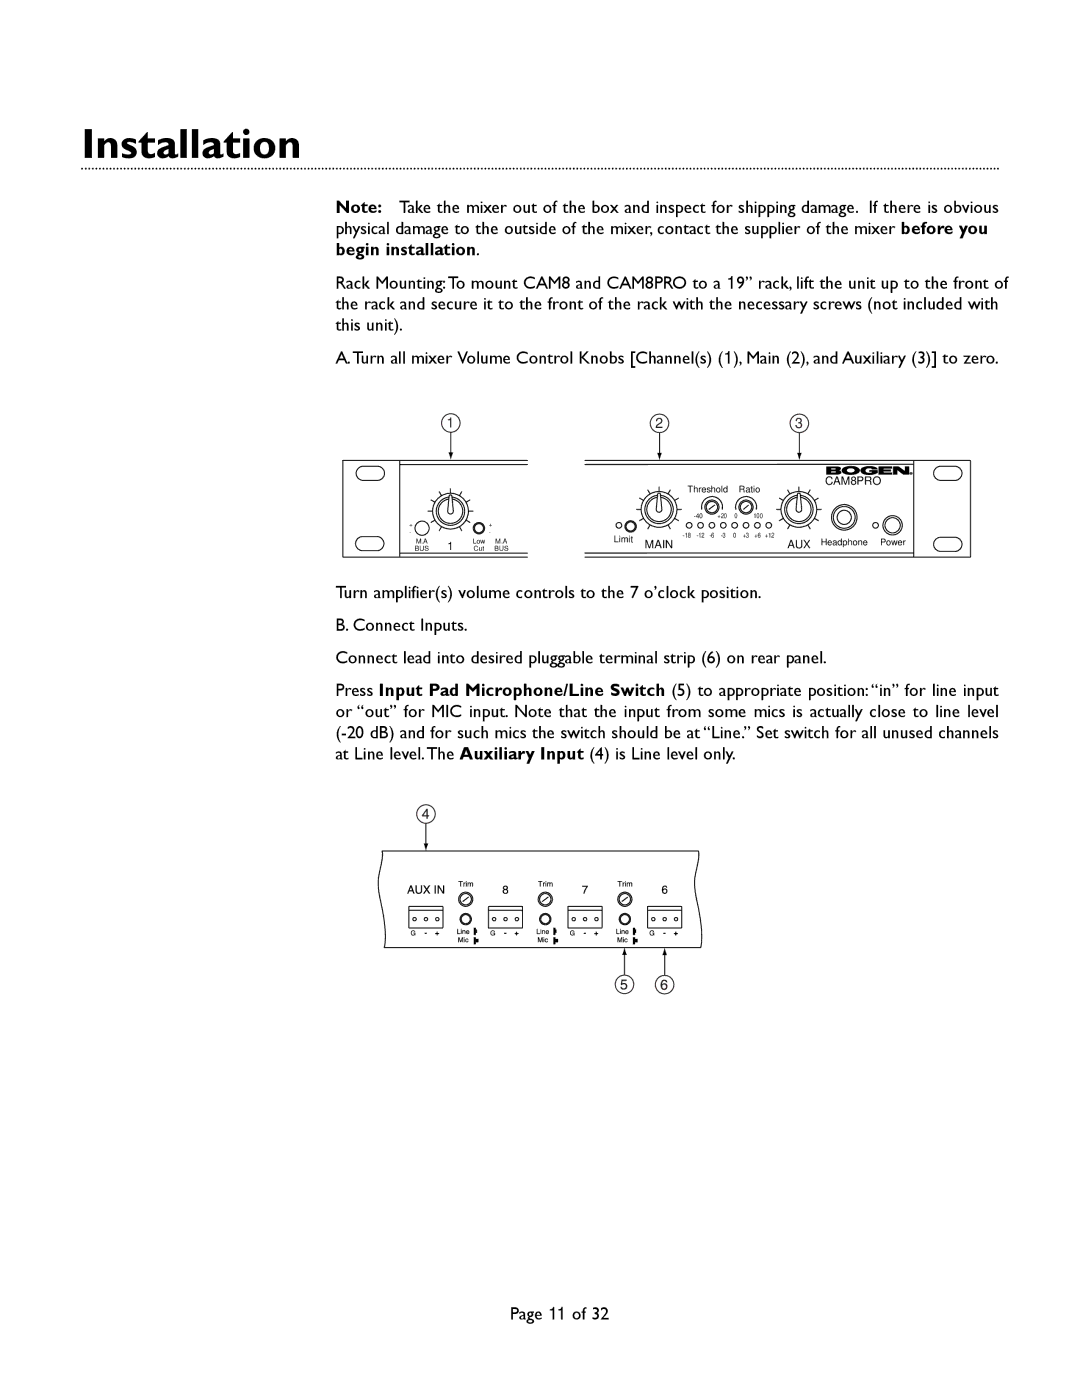
A.Turn all mixer Volume Control Knobs [Channel(s) (1), Main (2), and Auxiliary (3)] to zero.
| 1 |
|
|
| 2 |
|
| 3 |
|
|
|
|
| Threshold |
| CAM8PRO | |
|
|
|
|
|
| Ratio | ||
|
|
|
|
| +20 | 0 | 100 | |
+ |
|
| + |
|
|
|
|
|
- |
|
| - | Limit | 0 | +3 +6 +12 | ||
M.A |
| Low | M.A | |||||
1 | MAIN |
|
| AUX Headphone Power | ||||
BUS | Cut | BUS |
|
|
| |||
Turn amplifier(s) volume controls to the 7 o’clock position. B. Connect Inputs.
Connect lead into desired pluggable terminal strip (6) on rear panel.
Press Input Pad Microphone/Line Switch (5) to appropriate position: “in” for line input or “out” for MIC input. Note that the input from some mics is actually close to line level
Page 11 of 32