ASSEMBLY INSTRUCTIONS
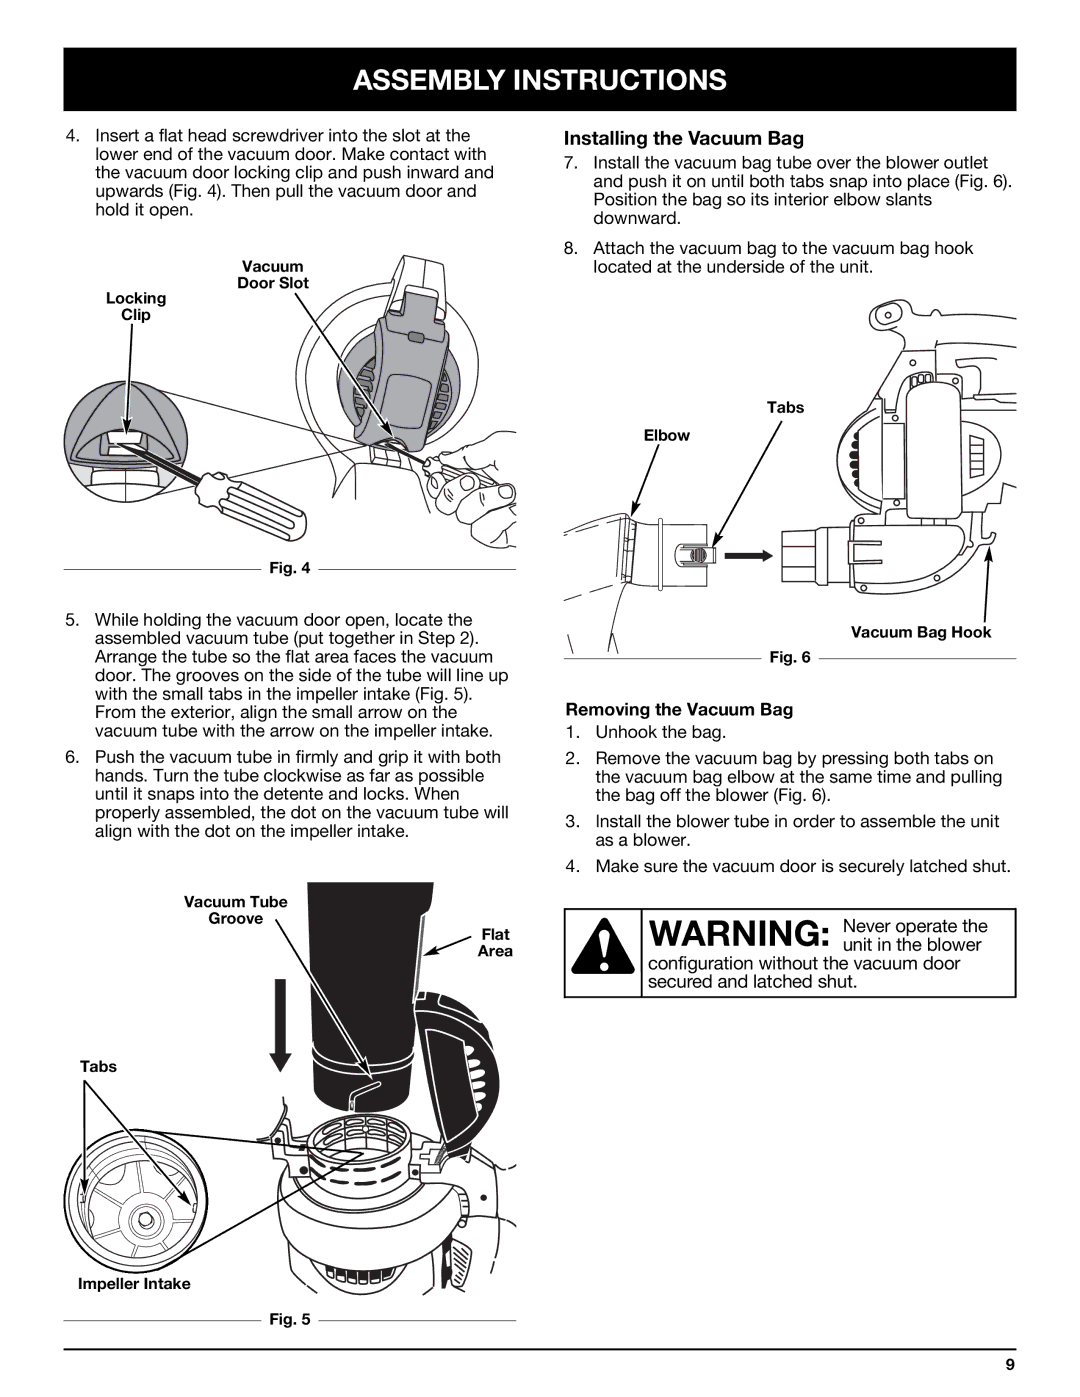
4.Insert a flat head screwdriver into the slot at the lower end of the vacuum door. Make contact with the vacuum door locking clip and push inward and upwards (Fig. 4). Then pull the vacuum door and hold it open.
Vacuum
Door Slot
Locking
Clip
Fig. 4
5.While holding the vacuum door open, locate the assembled vacuum tube (put together in Step 2). Arrange the tube so the flat area faces the vacuum door. The grooves on the side of the tube will line up with the small tabs in the impeller intake (Fig. 5). From the exterior, align the small arrow on the vacuum tube with the arrow on the impeller intake.
6.Push the vacuum tube in firmly and grip it with both hands. Turn the tube clockwise as far as possible until it snaps into the detente and locks. When properly assembled, the dot on the vacuum tube will align with the dot on the impeller intake.
Vacuum Tube
Groove
Flat
Area
Installing the Vacuum Bag
7.Install the vacuum bag tube over the blower outlet and push it on until both tabs snap into place (Fig. 6). Position the bag so its interior elbow slants downward.
8.Attach the vacuum bag to the vacuum bag hook located at the underside of the unit.
Tabs
Elbow
Vacuum Bag Hook
Fig. 6
Removing the Vacuum Bag
1.Unhook the bag.
2.Remove the vacuum bag by pressing both tabs on the vacuum bag elbow at the same time and pulling the bag off the blower (Fig. 6).
3.Install the blower tube in order to assemble the unit as a blower.
4.Make sure the vacuum door is securely latched shut.
WARNING: Never operate the unit in the blower
configuration without the vacuum door secured and latched shut.
Tabs
Impeller Intake
Fig. 5
9