Getting Started
Parts and Accessories
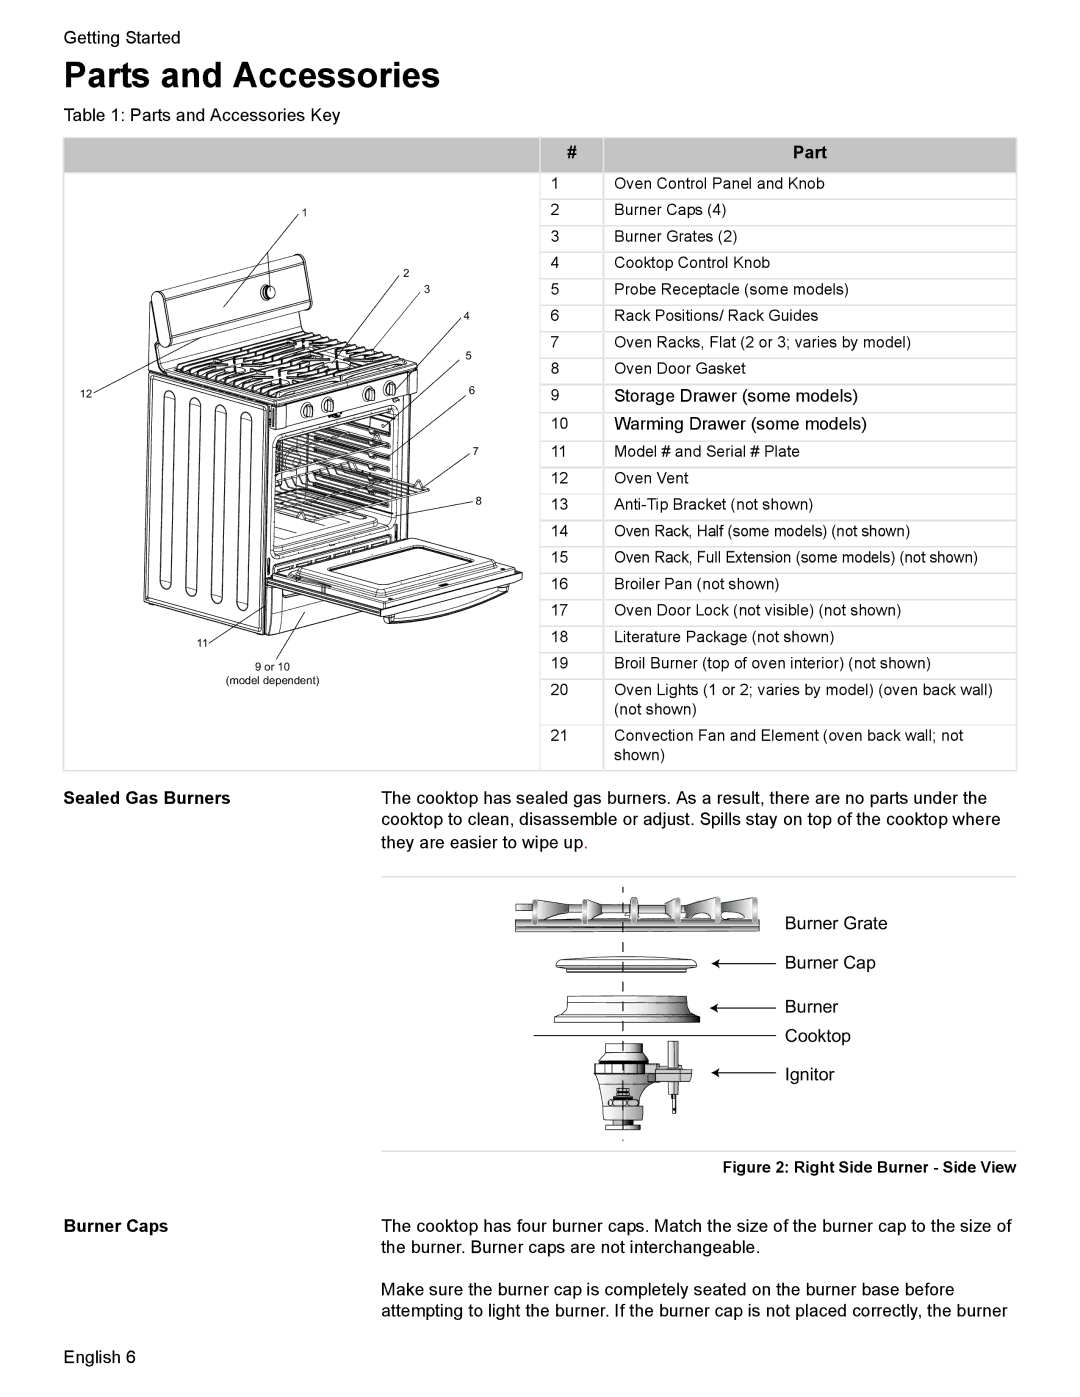
Table 1: Parts and Accessories Key
|
| # | Part |
|
| 1 | Oven Control Panel and Knob |
1 |
| 2 | Burner Caps (4) |
|
| 3 | Burner Grates (2) |
| 2 | 4 | Cooktop Control Knob |
| 5 | Probe Receptacle (some models) | |
| 3 | ||
| 4 | 6 | Rack Positions/ Rack Guides |
| 5 | 7 | Oven Racks, Flat (2 or 3; varies by model) |
| 8 | Oven Door Gasket | |
|
| ||
12 | 6 | 9 | Storage Drawer (some models) |
|
|
| |
|
| 10 | Warming Drawer (some models) |
| 7 | 11 | Model # and Serial # Plate |
|
| 12 | Oven Vent |
| 8 | 13 | |
|
| 14 | Oven Rack, Half (some models) (not shown) |
|
| 15 | Oven Rack, Full Extension (some models) (not shown) |
|
| 16 | Broiler Pan (not shown) |
|
| 17 | Oven Door Lock (not visible) (not shown) |
11 |
| 18 | Literature Package (not shown) |
9 or 10 |
| 19 | Broil Burner (top of oven interior) (not shown) |
(model dependent) |
| 20 | Oven Lights (1 or 2; varies by model) (oven back wall) |
|
| ||
|
|
| (not shown) |
|
| 21 | Convection Fan and Element (oven back wall; not |
|
|
| shown) |
Sealed Gas Burners | The cooktop has sealed gas burners. As a result, there are no parts under the | ||
| cooktop to clean, disassemble or adjust. Spills stay on top of the cooktop where | ||
they are easier to wipe up.
Burner Grate
![]() Burner Cap
Burner Cap
Burner
Cooktop
Ignitor
| Figure 2: Right Side Burner - Side View |
Burner Caps | The cooktop has four burner caps. Match the size of the burner cap to the size of |
| the burner. Burner caps are not interchangeable. |
| Make sure the burner cap is completely seated on the burner base before |
| attempting to light the burner. If the burner cap is not placed correctly, the burner |
English 6 |
|
