BM 2609140574 08-08 9/3/08 8:40 AM Page 7
Scanning in Wood-Detection Mode
The
To scan for wood objects,
1. Press the wood detection mode button 5.
•The wood mode indicator b and the “ZOOM” indicator d are shown in the display, the arrow below the “ZOOM” indicator d flashes, and the “AutoCal” calibration indicator g and the illuminated ring 1 go out.
2.Position the
3.Then press the “ZOOM” button* 4 AND KEEP IT PRESSED.
•Now the illuminated ring 1 lights up green, the AutoCal” calibration indicator g is displayed again, and the “ZOOM” indicator d as well as the arrow below it go out, all indicating that the
4.After the
been calibrated and while continuing to press the “ZOOM” button 4, move the
felt pads 8 must always have contact with the surface.
•When an object is detected, an amplitude is displayed in the main measuring indicator f. Move the
Note: While the “ZOOM” button 4 is pressed during the wood scan, the “ZOOM” feature and ZOOM measuring indicator e are inactive.
Notes:
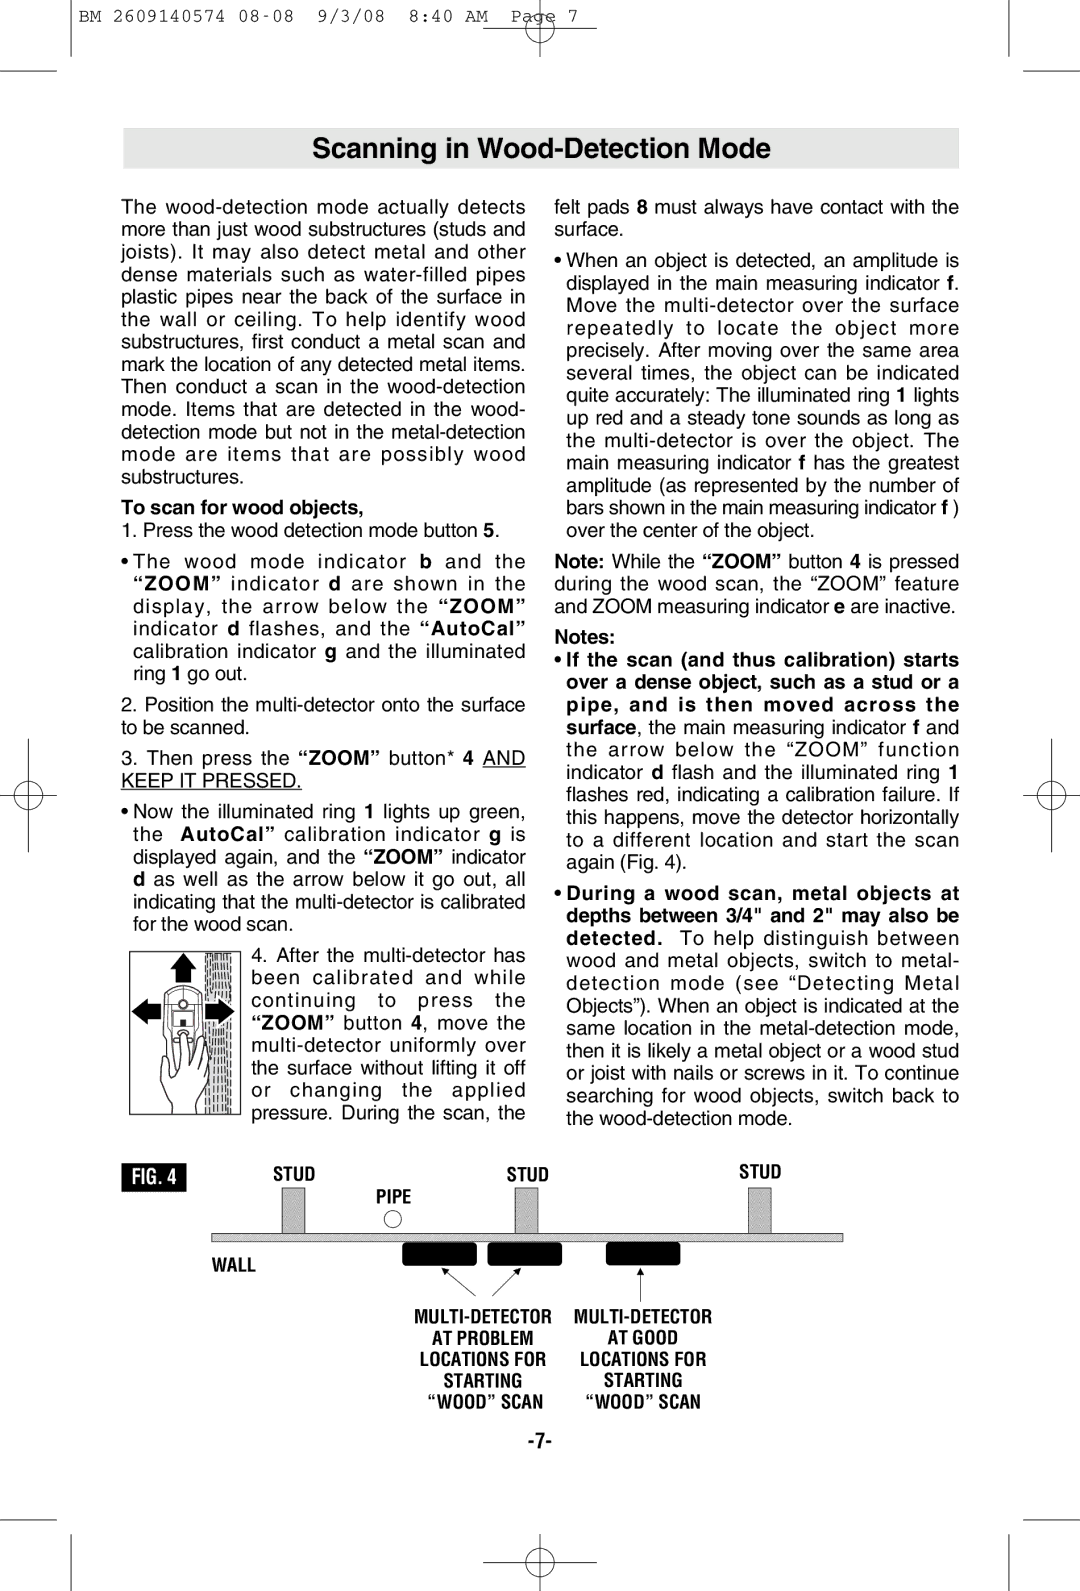
•If the scan (and thus calibration) starts over a dense object, such as a stud or a pipe, and is then moved across the surface, the main measuring indicator f and the arrow below the “ZOOM” function indicator d flash and the illuminated ring 1 flashes red, indicating a calibration failure. If this happens, move the detector horizontally to a different location and start the scan again (Fig. 4).
•During a wood scan, metal objects at depths between 3/4" and 2" may also be detected. To help distinguish between wood and metal objects, switch to metal- detection mode (see “Detecting Metal Objects”). When an object is indicated at the same location in the
FIG. 4 |
|
| STUD |
|
|
|
| STUD |
|
|
|
| STUD | |
|
|
|
|
|
| PIPE |
|
|
|
|
|
|
| |
|
|
|
|
|
|
|
|
|
|
|
|
| ||
|
|
|
|
|
|
|
|
|
|
|
| |||
|
| WALL |
|
|
|
|
|
|
|
|
|
| ||
|
|
|
|
|
|
|
|
|
| |||||
|
|
|
|
|
|
|
|
|
|
|
|
|
|
|
|
|
|
|
|
|
|
|
| ||||||
|
|
|
|
|
|
|
| AT PROBLEM |
|
| AT GOOD |
| ||
|
|
|
|
|
|
|
| LOCATIONS FOR |
|
| LOCATIONS FOR |
| ||
|
|
|
|
|
|
|
| STARTING |
|
| STARTING |
| ||
|
|
|
|
|
|
|
| “WOOD” SCAN |
|
| “WOOD” SCAN |
| ||
|
|
|
|
|
|
|
|
|
|
|
|
|
|
|