Square |
|
|
| A | Y |
|
| |
B |
| Z |
|
|
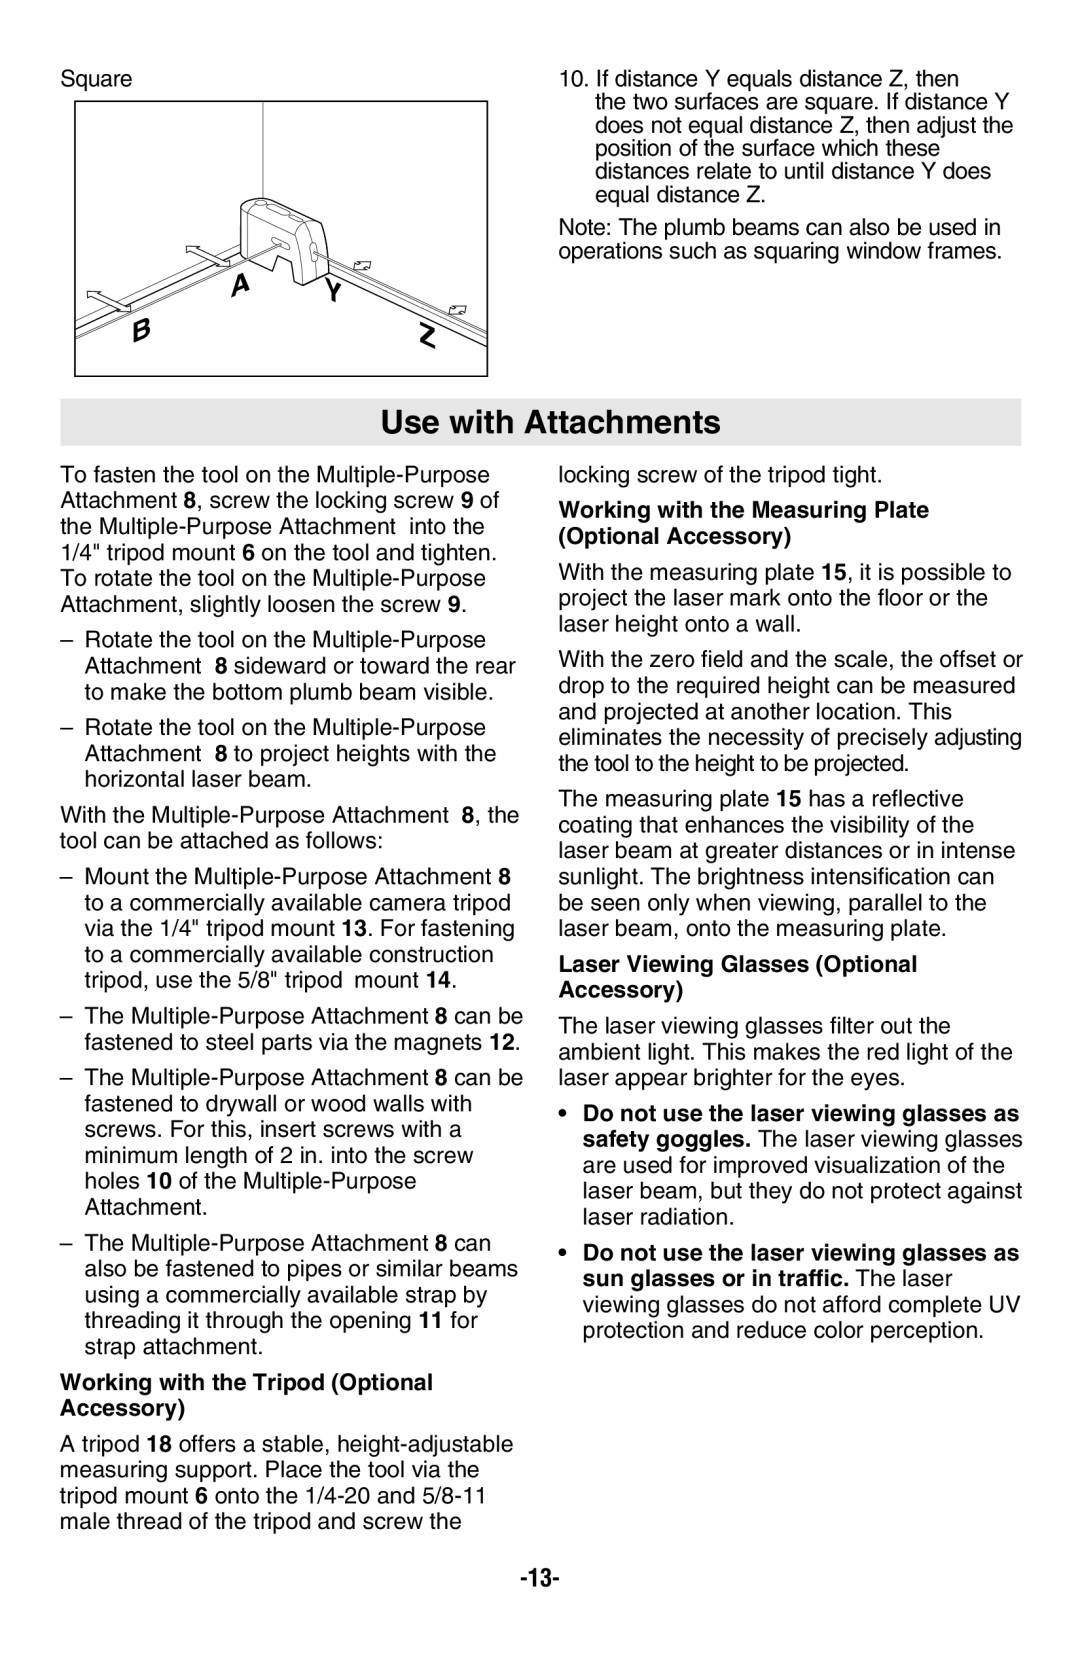
10.If distance Y equals distance Z, then
the two surfaces are square. If distance Y does not equal distance Z, then adjust the position of the surface which these distances relate to until distance Y does equal distance Z.
Note: The plumb beams can also be used in operations such as squaring window frames.
Use with Attachments
To fasten the tool on the
–Rotate the tool on the
–Rotate the tool on the
With the
–Mount the
–The
–The
–The
Working with the Tripod (Optional Accessory)
A tripod 18 offers a stable,
locking screw of the tripod tight.
Working with the Measuring Plate (Optional Accessory)
With the measuring plate 15, it is possible to project the laser mark onto the floor or the laser height onto a wall.
With the zero field and the scale, the offset or drop to the required height can be measured and projected at another location. This eliminates the necessity of precisely adjusting the tool to the height to be projected.
The measuring plate 15 has a reflective coating that enhances the visibility of the laser beam at greater distances or in intense sunlight. The brightness intensification can be seen only when viewing, parallel to the laser beam, onto the measuring plate.
Laser Viewing Glasses (Optional Accessory)
The laser viewing glasses filter out the ambient light. This makes the red light of the laser appear brighter for the eyes.
•Do not use the laser viewing glasses as safety goggles. The laser viewing glasses are used for improved visualization of the laser beam, but they do not protect against laser radiation.
•Do not use the laser viewing glasses as sun glasses or in traffic. The laser viewing glasses do not afford complete UV protection and reduce color perception.
