A
B
13 ft
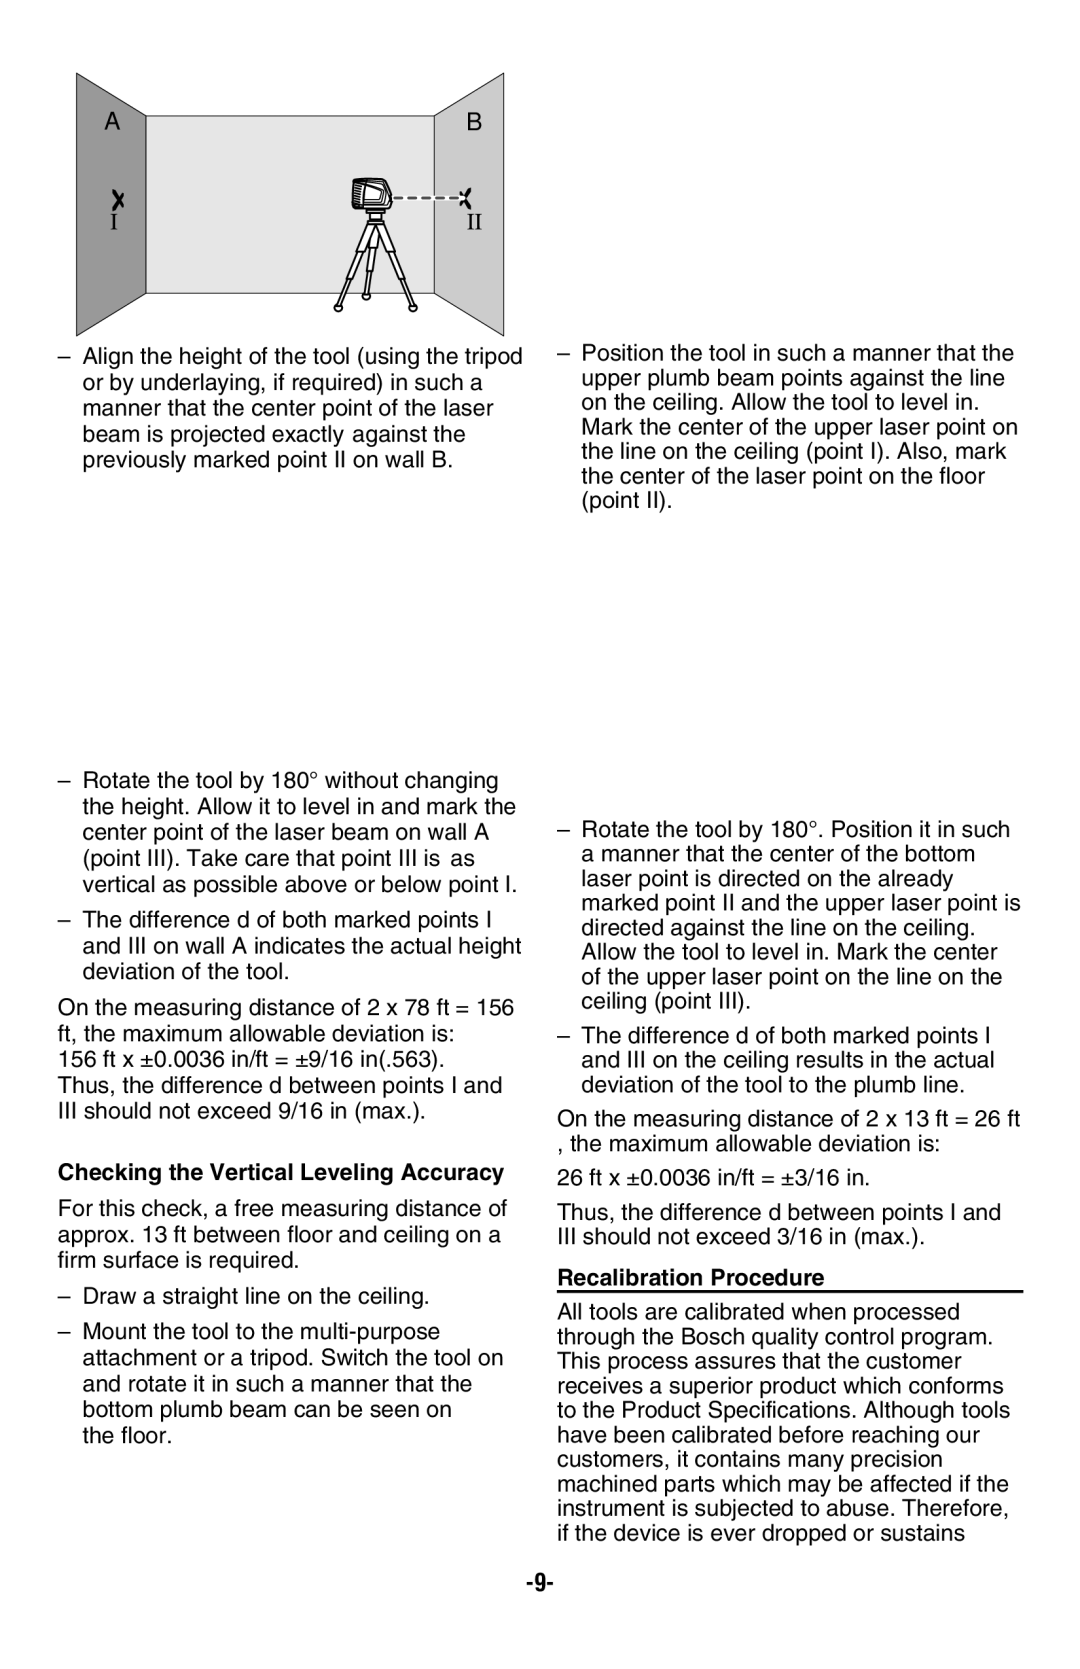
–Align the height of the tool (using the tripod or by underlaying, if required) in such a manner that the center point of the laser beam is projected exactly against the previously marked point II on wall B.
A | 180˚ | B |
d ![]()
–Rotate the tool by 180° without changing the height. Allow it to level in and mark the center point of the laser beam on wall A (point III). Take care that point III is as vertical as possible above or below point I.
–The difference d of both marked points I and III on wall A indicates the actual height deviation of the tool.
On the measuring distance of 2 x 78 ft = 156 ft, the maximum allowable deviation is:
156 ft x ±0.0036 in/ft = ±9/16 in(.563). Thus, the difference d between points I and III should not exceed 9/16 in (max.).
Checking the Vertical Leveling Accuracy
For this check, a free measuring distance of approx. 13 ft between floor and ceiling on a firm surface is required.
–Draw a straight line on the ceiling.
–Mount the tool to the
–Position the tool in such a manner that the upper plumb beam points against the line on the ceiling. Allow the tool to level in.
Mark the center of the upper laser point on the line on the ceiling (point I). Also, mark the center of the laser point on the floor (point II).
d
–Rotate the tool by 180°. Position it in such a manner that the center of the bottom laser point is directed on the already marked point II and the upper laser point is directed against the line on the ceiling. Allow the tool to level in. Mark the center of the upper laser point on the line on the ceiling (point III).
–The difference d of both marked points I and III on the ceiling results in the actual deviation of the tool to the plumb line.
On the measuring distance of 2 x 13 ft = 26 ft
,the maximum allowable deviation is: 26 ft x ±0.0036 in/ft = ±3/16 in.
Thus, the difference d between points I and III should not exceed 3/16 in (max.).
Recalibration Procedure
All tools are calibrated when processed through the Bosch quality control program. This process assures that the customer receives a superior product which conforms to the Product Specifications. Although tools have been calibrated before reaching our customers, it contains many precision machined parts which may be affected if the instrument is subjected to abuse. Therefore, if the device is ever dropped or sustains
