
BFP800XL specifications
The Breville BFP800XL, known as the Sous Chef Food Processor, is a premium kitchen appliance that stands out for its versatility and advanced features. Designed for both home cooks and culinary enthusiasts, this food processor is equipped to handle a range of food preparation tasks with ease.One of the defining features of the BFP800XL is its powerful 1,200-watt motor, which provides sufficient horsepower to process even the toughest ingredients. This motor enables the food processor to operate efficiently, allowing users to prepare large quantities of food in a fraction of the time compared to traditional methods.
The BFP800XL boasts a generous 16-cup bowl capacity, which is ideal for preparing large batches of food. Additionally, it includes a smaller 2.5-cup mini bowl, providing flexibility for smaller tasks or when working with different ingredients. The nested design of the bowls allows for easy storage while maximizing functionality.
Another standout feature is the wide feed chute, which measures 5.5 inches in diameter. This wide opening can accommodate whole fruits and vegetables, reducing the need for pre-cutting and saving valuable preparation time. The food processor also comes with various stainless steel blades and discs, offering multiple slicing and grating options.
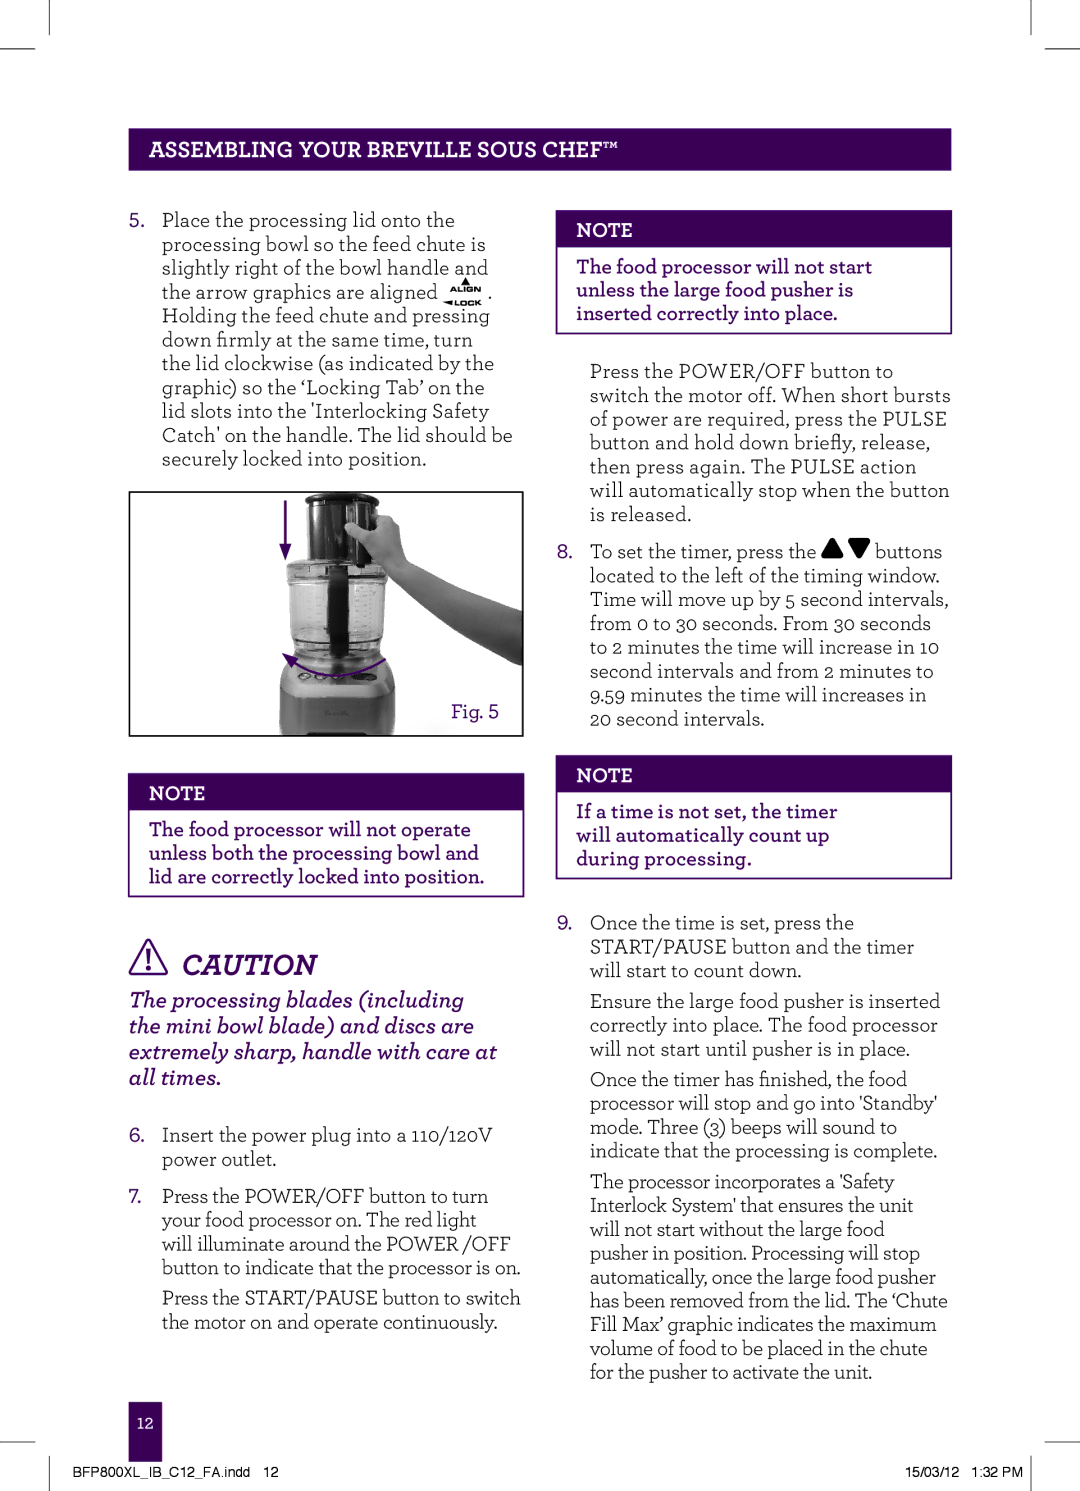
Breville incorporates its innovative SureLock technology, which ensures that the food processor operates only when securely assembled. This feature enhances safety during operation, giving users peace of mind while working in the kitchen. The food processor also features an intuitive control panel with simple buttons, allowing for easy selection of different speeds and settings.
The BFP800XL is designed for easy cleaning, with all removable parts being dishwasher safe. This convenience factor is essential for busy home cooks who need to minimize post-cooking cleanup.
Overall, the Breville BFP800XL Sous Chef Food Processor combines power, versatility, and user-friendly design, making it a top choice for anyone looking to streamline their food preparation process. With its array of features and durable construction, it is an investment that will enhance culinary creativity and efficiency in the kitchen.