OPERATION
OPERATION
Add Oil
1.Place compressor on a flat, level surface.
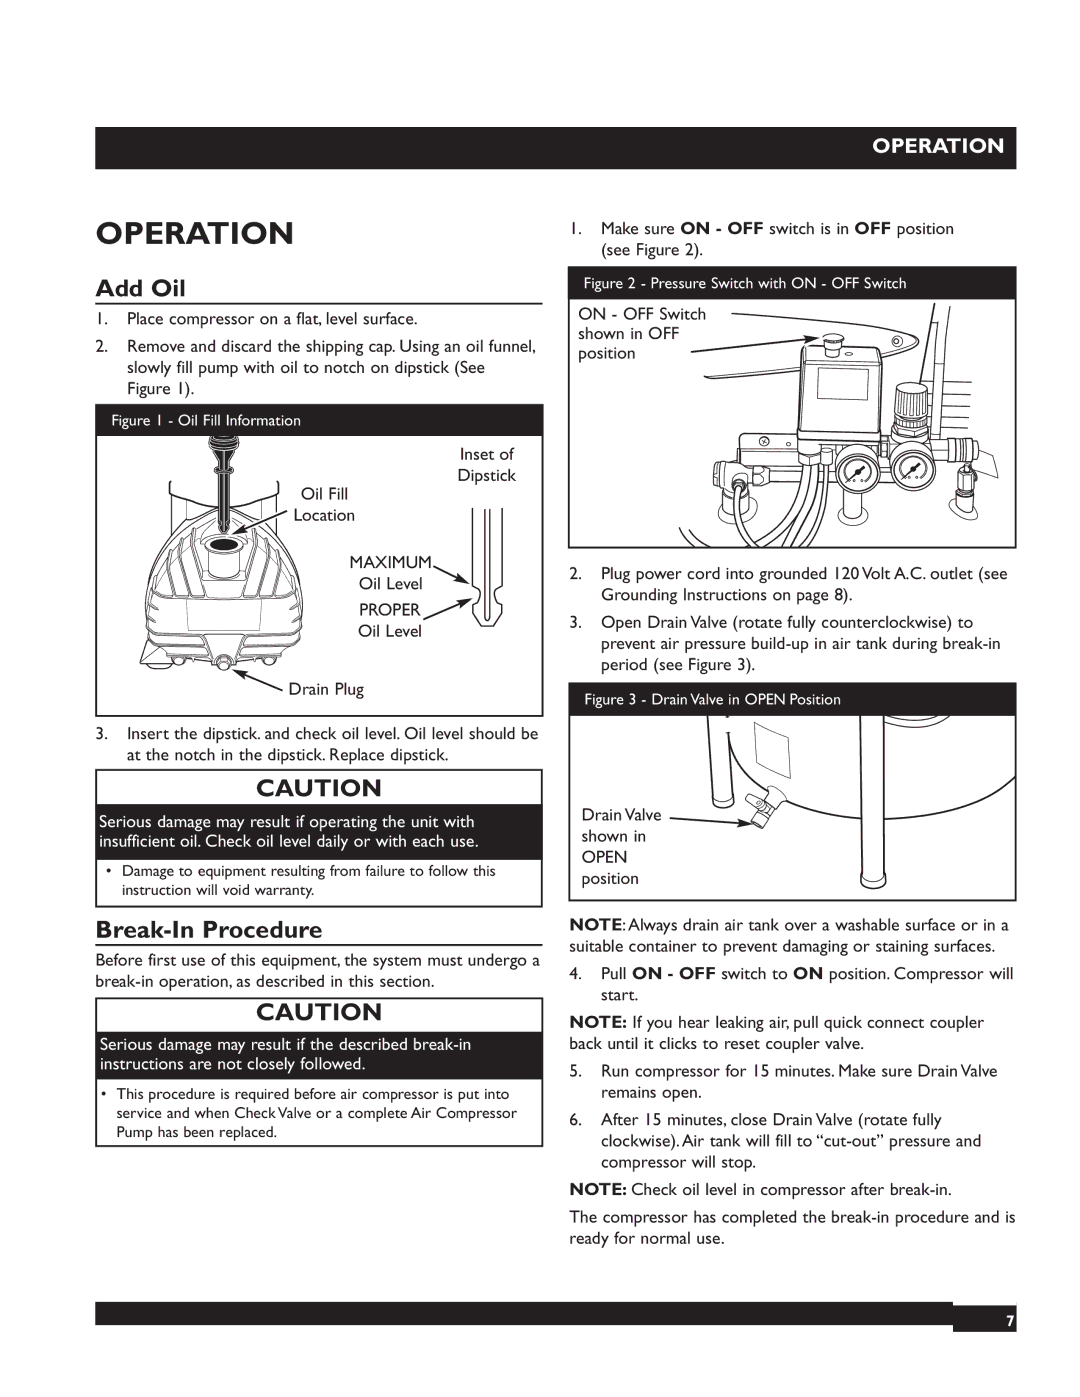
2.Remove and discard the shipping cap. Using an oil funnel, slowly fill pump with oil to notch on dipstick (See Figure 1).
Figure 1 - Oil Fill Information
Inset of
Dipstick
Oil Fill
![]() Location
Location
MAXIMUM
Oil Level
PROPER 
Oil Level
![]() Drain Plug
Drain Plug
3.Insert the dipstick. and check oil level. Oil level should be at the notch in the dipstick. Replace dipstick.
CAUTION
Serious damage may result if operating the unit with insufficient oil. Check oil level daily or with each use.
•Damage to equipment resulting from failure to follow this instruction will void warranty.
Break-In Procedure
Before first use of this equipment, the system must undergo a
CAUTION
Serious damage may result if the described
•This procedure is required before air compressor is put into service and when Check Valve or a complete Air Compressor Pump has been replaced.
1.Make sure ON - OFF switch is in OFF position (see Figure 2).
Figure 2 - Pressure Switch with ON - OFF Switch
ON - OFF Switch shown in OFF position
2.Plug power cord into grounded 120 Volt A.C. outlet (see Grounding Instructions on page 8).
3.Open Drain Valve (rotate fully counterclockwise) to prevent air pressure
Figure 3 - Drain Valve in OPEN Position
Drain Valve shown in
OPEN position
NOTE:Always drain air tank over a washable surface or in a suitable container to prevent damaging or staining surfaces.
4.Pull ON - OFF switch to ON position. Compressor will start.
NOTE: If you hear leaking air, pull quick connect coupler back until it clicks to reset coupler valve.
5.Run compressor for 15 minutes. Make sure Drain Valve remains open.
6.After 15 minutes, close Drain Valve (rotate fully clockwise). Air tank will fill to
NOTE: Check oil level in compressor after
The compressor has completed the
7
