Power Steering Conversion Kit | Installation Instructions |
Do not allow dirt, water, or other debris to enter the expansion chamber or transmission. Even a small amount of dirt can damage the transmission
The hydraulic system is powered by the hydrostatic transmission charge pump, and subsequently shares oil with the transmission. It is for this reason that great care must be taken when adding or replacing hydraulic system parts to prevent contaminants from entering the transmission.
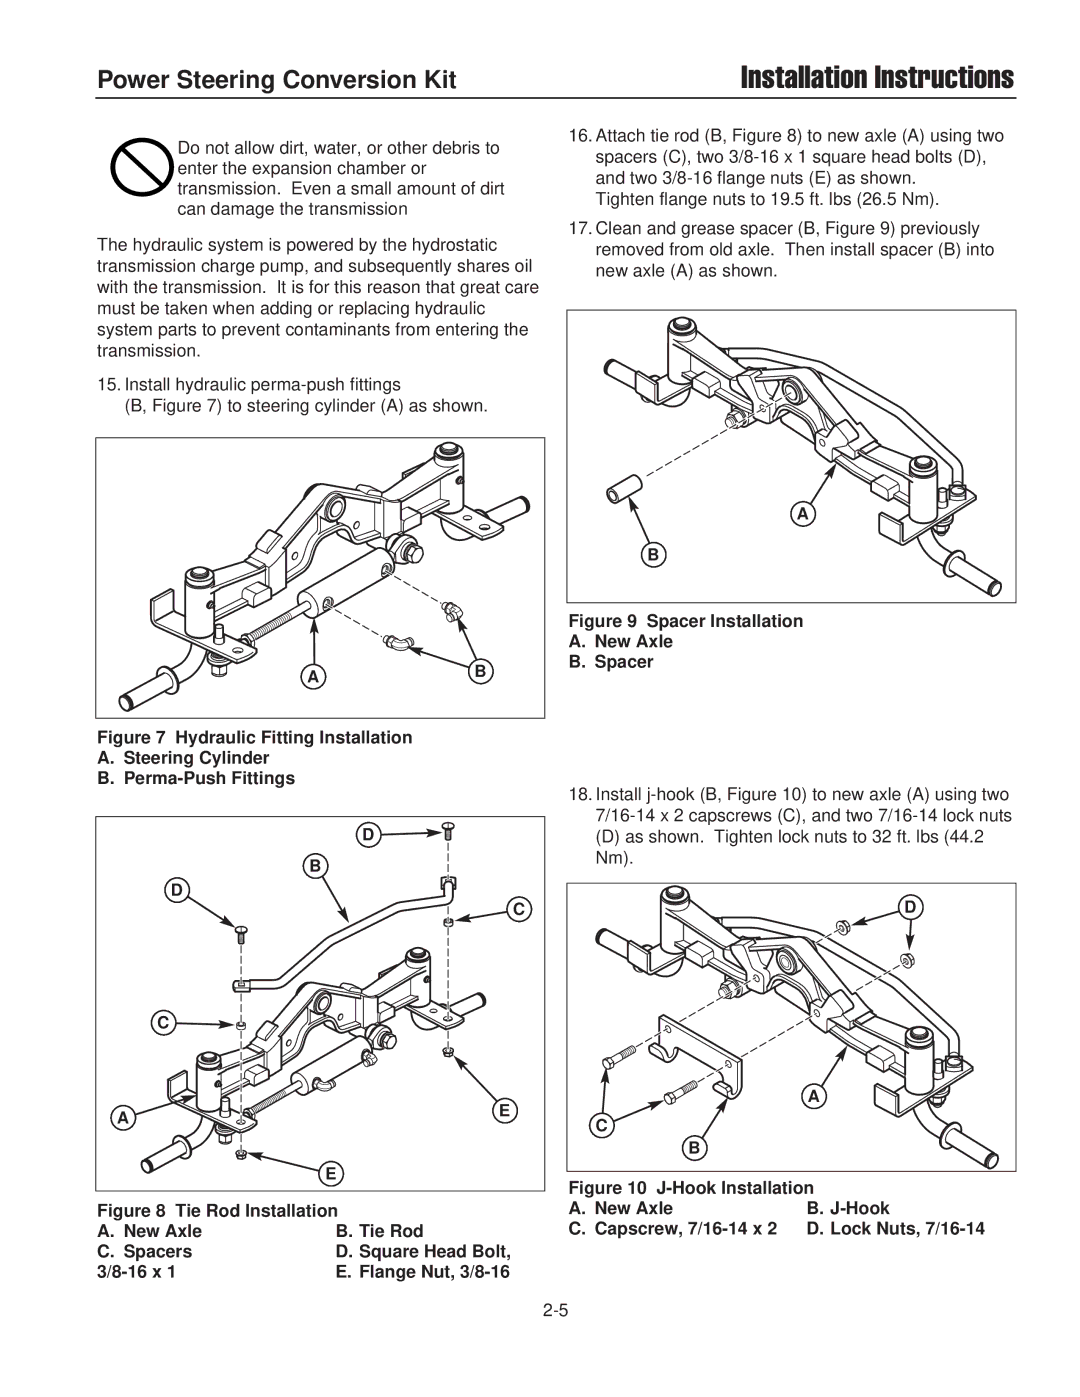
15.Install hydraulic
(B, Figure 7) to steering cylinder (A) as shown.
A | B |
|
Figure 7 Hydraulic Fitting Installation
A.Steering Cylinder
B.Perma-Push Fittings
| D |
| B |
| D |
| C |
| C |
A | E |
| |
| E |
Figure 8 Tie Rod Installation
A. New Axle | B. Tie Rod |
C. Spacers | D. Square Head Bolt, |
| E. Flange Nut, |
16.Attach tie rod (B, Figure 8) to new axle (A) using two spacers (C), two
Tighten flange nuts to 19.5 ft. lbs (26.5 Nm).
17.Clean and grease spacer (B, Figure 9) previously removed from old axle. Then install spacer (B) into new axle (A) as shown.
A
B
Figure 9 Spacer Installation
A.New Axle
B.Spacer
18.Install
(D) as shown. Tighten lock nuts to 32 ft. lbs (44.2 Nm).
D |
A |
C |
B |
Figure 10 J-Hook Installation
A. | New Axle | B. |
C. | Capscrew, | D. Lock Nuts, |
