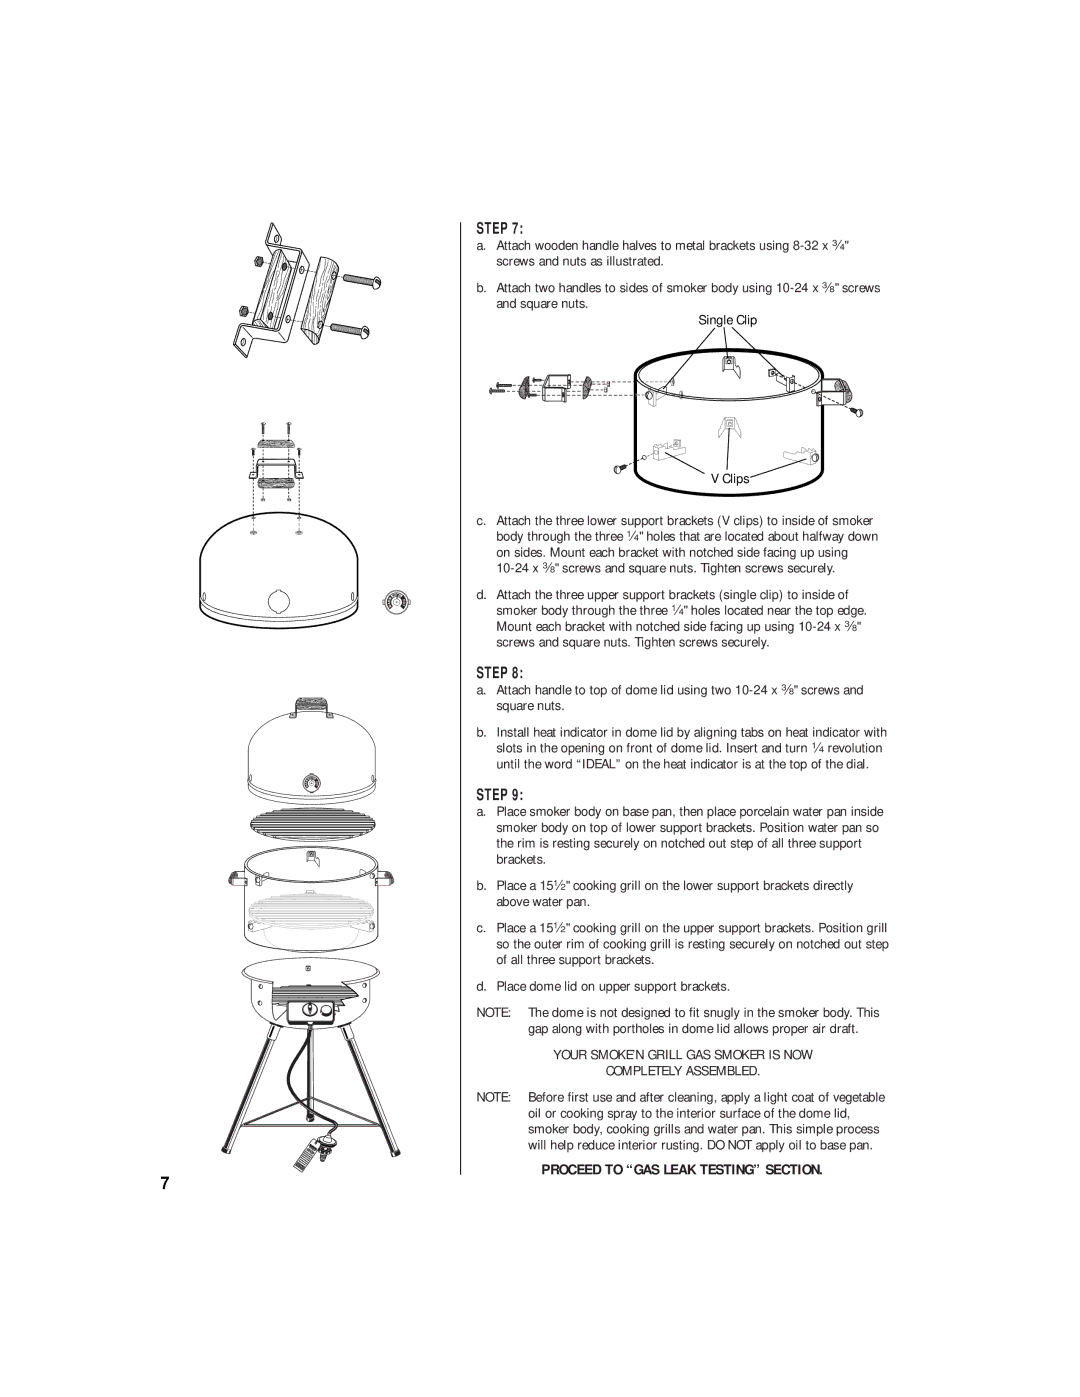
STEP 7:
a.Attach wooden handle halves to metal brackets using
b.Attach two handles to sides of smoker body using
Single Clip
V Clips
c.Attach the three lower support brackets (V clips) to inside of smoker body through the three 4" holes that are located about halfway down
on sides. Mount each bracket with notched side facing up using
d.Attach the three upper support brackets (single clip) to inside of smoker body through the three 4" holes located near the top edge. Mount each bracket with notched side facing up using
STEP 8:
a.Attach handle to top of dome lid using two
b.Install heat indicator in dome lid by aligning tabs on heat indicator with slots in the opening on front of dome lid. Insert and turn 4 revolution until the word “IDEAL” on the heat indicator is at the top of the dial.
STEP 9:
a.Place smoker body on base pan, then place porcelain water pan inside smoker body on top of lower support brackets. Position water pan so the rim is resting securely on notched out step of all three support brackets.
b.Place a 152" cooking grill on the lower support brackets directly above water pan.
c.Place a 152" cooking grill on the upper support brackets. Position grill so the outer rim of cooking grill is resting securely on notched out step of all three support brackets.
d.Place dome lid on upper support brackets.
NOTE: The dome is not designed to fit snugly in the smoker body. This gap along with portholes in dome lid allows proper air draft.
YOUR SMOKE’N GRILL GAS SMOKER IS NOW
COMPLETELY ASSEMBLED.
NOTE: Before first use and after cleaning, apply a light coat of vegetable oil or cooking spray to the interior surface of the dome lid, smoker body, cooking grills and water pan. This simple process will help reduce interior rusting. DO NOT apply oil to base pan.
PROCEED TO “GAS LEAK TESTING” SECTION.
7
