Installation for Children 40 – 80 lbs.
Installation for Children 40 – 80 lbs.
d Route the child’s left LATCH connector through the child’s left belt slot to the rear of the child seat.
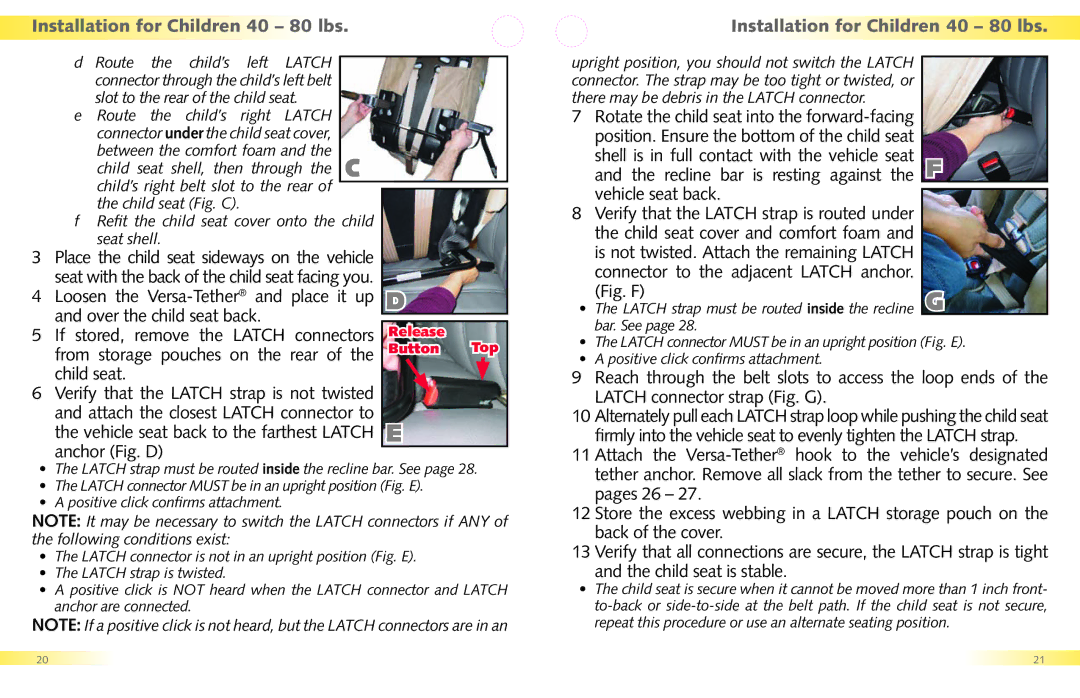
e Route the child’s right LATCH connector under the child seat cover, between the comfort foam and the child seat shell, then through the C child’s right belt slot to the rear of the child seat (Fig. C).
fRefit the child seat cover onto the child seat shell.
3Place the child seat sideways on the vehicle seat with the back of the child seat facing you.
4Loosen the
5If stored, remove the LATCH connectors from storage pouches on the rear of the child seat.
6Verify that the LATCH strap is not twisted and attach the closest LATCH connector to the vehicle seat back to the farthest LATCH anchor (Fig. D)
D
Release Button Top
E
upright position, you should not switch the LATCH connector. The strap may be too tight or twisted, or there may be debris in the LATCH connector.
7Rotate the child seat into the
8Verify that the LATCH strap is routed under the child seat cover and comfort foam and is not twisted. Attach the remaining LATCH connector to the adjacent LATCH anchor.
(Fig. F) | G |
s The LATCH strap must be routed inside the recline | |
bar. See page 28. |
|
s The LATCH connector MUST be in an upright position (Fig. E). s A positive click confirms attachment.
9 | Reach through the belt slots to access the loop ends of the |
| LATCH connector strap (Fig. G). |
10 | Alternately pull each LATCH strap loop while pushing the child seat |
| firmly into the vehicle seat to evenly tighten the LATCH strap. |
11 Attach the | |
sThe LATCH strap must be routed inside the recline bar. See page 28.
sThe LATCH connector MUST be in an upright position (Fig. E).
sA positive click confirms attachment.
NOTE: It may be necessary to switch the LATCH connectors if ANY of the following conditions exist:
sThe LATCH connector is not in an upright position (Fig. E).
sThe LATCH strap is twisted.
sA positive click is NOT heard when the LATCH connector and LATCH anchor are connected.
NOTE: If a positive click is not heard, but the LATCH connectors are in an
tether anchor. Remove all slack from the tether to secure. See |
pages 26 – 27. |
12 Store the excess webbing in a LATCH storage pouch on the |
back of the cover. |
13 Verify that all connections are secure, the LATCH strap is tight |
and the child seat is stable.
sThe child seat is secure when it cannot be moved more than 1 inch front-
20 | 21 |