Installation for Children 22 – 40 lbs.
NOTE: If a positive click is not heard, but the LATCH connectors are in an upright position, you should not switch the LATCH connector. The strap may be too tight or twisted, or there may be debris in the LATCH connector.
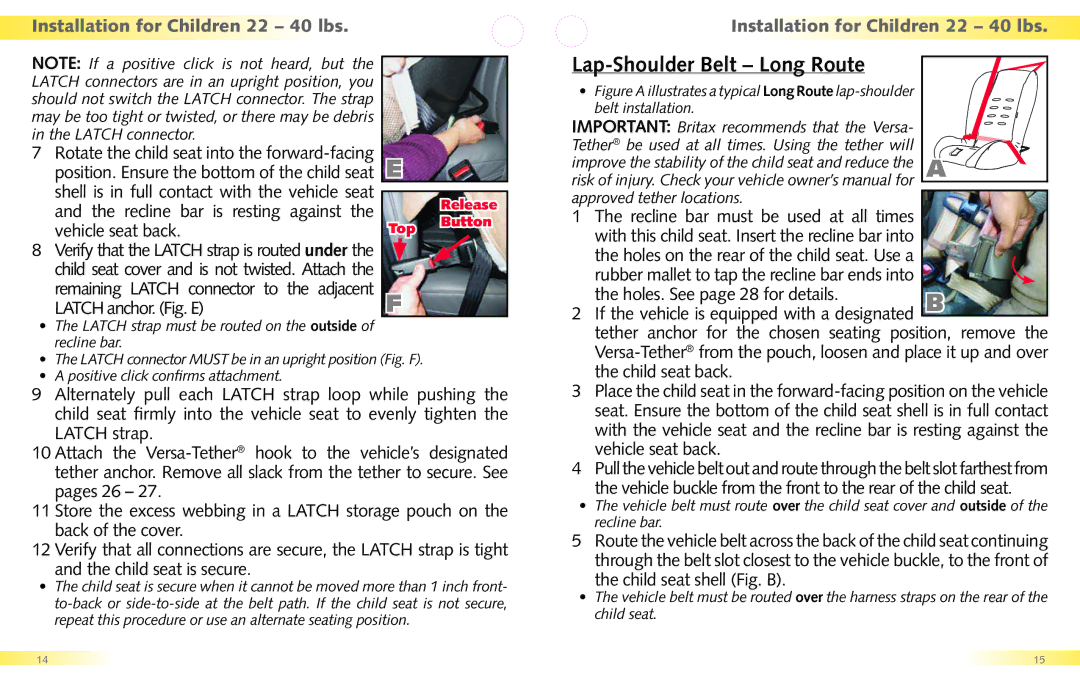
7 Rotate the child seat into the | E |
| |
position. Ensure the bottom of the child seat |
| ||
shell is in full contact with the vehicle seat |
| Release | |
and the recline bar is resting against the |
| ||
| Button | ||
vehicle seat back. | Top | ||
| |||
8 Verify that the LATCH strap is routed under the |
|
| |
child seat cover and is not twisted. Attach the |
|
| |
remaining LATCH connector to the adjacent | F |
| |
LATCH anchor. (Fig. E) |
|
sThe LATCH strap must be routed on the outside of recline bar.
sThe LATCH connector MUST be in an upright position (Fig. F).
sA positive click confirms attachment.
9Alternately pull each LATCH strap loop while pushing the child seat firmly into the vehicle seat to evenly tighten the LATCH strap.
10Attach the
11Store the excess webbing in a LATCH storage pouch on the back of the cover.
12Verify that all connections are secure, the LATCH strap is tight
and the child seat is secure.
sThe child seat is secure when it cannot be moved more than 1 inch front-
Installation for Children 22 – 40 lbs.
Lap-Shoulder Belt – Long Route
sFigure A illustrates a typical Long Route lap-shoulder
belt installation.
IMPORTANT: Britax recommends that the Versa- Tether® be used at all times. Using the tether will improve the stability of the child seat and reduce the A risk of injury. Check your vehicle owner’s manual for approved tether locations.
1The recline bar must be used at all times with this child seat. Insert the recline bar into
| the holes on the rear of the child seat. Use a |
| rubber mallet to tap the recline bar ends into |
| the holes. See page 28 for details. |
2 | If the vehicle is equipped with a designated B |
| tether anchor for the chosen seating position, remove the |
| |
| the child seat back. |
3 | Place the child seat in the |
| seat. Ensure the bottom of the child seat shell is in full contact |
| with the vehicle seat and the recline bar is resting against the |
| vehicle seat back. |
4 | Pull the vehicle belt out and route through the belt slot farthest from |
| the vehicle buckle from the front to the rear of the child seat. |
sThe vehicle belt must route over the child seat cover and outside of the recline bar.
5Route the vehicle belt across the back of the child seat continuing through the belt slot closest to the vehicle buckle, to the front of
the child seat shell (Fig. B).
sThe vehicle belt must be routed over the harness straps on the rear of the child seat.
14 | 15 |