
CO5120PDB specifications
The BRK electronic CO5120PDB is a state-of-the-art combination carbon monoxide and smoke detector that offers enhanced safety features for modern homes. Designed with innovation in mind, this device aims to provide reliable protection against the dangers of carbon monoxide poisoning and smoke inhalation from fires.One of the standout features of the CO5120PDB is its dual-sensor technology. It incorporates both photoelectric and ionization sensors. The photoelectric sensor is highly effective in detecting slow-burning fires that produce a lot of smoke, while the ionization sensor is adept at detecting fast-flaming fires. This combination ensures comprehensive smoke detection, providing a higher level of safety and peace of mind for homeowners.
In addition to its advanced smoke detection capabilities, the CO5120PDB is equipped with a highly sensitive carbon monoxide sensor. Carbon monoxide is an insidious gas that cannot be seen or smelled, making it a silent threat in many households. The CO sensor can quickly identify dangerous levels of this gas, sounding an alarm to alert residents and help them take necessary action.
The CO5120PDB features a user-friendly design, including a digital display that shows the current CO levels in parts per million (ppm). This allows users to monitor the levels of carbon monoxide in real time. The detector also comes with a voice alert feature, providing clear and understandable warnings in the event of smoke or CO detection, which helps in identifying the situation promptly.
Another significant characteristic of the CO5120PDB is its ability to operate even during power outages. It is equipped with a battery backup system that ensures continuous operation, making it ideal for locations where power interruptions may occur. Additionally, the device has a test/silence button that allows users to test the unit for functionality as well as silence false alarms if necessary.
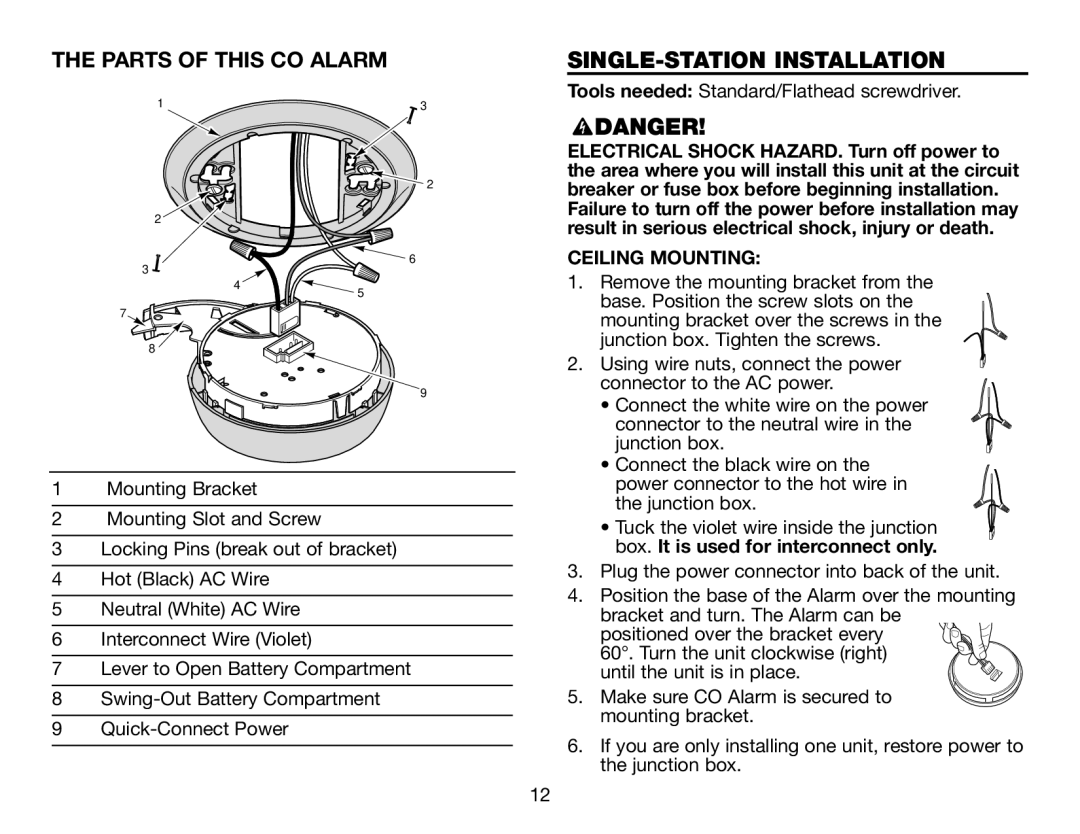
Installation is straightforward with the CO5120PDB, which can be mounted on walls or ceilings, adhering to the recommendations of safety organizations regarding placement. The unit also features a sleek design that blends seamlessly into home decor, ensuring that safety doesn’t compromise aesthetics.
In conclusion, the BRK electronic CO5120PDB is an exemplary choice for those seeking robust protection against both carbon monoxide and smoke. Its dual-sensor technology, digital display, voice alerts, and battery backup make it an indispensable addition to any household, ensuring that residents can live with comfort and peace of mind, knowing they are protected from two of the most significant indoor hazards.