PREPARE THE HOOD
Note: On stainless steel hoods, carefully remove the plastic protective film from all exterior surfaces of the hood and decorative flues, prior to final installation.
DUCTED CONFIGURATION
1.Remove the tape on the electrical system plate; place the electrical system plate on the hood (use a protection). Fig. 5
2.Install the discharge collar into the duct connector of the range hood. Fig. 6
3.Attach an adequate length of 6” round steel ducting to the range hood duct connector. Fig. 6
4.Duct tape all joints to make them secure and air tight.
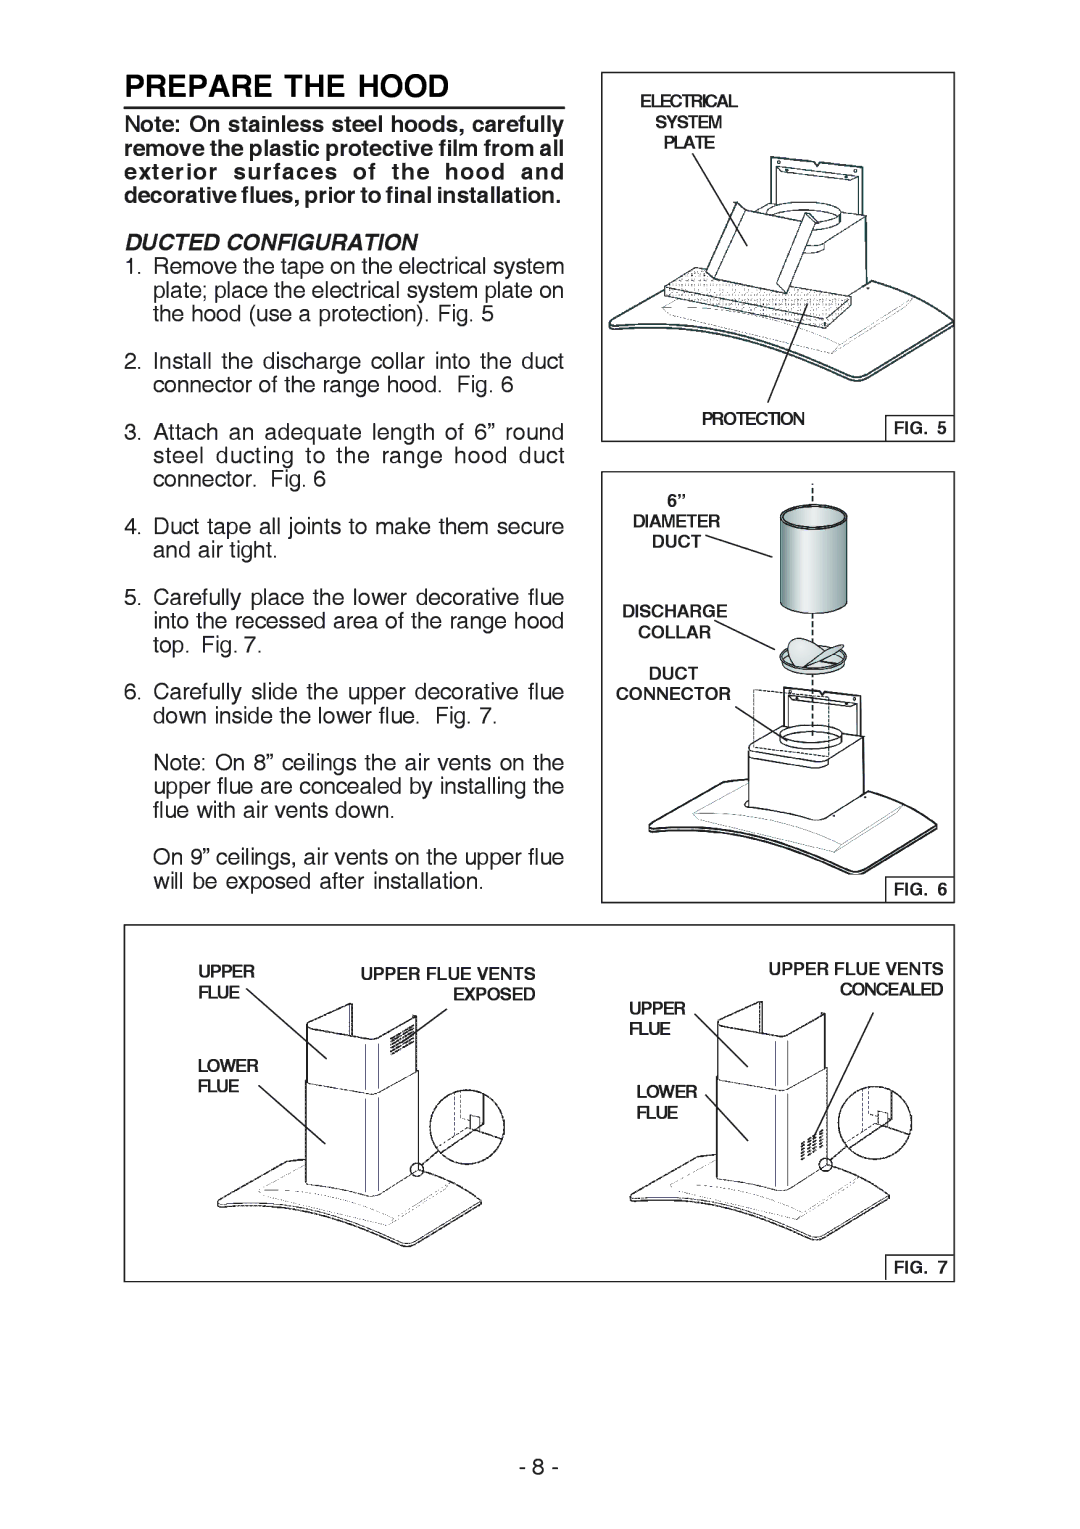
5.Carefully place the lower decorative flue into the recessed area of the range hood top. Fig. 7.
6.Carefully slide the upper decorative flue down inside the lower flue. Fig. 7.
Note: On 8” ceilings the air vents on the upper flue are concealed by installing the flue with air vents down.
On 9” ceilings, air vents on the upper flue will be exposed after installation.
ELECTRICAL
SYSTEM
PLATE
PROTECTION | FIG. 5 |
|
6”
DIAMETER
DUCT ![]()
DISCHARGE
COLLAR ![]()
DUCT
CONNECTOR
FIG. 6
UPPER | UPPER FLUE VENTS | UPPER FLUE VENTS |
FLUE | EXPOSED | CONCEALED |
|
| UPPER |
|
| FLUE |
LOWER
FLUELOWER
FLUE
FIG. 7
- 8 -