
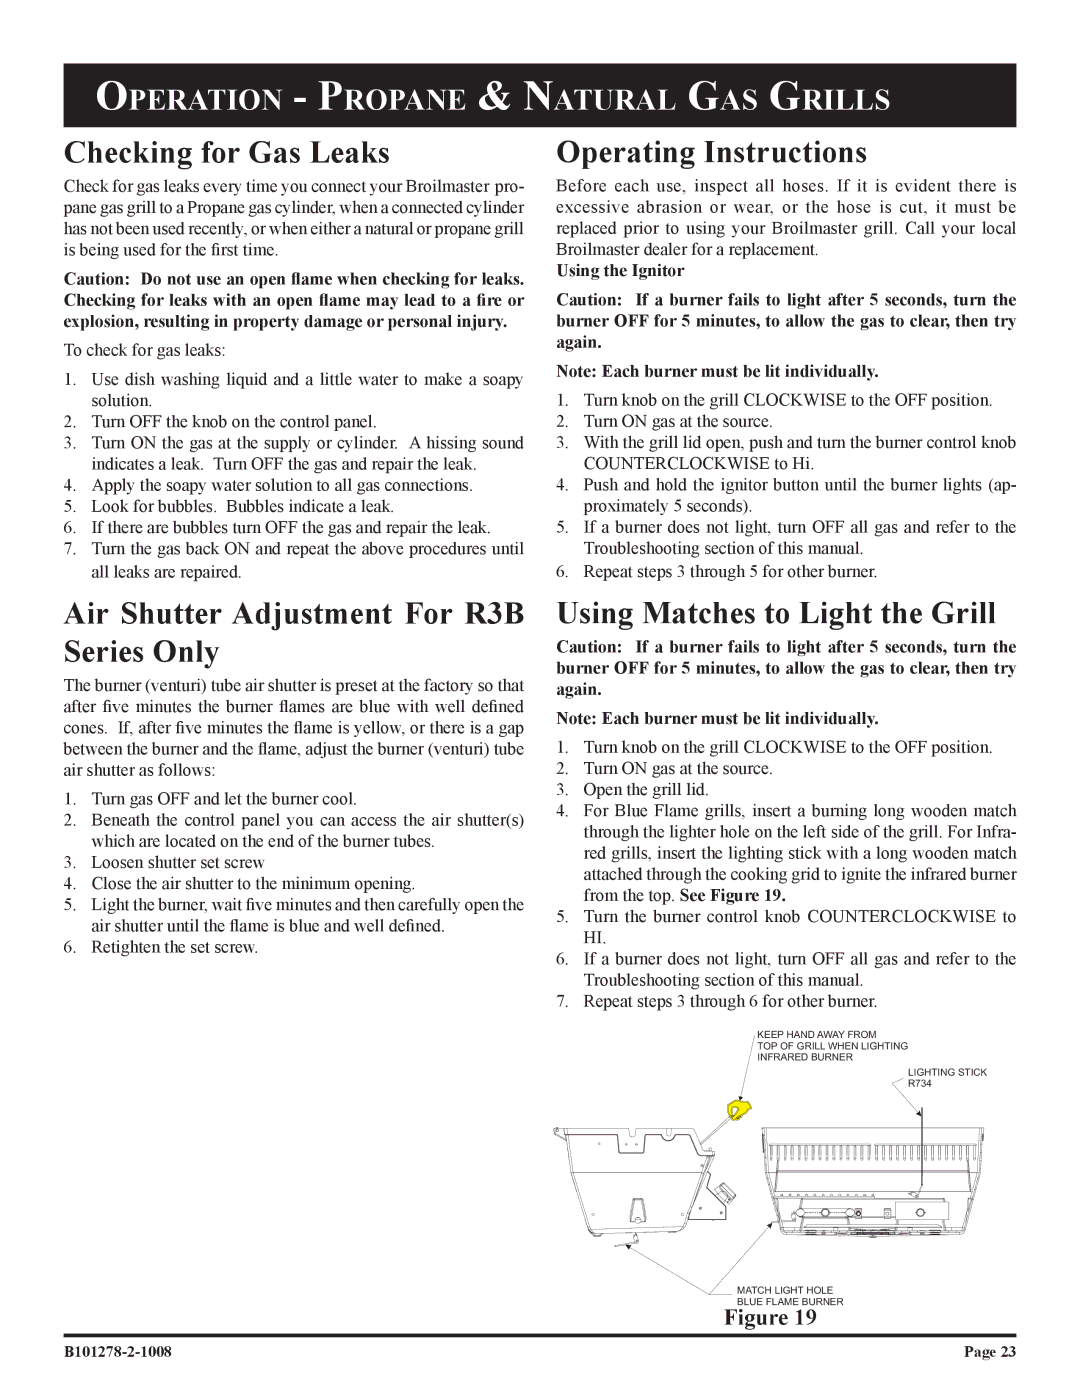
R3B-1, R3BN-1, R3-1, R3N-1 specifications
Broilmaster has been a trusted name in outdoor cooking, and their R3 series of gas grills, which includes models R3N-1, R3-1, R3BN-1, and R3B-1, exemplifies quality, performance, and innovation. Each model is thoughtfully designed to meet the demands of the modern grill master while ensuring a user-friendly experience.One of the standout features of the Broilmaster R3 series is its powerful cooking system. All models are equipped with a high-performance stainless steel burner, providing even heat distribution and efficient cooking. This ensures that your food is cooked to perfection, whether it's a juicy steak, flavorful chicken, or grilled vegetables. The burners are designed to reach high temperatures quickly, allowing for searing and rapid cooking, which is essential for achieving that perfect char.
The R3N-1, R3-1, R3BN-1, and R3B-1 models feature an innovative cooking grid construction made from cast iron, which retains heat exceptionally well and provides excellent grill marks on your food. The cast iron grids, combined with the burners, create an optimal cooking environment that can accommodate various cooking styles, from direct grilling to indirect cooking.
Another significant characteristic of these grills is their durability. Constructed from heavy-duty materials, including rust-resistant stainless steel, the R3 series is built to withstand the elements, ensuring longevity and consistent performance. The grills come with a stylish and functional hood that not only enhances their aesthetic appeal but also helps retain heat effectively during the cooking process.
For added convenience, the R3 models feature an integrated ignition system that ensures reliable startup every time you fire up the grill. Many of the models also come with built-in side shelves, providing additional workspace for food preparation and storage of grilling tools. The added versatility of these grills allows users to explore a variety of cooking methods, including smoking and baking when equipped with optional accessories.
In summary, the Broilmaster R3N-1, R3-1, R3BN-1, and R3B-1 gas grills are excellent options for anyone looking to elevate their outdoor cooking experience. With their powerful burners, durable construction, and user-friendly features, they cater to both novice grillers and seasoned barbecue enthusiasts alike. The R3 series not only embodies excellent performance but also offers the versatility and reliability necessary for any grilling occasion.