SURROUND AND GRILL ASSEMBLY
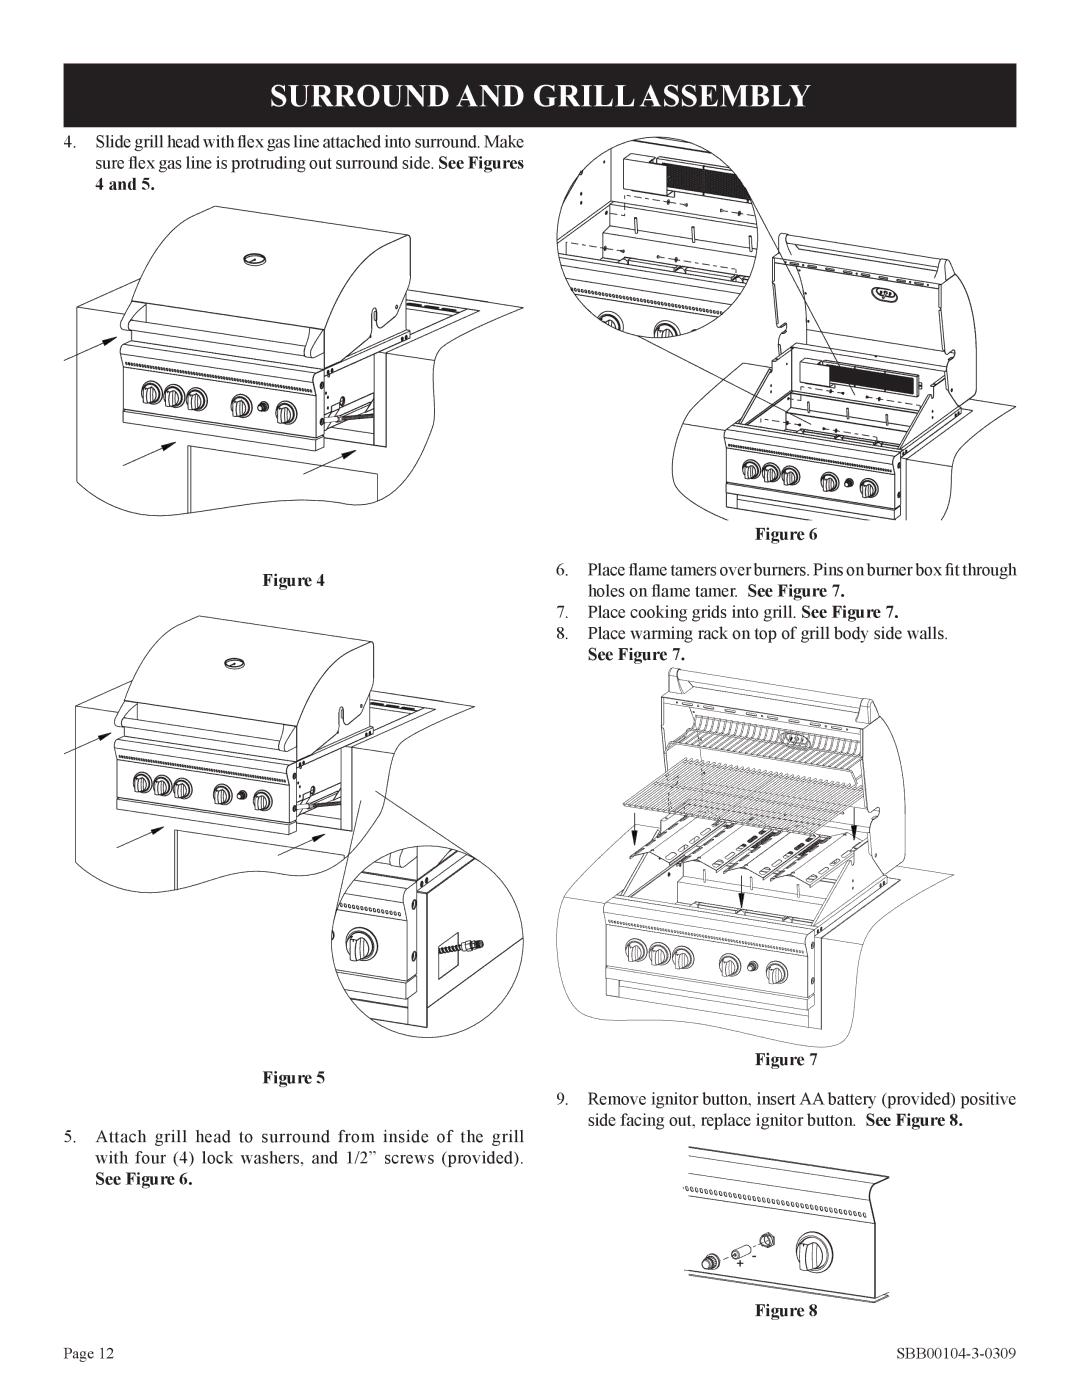
4.Slide grill head with flex gas line attached into surround. Make sure flex gas line is protruding out surround side. See Figures 4 and 5.
|
| Figure 6 |
Figure 4 | 6. | Place flame tamers over burners. Pins on burner box fit through |
| holes on flame tamer. See Figure 7. | |
|
| |
| 7. | Place cooking grids into grill. See Figure 7. |
| 8. | Place warming rack on top of grill body side walls. |
|
| See Figure 7. |
Figure 5
5.Attach grill head to surround from inside of the grill with four (4) lock washers, and 1/2” screws (provided).
See Figure 6.
Figure 7
9.Remove ignitor button, insert AA battery (provided) positive side facing out, replace ignitor button. See Figure 8.
Figure 8
Page 12 |
