4Sew with the center of the presser foot aligned along the center of the two pieces of fabric.
5After sewing is finished, remove the paper and the basting stitches.
Overedge stitching
| Pattern | Stitch | Stitch | ||
Stitch Name |
|
|
| Length | Width |
37 |
| 27 | |||
|
| [mm (inch)] | [mm (inch)] | ||
Elastic Shell | 12 |
| |||
|
|
| |||
Tuck Stitch |
|
|
| ||
|
|
|
|
|
|
| 22 |
| 17 | Fixed | |
|
|
|
| ||
|
|
|
| 2.5 (3/32) | |
Elastic Overlock |
|
|
|
| |
|
|
|
|
| |
Stitch | 23 |
| 18 | Fixed | |
|
| ||||
|
|
|
| ||
|
|
|
| 2.5 (3/32) | |
|
|
|
|
| |
|
|
|
|
|
|
| 25 |
| 20 | Fixed | |
|
|
|
| ||
|
|
|
| 2.5 (3/32) | |
|
|
|
|
| |
Comb Stitch |
|
|
|
|
|
30 |
| 25 | Fixed | 5 | |
|
| ||||
|
|
|
| ||
|
|
|
| 2.5 (3/32) | (3/16) |
|
|
|
|
| |
|
|
|
|
|
|
These stitches are used to join together seams and finish them in one operation. Elastic Overlock Stitch: for sewing stretch materials.
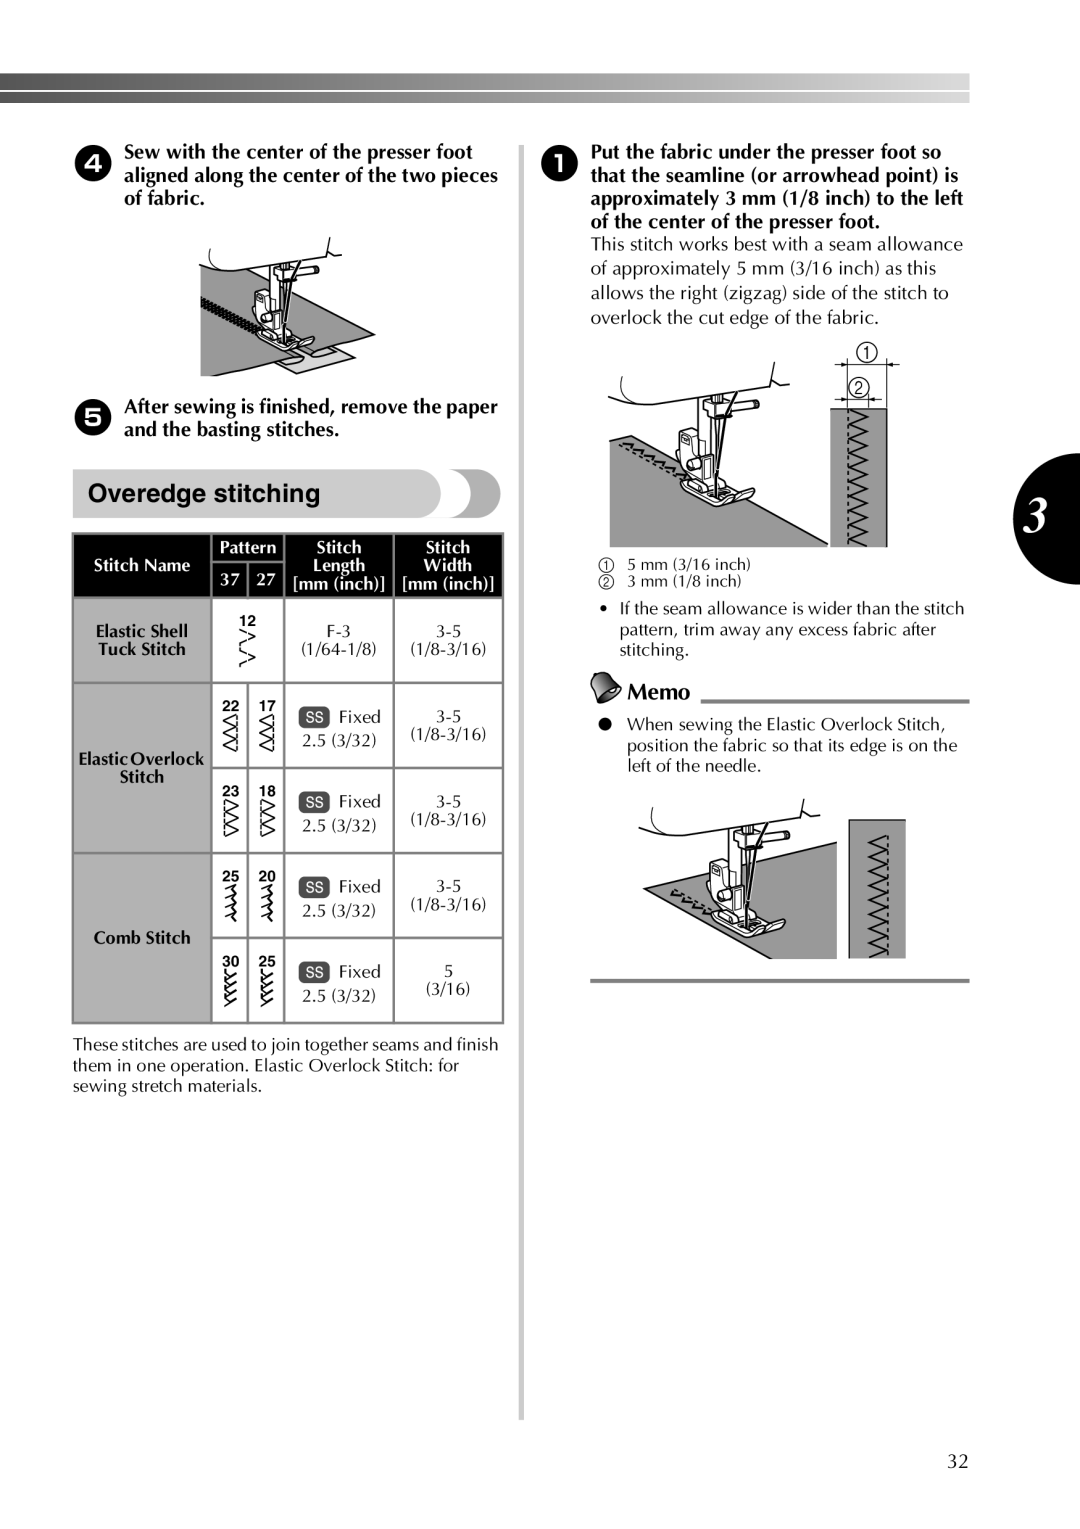
1Put the fabric under the presser foot so that the seamline (or arrowhead point) is approximately 3 mm (1/8 inch) to the left of the center of the presser foot.
This stitch works best with a seam allowance of approximately 5 mm (3/16 inch) as this allows the right (zigzag) side of the stitch to overlock the cut edge of the fabric.
1 |
2 |
3
15 mm (3/16 inch)
2 3 mm (1/8 inch)
•If the seam allowance is wider than the stitch pattern, trim away any excess fabric after stitching.
 Memo
Memo
●When sewing the Elastic Overlock Stitch, position the fabric so that its edge is on the left of the needle.
32