SERVICE (cont.)

Solenoid Valve

P1478

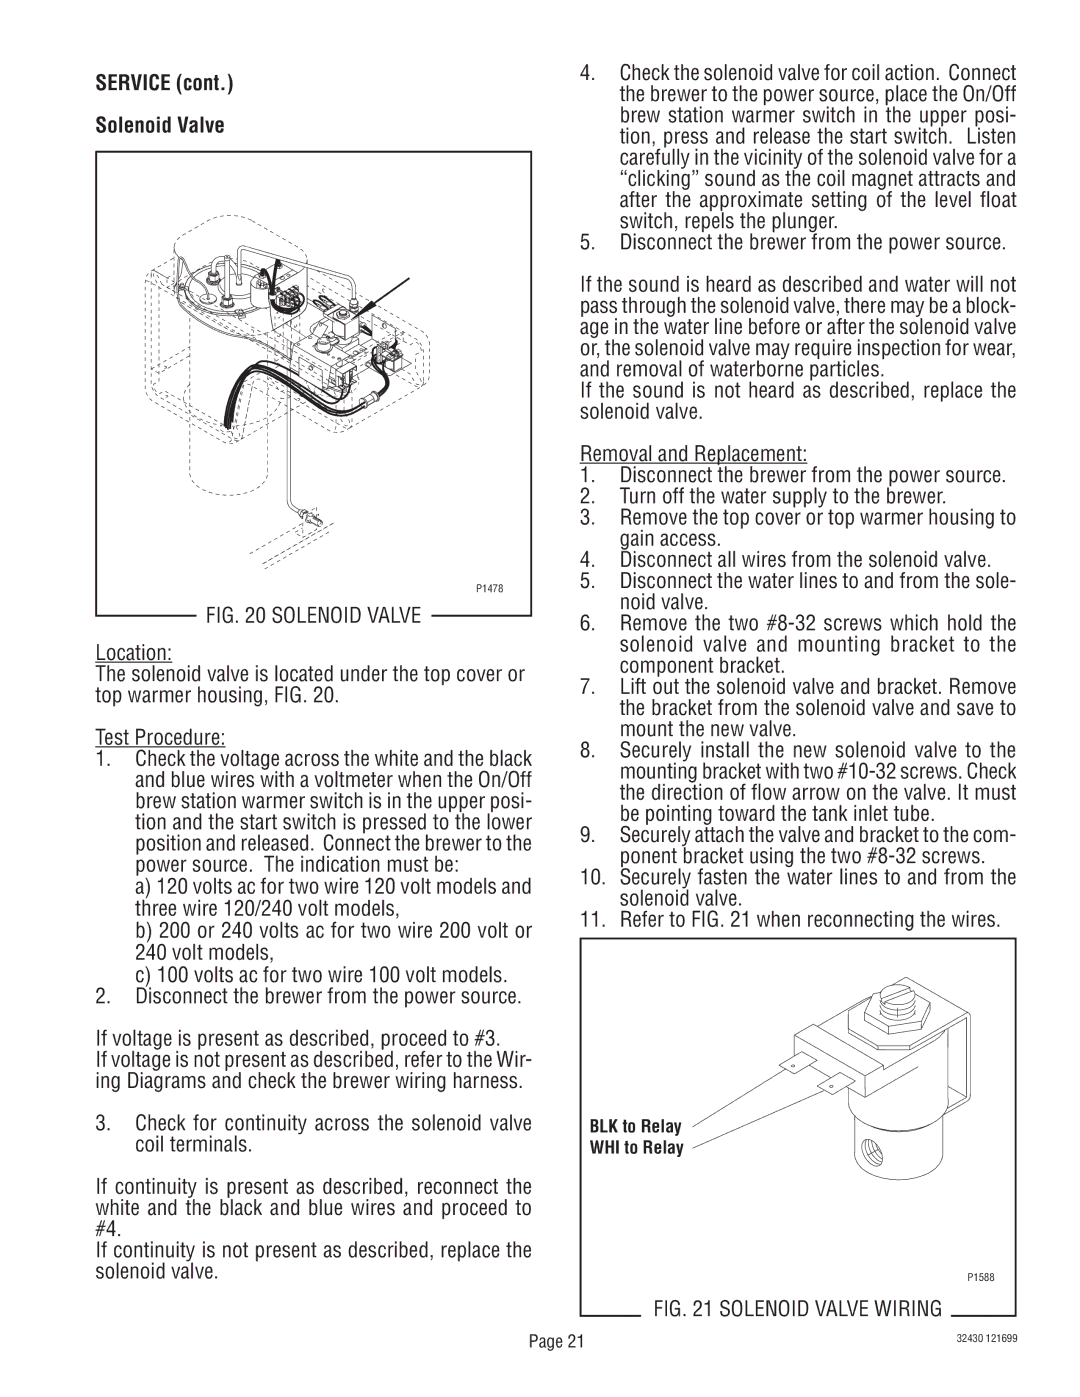
FIG. 20 SOLENOID VALVE

Location:

The solenoid valve is located under the top cover or top warmer housing, FIG. 20.

Test Procedure:

1.Check the voltage across the white and the black and blue wires with a voltmeter when the On/Off brew station warmer switch is in the upper posi- tion and the start switch is pressed to the lower position and released. Connect the brewer to the power source. The indication must be:

a)120 volts ac for two wire 120 volt models and three wire 120/240 volt models,

b)200 or 240 volts ac for two wire 200 volt or 240 volt models,

c)100 volts ac for two wire 100 volt models.

2.Disconnect the brewer from the power source.

If voltage is present as described, proceed to #3.

If voltage is not present as described, refer to the Wir- ing Diagrams and check the brewer wiring harness.

3.Check for continuity across the solenoid valve coil terminals.

If continuity is present as described, reconnect the white and the black and blue wires and proceed to #4.

If continuity is not present as described, replace the solenoid valve.

4.Check the solenoid valve for coil action. Connect the brewer to the power source, place the On/Off brew station warmer switch in the upper posi- tion, press and release the start switch. Listen carefully in the vicinity of the solenoid valve for a “clicking” sound as the coil magnet attracts and after the approximate setting of the level float switch, repels the plunger.

5.Disconnect the brewer from the power source.

If the sound is heard as described and water will not pass through the solenoid valve, there may be a block- age in the water line before or after the solenoid valve or, the solenoid valve may require inspection for wear, and removal of waterborne particles.

If the sound is not heard as described, replace the solenoid valve.

Removal and Replacement:

1.Disconnect the brewer from the power source.

2.Turn off the water supply to the brewer.

3.Remove the top cover or top warmer housing to gain access.

4.Disconnect all wires from the solenoid valve.

5.Disconnect the water lines to and from the sole- noid valve.

6.Remove the two #8-32 screws which hold the solenoid valve and mounting bracket to the component bracket.

7.Lift out the solenoid valve and bracket. Remove the bracket from the solenoid valve and save to mount the new valve.

8.Securely install the new solenoid valve to the mounting bracket with two #10-32 screws. Check the direction of flow arrow on the valve. It must be pointing toward the tank inlet tube.

9.Securely attach the valve and bracket to the com- ponent bracket using the two #8-32 screws.

10.Securely fasten the water lines to and from the solenoid valve.

11.Refer to FIG. 21 when reconnecting the wires.

BLK to Relay

WHI to Relay

P1588

FIG. 21 SOLENOID VALVE WIRING

Page 21

32430 121699


Page 21
Image 21
Bunn RL00006929 service manual Service Solenoid Valve

RL00006929 specifications

The Bunn RL00006929 is a commercial-grade coffee brewer that exemplifies innovation, efficiency, and durability, making it a preferred choice for coffee shops, restaurants, and large offices. This model is designed to meet high-volume demands while ensuring consistent quality and flavor in every cup.

One of the most notable features of the Bunn RL00006929 is its capacity to brew up to 3.8 gallons of coffee per hour. This remarkable output is facilitated by its dual-funnel design, which allows for simultaneous brewing, reducing wait times and enhancing service speed. The brewer is equipped with a precise temperature control system, ensuring that water is heated to the optimal brewing temperature of 200°F. This consistency in temperature plays a crucial role in extracting the full flavor profile from coffee grounds.

In terms of design, the Bunn RL00006929 boasts a compact footprint, making it suitable for various settings, including kitchens with limited space. The unit features a stainless steel construction, which not only provides a sleek appearance but also contributes to its durability and resistance to corrosion. Additionally, the easy-access design makes maintenance straightforward, allowing operators to clean and service the unit with minimal effort.

The RL00006929 incorporates advanced technologies that enhance its functionality. For instance, the machine features a digital control panel that provides real-time feedback on brewing status, water temperature, and other critical parameters. This intelligent system allows operators to make quick adjustments and ensures that brewing conditions are always optimal.

Another standout characteristic is the integrated brew basket that holds filters securely in place, preventing spills and ensuring a smooth brewing process. This feature minimizes mess and simplifies the coffee-making process, making it user-friendly for both experienced baristas and novice operators.

In summary, the Bunn RL00006929 stands out for its high brewing capacity, precise temperature control, compact design, and user-friendly features. Its combination of advanced technology and durability makes it an excellent investment for any establishment that demands quality coffee at high volumes. With Bunn's reputation for excellence, the RL00006929 is a reliable choice for delivering exceptional coffee experiences.