
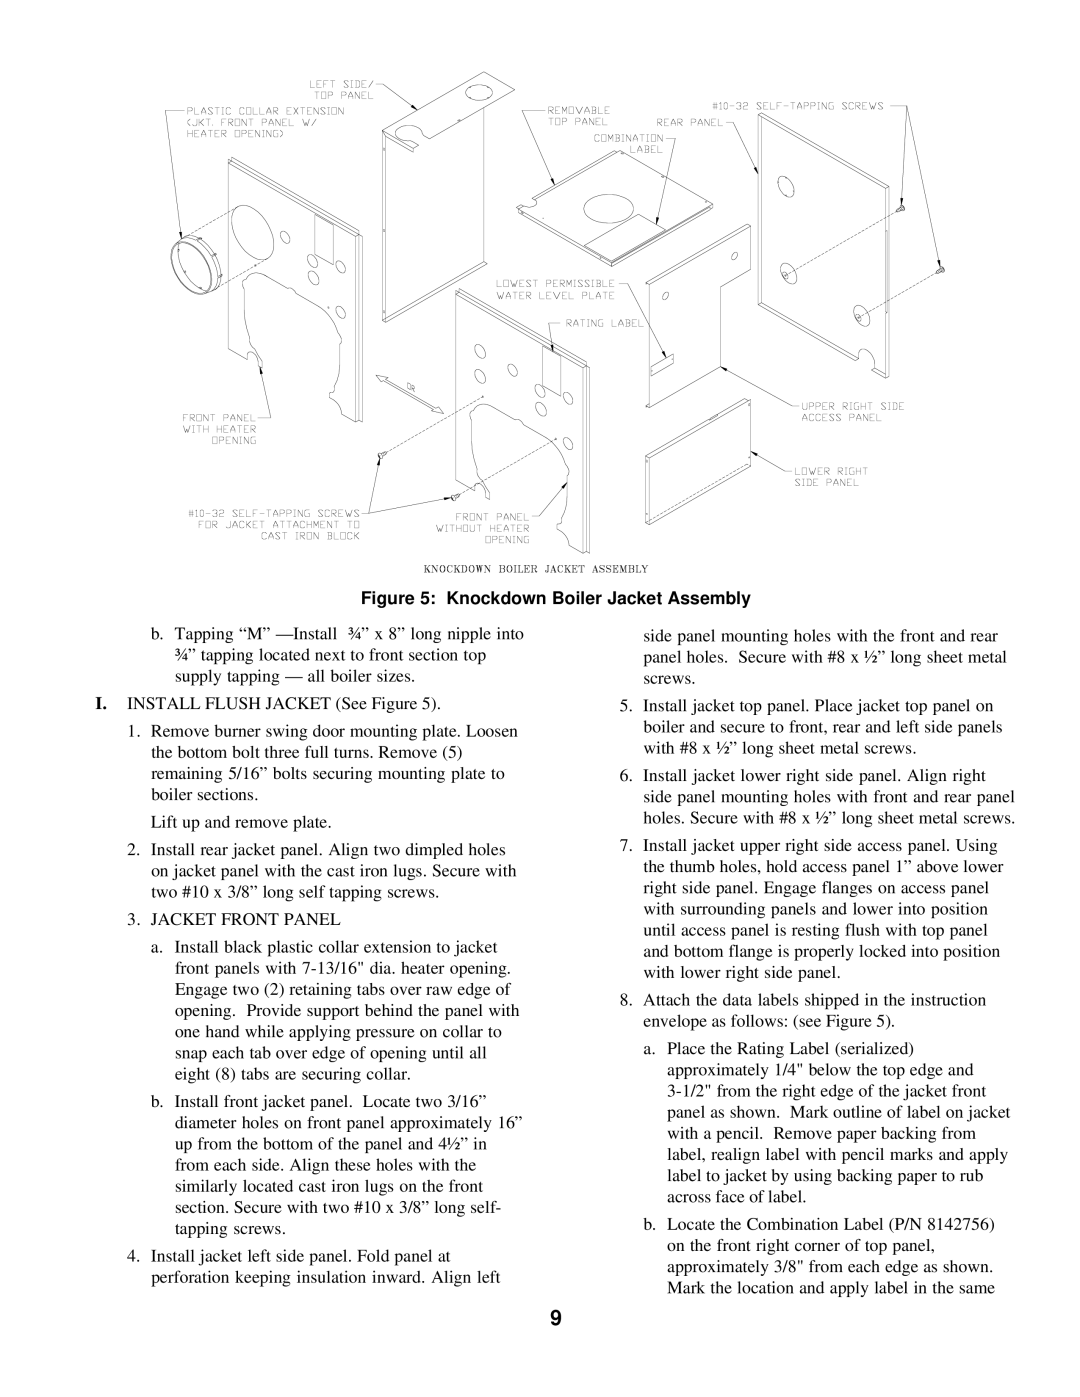
V7 SERIES specifications
The Burnham V7 Series is a standout choice in the realm of residential and light commercial boilers, known for its high efficiency and dependable performance. Engineered for those seeking a reliable heating solution, the V7 Series integrates advanced technologies that prioritize both effectiveness and energy conservation.At the heart of the Burnham V7 Series is its innovative design that utilizes a cast iron heat exchanger. This robust component ensures excellent durability and longevity while providing efficient heat transfer. The V7's heat exchanger is designed to maximize heating output while minimizing fuel consumption, making it an environmentally friendly option that can help reduce utility costs.
One of the key features of the V7 Series is its ability to operate on multiple fuel sources, including natural gas and propane. This versatility allows homeowners and businesses to choose the most suitable and cost-effective fuel option for their specific needs. The V7 also supports a variety of installation configurations, which makes it adaptable to different spaces and configurations.
The series is equipped with advanced control technologies, including a state-of-the-art electronic ignition system. This system enhances reliability by ensuring a quick and safe start-up while reducing energy waste. Additionally, the integrated boiler control allows users to monitor and adjust their heating settings easily, providing enhanced comfort and efficiency at the touch of a button.
Safety is a top priority in the Burnham V7 Series, which features built-in safety controls to minimize risks. These include thermal overload protection, a pressure relief valve, and a low water cutoff feature, all of which work together to safeguard the boiler and its surroundings.
Moreover, the Burnham V7 Series is designed with a user-friendly interface that makes maintenance straightforward. Routine tasks can be conducted with ease, helping to extend the life of the unit.
In conclusion, the Burnham V7 Series is crafted for those who prioritize efficiency, adaptability, and safety in their heating solutions. With its myriad features and commitment to energy conservation, it stands as a leading choice for heating needs in various settings. The combination of innovative technology, reliable performance, and user-friendly design makes the V7 Series an excellent investment in comfort and efficiency.