A Tour of the MultiMix USB 2
Channel Strips
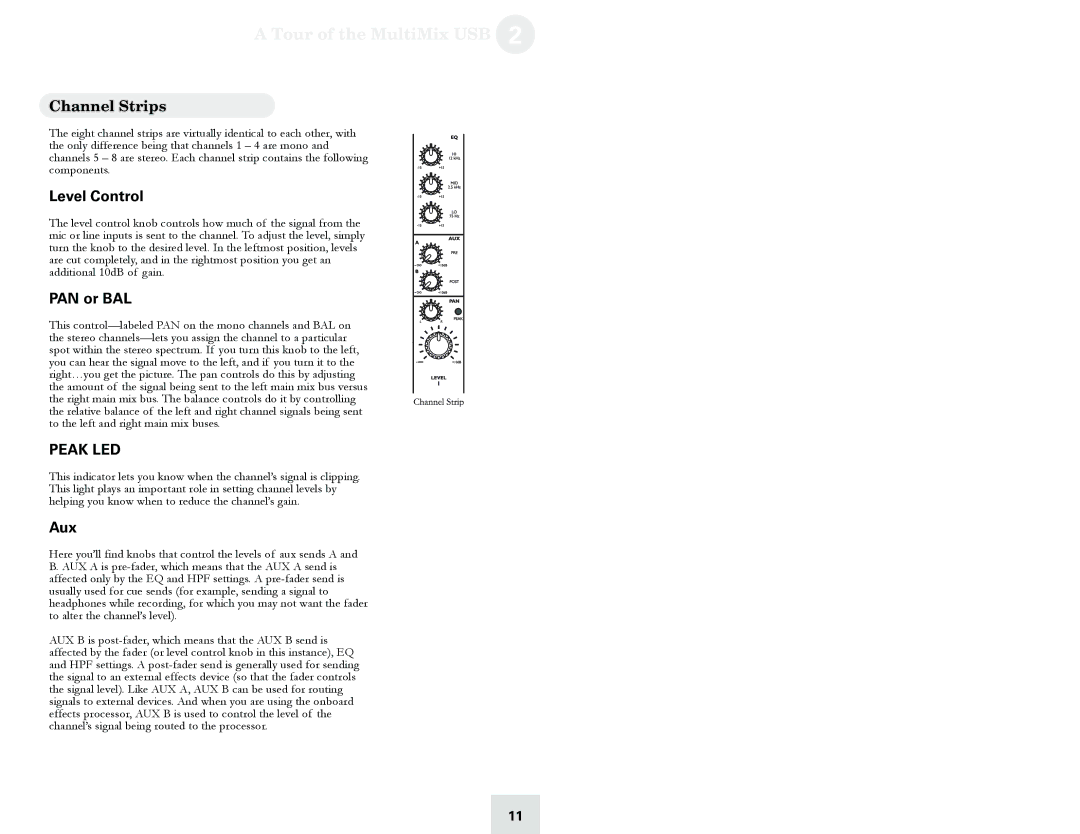
The eight channel strips are virtually identical to each other, with the only difference being that channels 1 – 4 are mono and channels 5 – 8 are stereo. Each channel strip contains the following components.
Level Control
The level control knob controls how much of the signal from the mic or line inputs is sent to the channel. To adjust the level, simply turn the knob to the desired level. In the leftmost position, levels are cut completely, and in the rightmost position you get an additional 10dB of gain.
PAN or BAL
This control—labeled PAN on the mono channels and BAL on the stereo channels—lets you assign the channel to a particular spot within the stereo spectrum. If you turn this knob to the left, you can hear the signal move to the left, and if you turn it to the right…you get the picture. The pan controls do this by adjusting the amount of the signal being sent to the left main mix bus versus the right main mix bus. The balance controls do it by controlling the relative balance of the left and right channel signals being sent to the left and right main mix buses.
PEAK LED
This indicator lets you know when the channel’s signal is clipping. This light plays an important role in setting channel levels by helping you know when to reduce the channel’s gain.
Aux
Here you’ll find knobs that control the levels of aux sends A and B. AUX A is pre-fader, which means that the AUX A send is affected only by the EQ and HPF settings. A pre-fader send is usually used for cue sends (for example, sending a signal to headphones while recording, for which you may not want the fader to alter the channel’s level).
AUX B is post-fader, which means that the AUX B send is affected by the fader (or level control knob in this instance), EQ and HPF settings. A post-fader send is generally used for sending the signal to an external effects device (so that the fader controls the signal level). Like AUX A, AUX B can be used for routing signals to external devices. And when you are using the onboard effects processor, AUX B is used to control the level of the channel’s signal being routed to the processor.