Operating Instructions | Oil Lubricated Portable Air Compressor |
Preparation (Cont.)
2.If repair or replacement of cord or plug is necessary, do not connect grounding wire to either flat blade terminal. The grounding wire has insulation and an outer surface that is green with or without yellow stripes.
3.Check with a qualified electrician or serviceman to ensure product is properly grounded. Do not modify plug provided; if plug will not fit outlet, have proper outlet installed by a qualified electrician.
! WARNING | Never connect |
green (or green and |
yellow) wire to a live terminal.
EXTENSION CORDS
Avoid using an extension cord. To extend the reach of the compressor, additional air hose is recommended.
1.Use only a
2.Make sure extension cord is in good condition, and heavy enough to carry current product will draw. An undersized cord will cause a drop in line voltage resulting in loss of power and overheating.
3.The chart on page 3 shows correct size to use depending on cord length and nameplate ampere rating. If in doubt, use next heavier gauge.
NOTE: The smaller the gauge number, the heavier the cord.
Operation
FOR TROUBLE-FREE OPERATION
1.Keep compressor level during operation and while checking oil level.
2.Check oil level before each use. Add oil to full line on the dipstick. Operation with low oil will damage pump and may cause difficulty in starting.
3.Read instructions: Carefully read through this owner’s manual BEFORE OPERATING the new air compressor.
It contains information |
|
about operation and |
|
maintenance of unit. | MANUAL |
4.Drain tank daily: Open drain cocks and tilt unit
to drain moisture from tanks (See Figure 12). Be sure to close drain cocks tightly before operating compressor. This helps prevent tank corrosion and keeps oil and moisture out of compressed air.
5.Check air filter: Never run compressor without an air filter nor with a clogged air filter. See maintenance section for cleaning and replacement instructions.
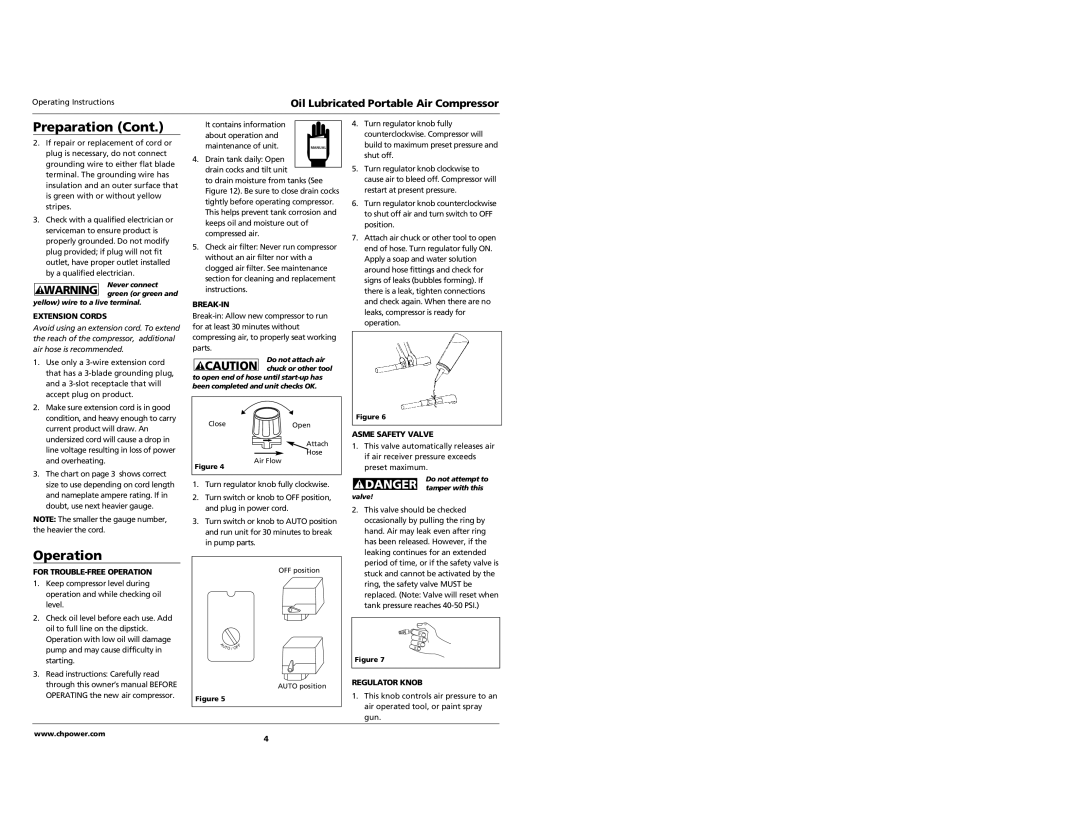
BREAK-IN
Do not attach air
! CAUTION chuck or other tool to open end of hose until
CloseOpen
Attach
Hose
Air Flow
Figure 4
1.Turn regulator knob fully clockwise.
2.Turn switch or knob to OFF position, and plug in power cord.
3.Turn switch or knob to AUTO position and run unit for 30 minutes to break in pump parts.
OFF position
A | FF |
U | |
| TO / O |
AUTO position
Figure 5
4.Turn regulator knob fully counterclockwise. Compressor will build to maximum preset pressure and shut off.
5.Turn regulator knob clockwise to cause air to bleed off. Compressor will restart at present pressure.
6.Turn regulator knob counterclockwise to shut off air and turn switch to OFF position.
7.Attach air chuck or other tool to open end of hose. Turn regulator fully ON. Apply a soap and water solution around hose fittings and check for signs of leaks (bubbles forming). If there is a leak, tighten connections and check again. When there are no leaks, compressor is ready for operation.
Figure 6
ASME SAFETY VALVE
1.This valve automatically releases air if air receiver pressure exceeds preset maximum.
| Do not attempt to | |
! DANGER | ||
tamper with this | ||
|
valve!
2.This valve should be checked occasionally by pulling the ring by hand. Air may leak even after ring has been released. However, if the leaking continues for an extended period of time, or if the safety valve is stuck and cannot be activated by the ring, the safety valve MUST be replaced. (Note: Valve will reset when tank pressure reaches
Figure 7
REGULATOR KNOB
1.This knob controls air pressure to an air operated tool, or paint spray gun.
www.chpower.com
4