5Connected device: Begin recording when the scene you wish to copy appears. Stop recording when copying is complete.
6This camcorder: Stop playback.
![]() NOTES
NOTES
•We recommend powering the camcorder using the compact power adapter.
•When recording to a VCR using an analog connection ![]() or
or ![]() (
(![]()
•When recording to a digital video recorder using the DV terminal ![]() (
(![]()
-If the picture does not appear, disconnect the DV cable and restore the connection after a short while or turn the camcorder off and then on again.
-Proper operation cannot be guaranteed for all digital devices equipped with a DV terminal. If the operation does not work, use the AV terminal.
 Audio Dubbing
You can add sound to a recording using the
(![]() 19)
19)
 POINTS TO CHECK
You can only dub audio on tapes recorded
in SP mode with [ ![]() 12bit] audio
12bit] audio
(![]() 39). This function is operated with the wireless controller.
39). This function is operated with the wireless controller.
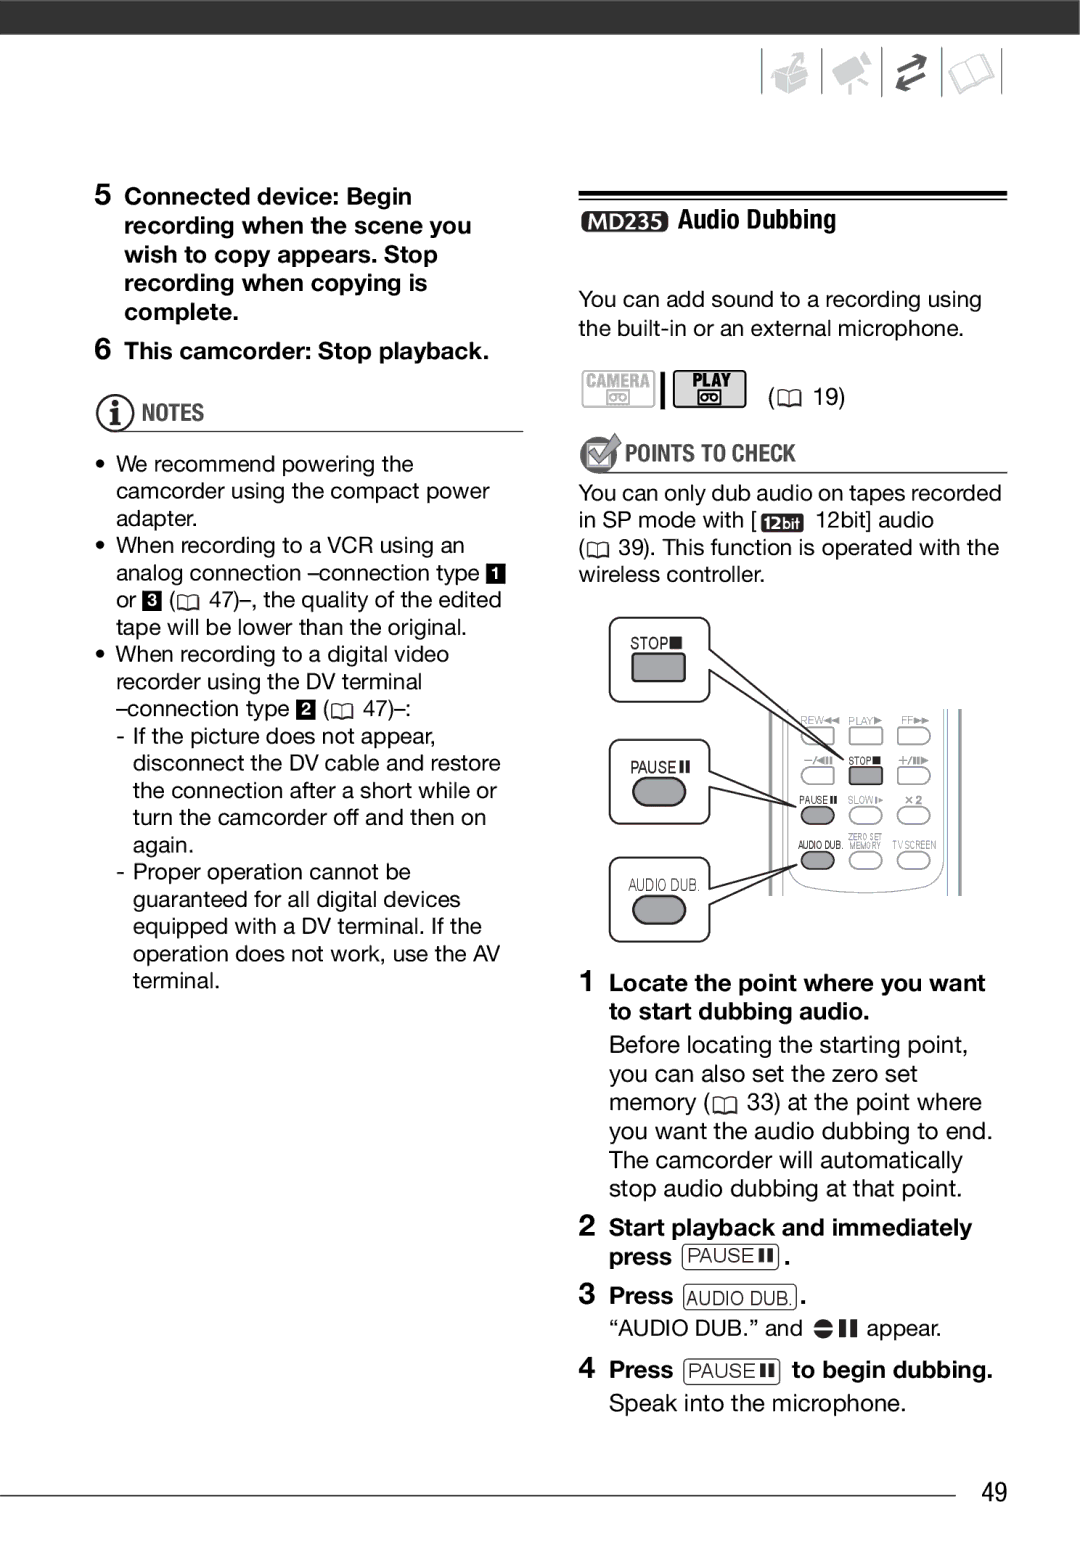
STOP![]()
REW | PLAY | FF |
PAUSE | STOP |
|
|
| |
PAUSE | SLOW |
|
AUDIO DUB. | ZERO SET | TV SCREEN |
MEMORY |
AUDIO DUB.
1Locate the point where you want to start dubbing audio.
Before locating the starting point, you can also set the zero set
memory (![]() 33) at the point where you want the audio dubbing to end. The camcorder will automatically stop audio dubbing at that point.
33) at the point where you want the audio dubbing to end. The camcorder will automatically stop audio dubbing at that point.
2Start playback and immediately press PAUSE  .
.
3Press AUDIO DUB. .
“AUDIO DUB.” and 
 appear.
4Press PAUSE  to begin dubbing. Speak into the microphone.
49