42 GW
Installation
Frame |
|
|
|
Safety belt |
|
|
|
Frame fixing screw |
|
|
|
|
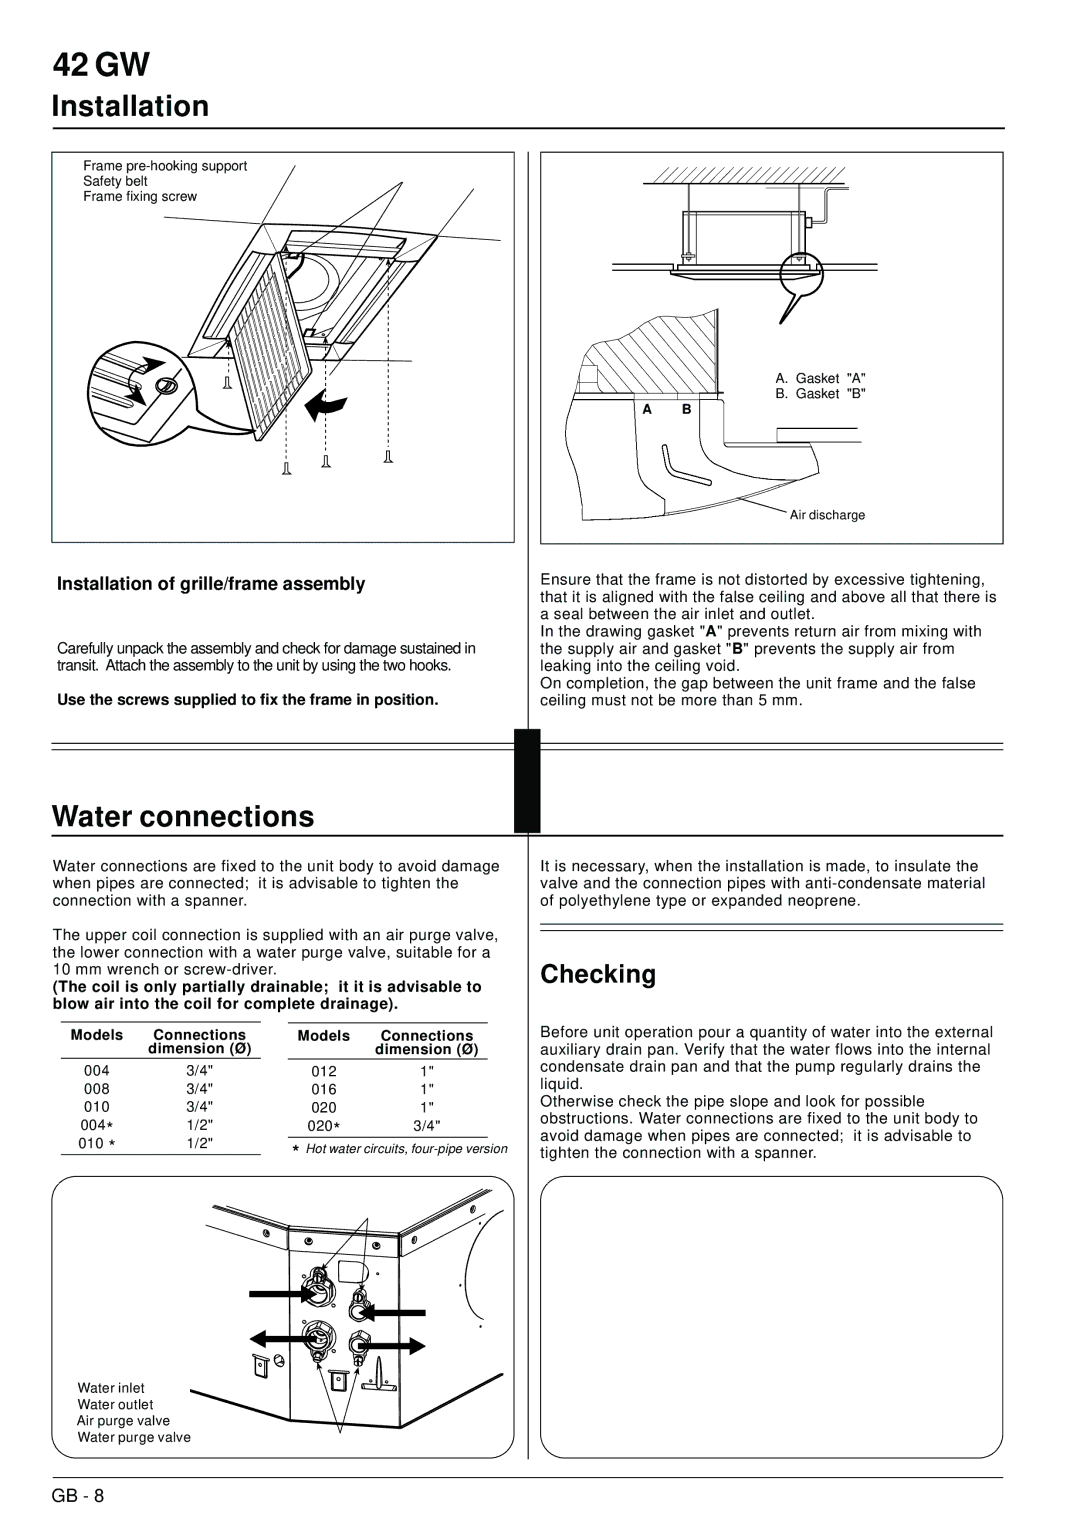
| A. Gasket | "A" |
|
| B. Gasket | "B" |
| A | B |
|
|
| Air discharge | |
Installation of grille/frame assembly | Ensure that the frame is not distorted by excessive tightening, | ||
| that it is aligned with the false ceiling and above all that there is | ||
| a seal between the air inlet and outlet. |
| |
Carefully unpack the assembly and check for damage sustained in | In the drawing gasket "A" prevents return air from mixing with | ||
the supply air and gasket "B" prevents the supply air from | |||
transit. Attach the assembly to the unit by using the two hooks. | leaking into the ceiling void. |
| |
Use the screws supplied to fix the frame in position. | On completion, the gap between the unit frame and the false | ||
ceiling must not be more than 5 mm. |
| ||
Water connections
Water connections are fixed to the unit body to avoid damage when pipes are connected; it is advisable to tighten the connection with a spanner.
The upper coil connection is supplied with an air purge valve, the lower connection with a water purge valve, suitable for a 10 mm wrench or
(The coil is only partially drainable; it it is advisable to blow air into the coil for complete drainage).
Models | Connections |
| Models | Connections | |
| dimension (Ø) |
|
| dimension (Ø) |
|
004 | 3/4" | 012 | 1" |
| |
008 | 3/4" | 016 | 1" |
| |
010 | 3/4" | 020 | 1" |
| |
004* | 1/2" |
| 020* | 3/4" |
|
010 * | 1/2" |
| * Hot water circuits, | ||
|
| ||||
It is necessary, when the installation is made, to insulate the valve and the connection pipes with
Checking
Before unit operation pour a quantity of water into the external auxiliary drain pan. Verify that the water flows into the internal condensate drain pan and that the pump regularly drains the liquid.
Otherwise check the pipe slope and look for possible obstructions. Water connections are fixed to the unit body to avoid damage when pipes are connected; it is advisable to tighten the connection with a spanner.
Water inlet Water outlet Air purge valve Water purge valve
GB - 8
