NOW CHOOSE WHICH INSTALLATION METHOD (a) or (b) | 14 | ||||||
| |||||||
IS MORE SUITABLE FOR YOUR CABINETRY... |
| ||||||
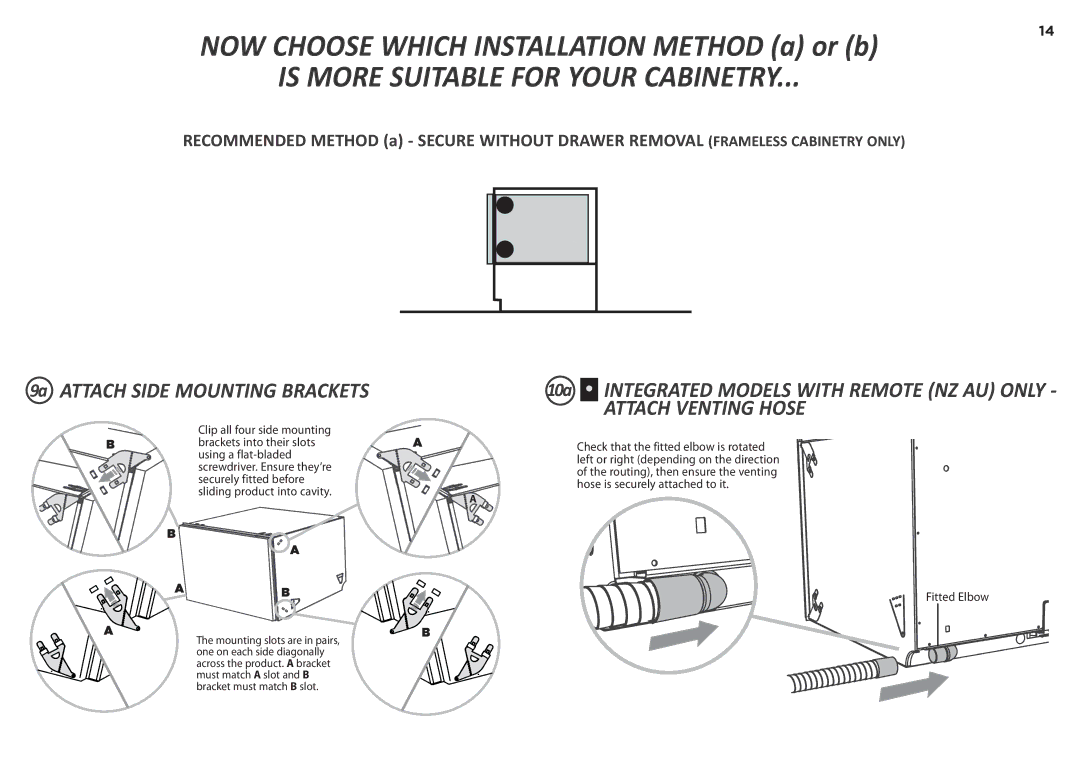
RECOMMENDED METHOD (a) - SECURE WITHOUT DRAWER REMOVAL (FRAMELESS CABINETRY ONLY) |
| ||||||
|
|
|
|
|
|
|
|
|
|
|
|
|
|
|
|
|
|
|
|
|
|
|
|
9a ATTACH SIDE MOUNTING BRACKETS
| Clip all four side mounting |
B | brackets into their slots |
| using a |
| screwdriver. Ensure they’re |
| securely fitted before |
| sliding product into cavity. |
B ![]()
A
AB
A ![]()
The mounting slots are in pairs, one on each side diagonally across the product. A bracket must match A slot and B bracket must match B slot.
10a ![]() INTEGRATED MODELS WITH REMOTE (NZ AU) ONLY -
INTEGRATED MODELS WITH REMOTE (NZ AU) ONLY -
ATTACH VENTING HOSE
A | Check that the fitted elbow is rotated |
| left or right (depending on the direction |
| of the routing), then ensure the venting |
| hose is securely attached to it. |
| A |
Fitted Elbow
B