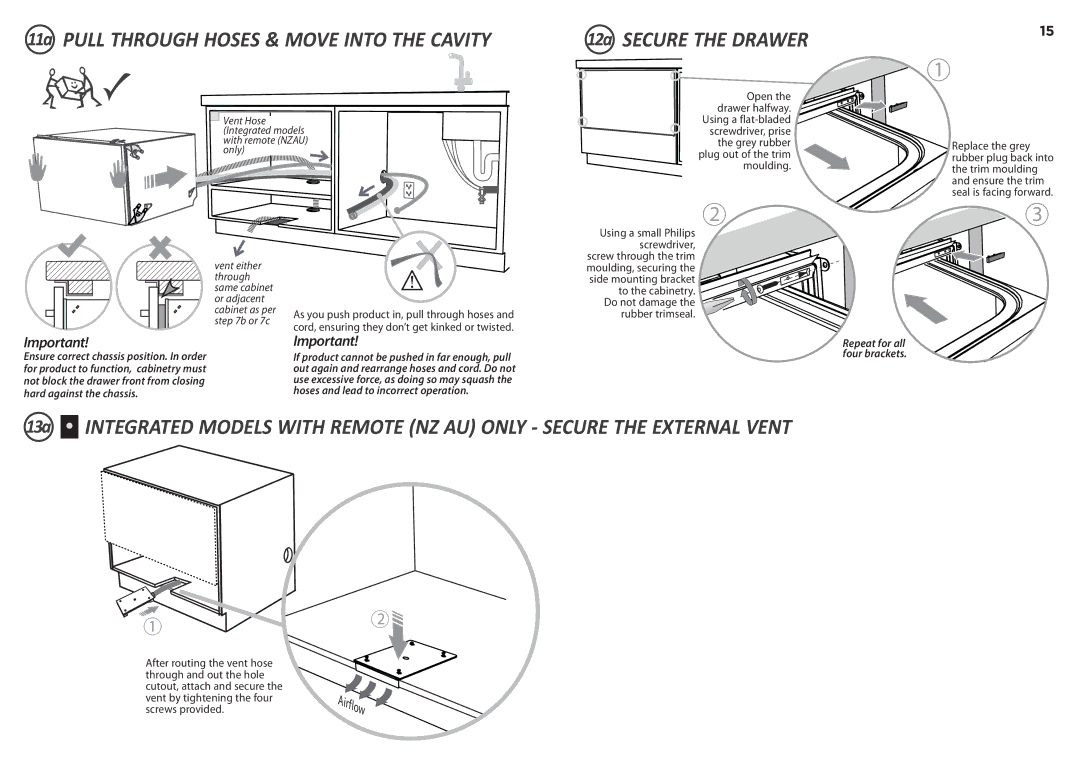
11a PULL THROUGH HOSES & MOVE INTO THE CAVITY
Vent Hose (Integrated models with remote (NZAU) only)
12a SECURE THE DRAWER
Open the drawer halfway.
Using a
2
Using a small Philips screwdriver, screw through the trim
15
1
Replace the grey rubber plug back into the trim moulding and ensure the trim seal is facing forward.
3
vent either through same cabinet or adjacent cabinet as per step 7b or 7c
As you push product in, pull through hoses and cord, ensuring they don’t get kinked or twisted.
moulding, securing the side mounting bracket to the cabinetry.
Do not damage the rubber trimseal.
Important! | Important! |
Ensure correct chassis position. In order | If product cannot be pushed in far enough, pull |
for product to function, cabinetry must | out again and rearrange hoses and cord. Do not |
not block the drawer front from closing | use excessive force, as doing so may squash the |
hard against the chassis. | hoses and lead to incorrect operation. |
Repeat for all four brackets.
13a ![]() INTEGRATED MODELS WITH REMOTE (NZ AU) ONLY - SECURE THE EXTERNAL VENT
INTEGRATED MODELS WITH REMOTE (NZ AU) ONLY - SECURE THE EXTERNAL VENT
1 | 2 |
|
After routing the vent hose through and out the hole cutout, attach and secure the vent by tightening the four screws provided.