11. DSP EFFECTS SELECTOR
The 24bit processor will provide a host of awesome sound- ing effects that include: Flange, Reverb, Echo, & Chorus. The EFFECT control will adjust the volume level of the selected effect. Remember each channel has its own EFFECT send that will adjust the amount of signal sent to the effects processor. The red PK LED will indicate when the effects sig- nal from the channel is clipping. Lowering the channel EFFECT control until the PK LED stops flashing is a good rule of thumb when setting up your effects. (Note: An audible note can be heard when adjusting the effects).
EFFECT PARAMETERS
Each of the four effects has a variable parameter that can be easily adjusted.
ECHO: When the SELECT control is at the “7
Increasing the PARAMETER to the right will increase the reverb decay time.
CHORUS: When the SELECT control is at the “1
FLANGE: When the SELECT control is at the “4
12. MONITOR MASTER LEVEL CONTROL
The MONITOR master level control is the master volume for the monitor mix which is sent to the monitor output. This control receives its signals from the channel monitor level controls.
15. MAIN OUTPUT JACK
The MAIN line out jack is a line level post graphic EQ output of the main mix. Use this to drive an external power amp. This same signal is also being fed to the internal power amplifier.
16. TAPE IN-OUT RCA JACKS
The RCA IN jacks are Ideal for pluggng in keyboard, cas- sette deck or CD player. The LEFT/RIGHT TAPE OUT RCA jacks deliver the main mix for recording (pre graphic EQ).
17. EFFECTS/FOOTSWITCH
Plug the optional FS22 footswitch into this jack to remote- ly turn the effects ON or OFF.
18. SPEAKER OUTPUT JACKS
Connect the main speakers to these two 1/4” phone jacks. A total of two 8Ω speakers can be connected (one per jack). Connecting 4Ω speakers or more than two 8Ω speakers will cause the mixer to go into “protect mode” and mute the audio. The output relay will engage after 20 minutes of heavy use when using 4Ω speakers.
19. POWER LED
The Power LED indicates when the mixer is powered up.
HELPFUL HINTS
8
9
10
11
12
19
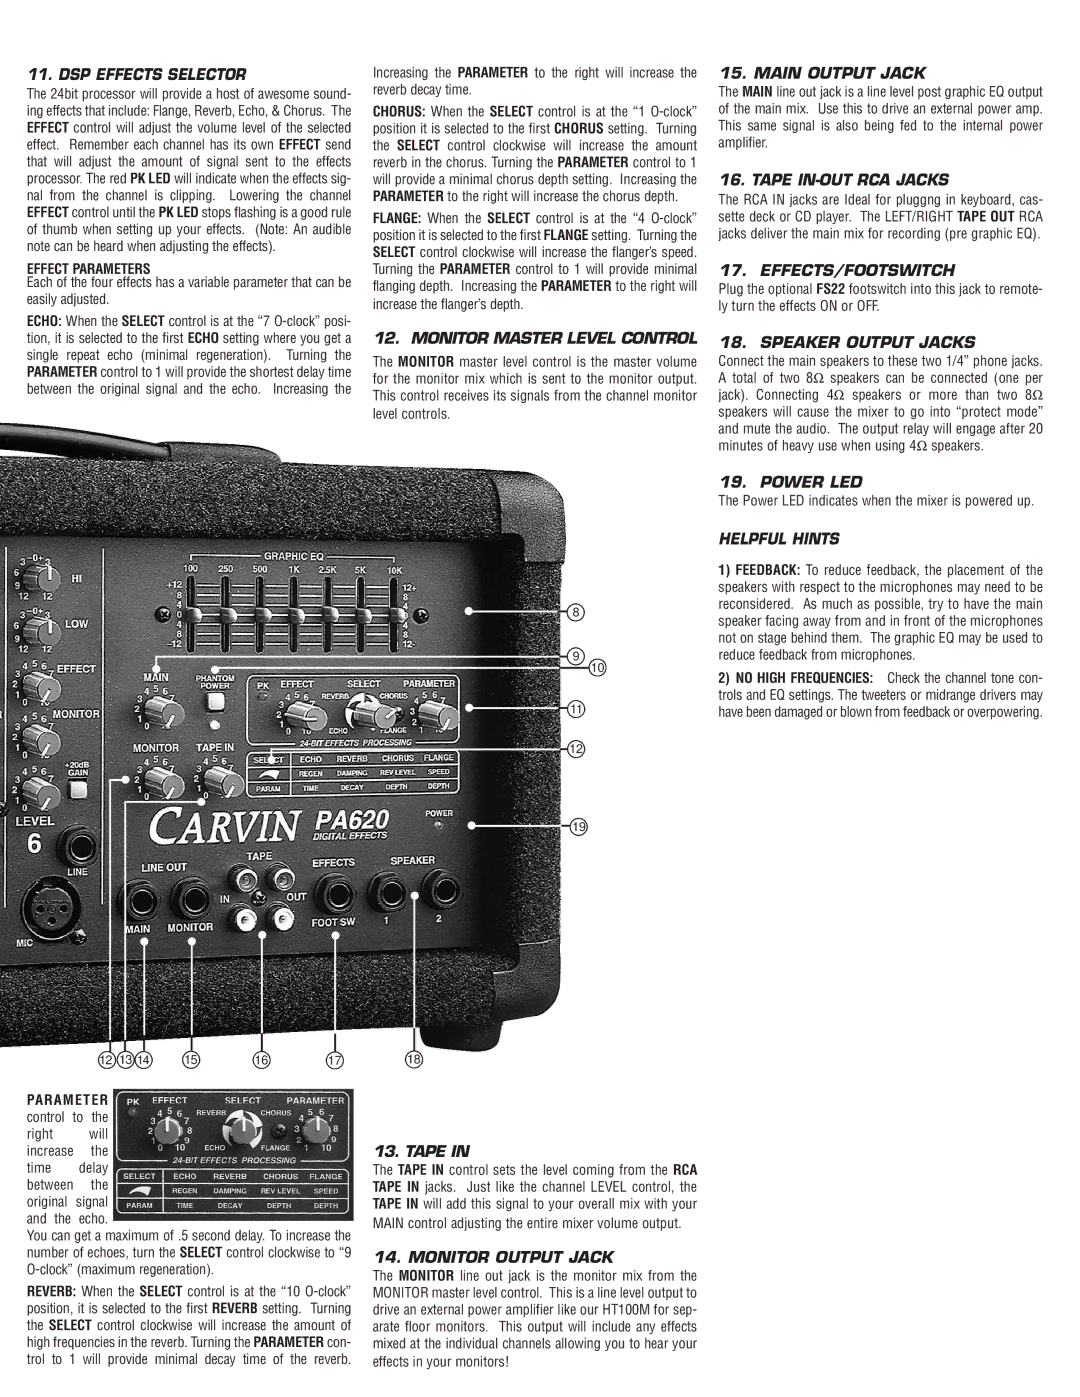
12 13 14 | 15 | 16 | 17 | 18 |
1)FEEDBACK: To reduce feedback, the placement of the speakers with respect to the microphones may need to be reconsidered. As much as possible, try to have the main speaker facing away from and in front of the microphones not on stage behind them. The graphic EQ may be used to reduce feedback from microphones.
2)NO HIGH FREQUENCIES: Check the channel tone con- trols and EQ settings. The tweeters or midrange drivers may have been damaged or blown from feedback or overpowering.
PARAMETER control to the
right will increase the
time delay between the original signal and the echo.
You can get a maximum of .5 second delay. To increase the number of echoes, turn the SELECT control clockwise to “9
REVERB: When the SELECT control is at the “10
13. TAPE IN
The TAPE IN control sets the level coming from the RCA TAPE IN jacks. Just like the channel LEVEL control, the TAPE IN will add this signal to your overall mix with your MAIN control adjusting the entire mixer volume output.
14. MONITOR OUTPUT JACK
The MONITOR line out jack is the monitor mix from the MONITOR master level control. This is a line level output to drive an external power amplifier like our HT100M for sep- arate floor monitors. This output will include any effects mixed at the individual channels allowing you to hear your effects in your monitors!