General Guide
LeftFront
1 2 | 3 |
12
4
|
| 5 |
13 | 11 | 6 |
10 |
| |
| 9 | 7 |
|
| 8 |
RightBack
14 | 17 | 18 | 19 |
16
20
21
22
23
15
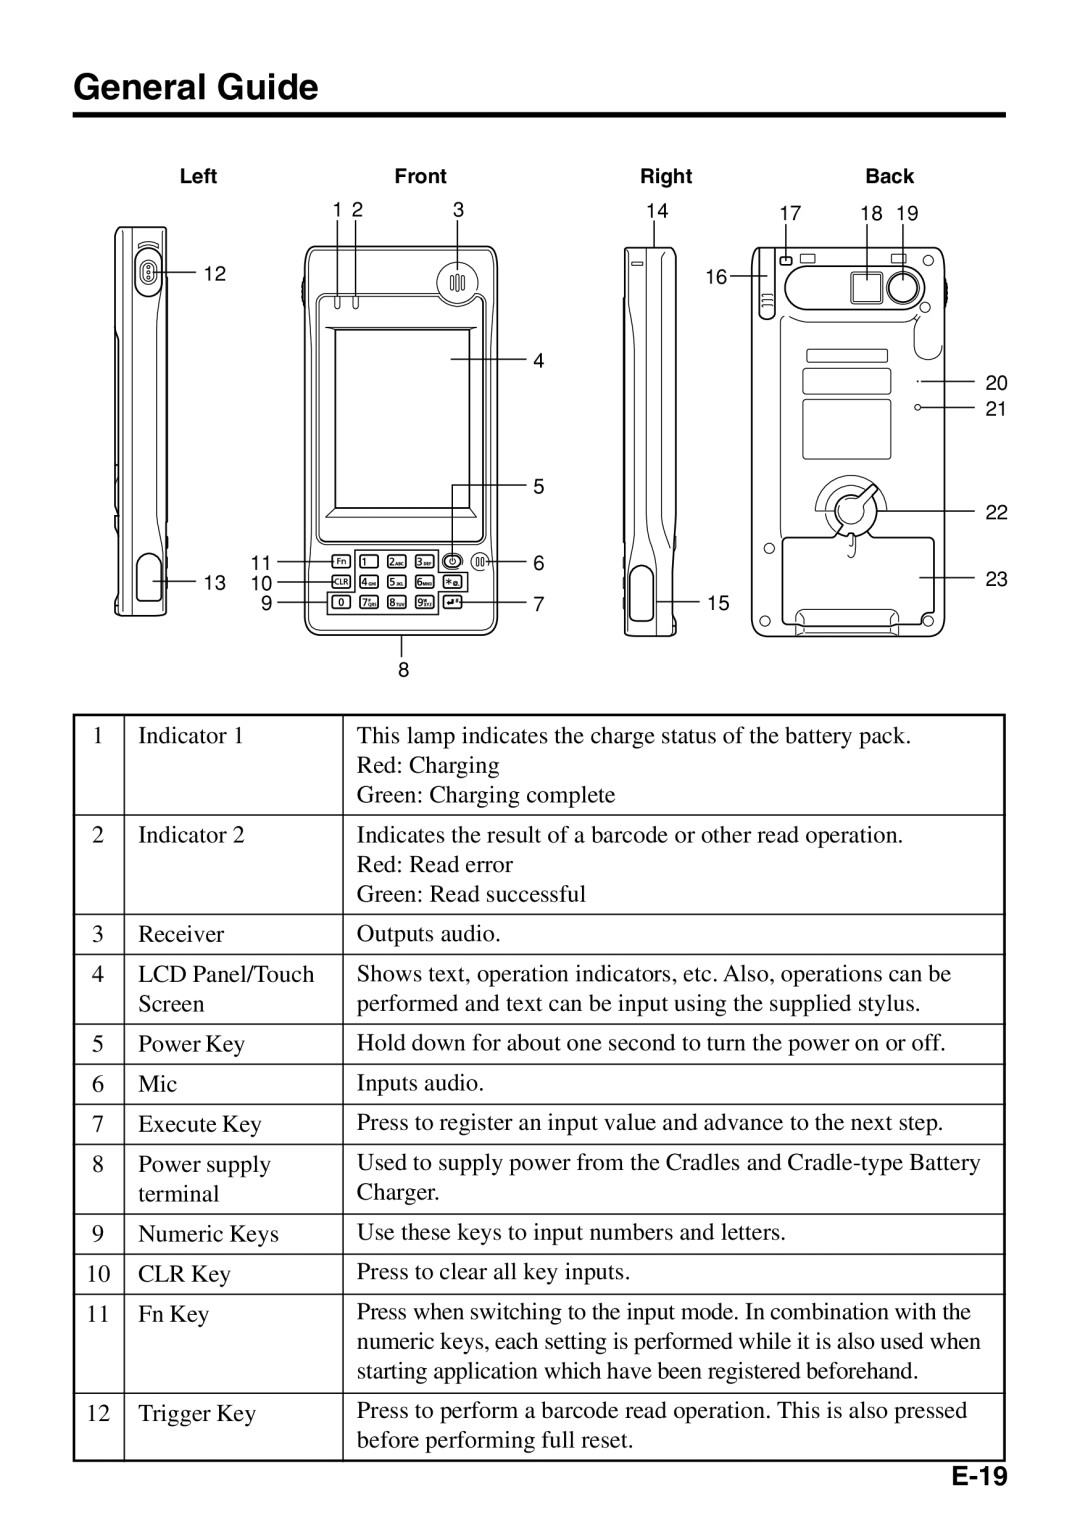
1 | Indicator 1 | This lamp indicates the charge status of the battery pack. |
|
| Red: Charging |
|
| Green: Charging complete |
|
|
|
2 | Indicator 2 | Indicates the result of a barcode or other read operation. |
|
| Red: Read error |
|
| Green: Read successful |
|
|
|
3 | Receiver | Outputs audio. |
|
|
|
4 | LCD Panel/Touch | Shows text, operation indicators, etc. Also, operations can be |
| Screen | performed and text can be input using the supplied stylus. |
|
|
|
5 | Power Key | Hold down for about one second to turn the power on or off. |
|
|
|
6 | Mic | Inputs audio. |
|
|
|
7 | Execute Key | Press to register an input value and advance to the next step. |
|
|
|
8 | Power supply | Used to supply power from the Cradles and |
| terminal | Charger. |
|
|
|
9 | Numeric Keys | Use these keys to input numbers and letters. |
|
|
|
10 | CLR Key | Press to clear all key inputs. |
|
|
|
11 | Fn Key | Press when switching to the input mode. In combination with the |
|
| numeric keys, each setting is performed while it is also used when |
|
| starting application which have been registered beforehand. |
|
|
|
12 | Trigger Key | Press to perform a barcode read operation. This is also pressed |
|
| before performing full reset. |
|
|
|
