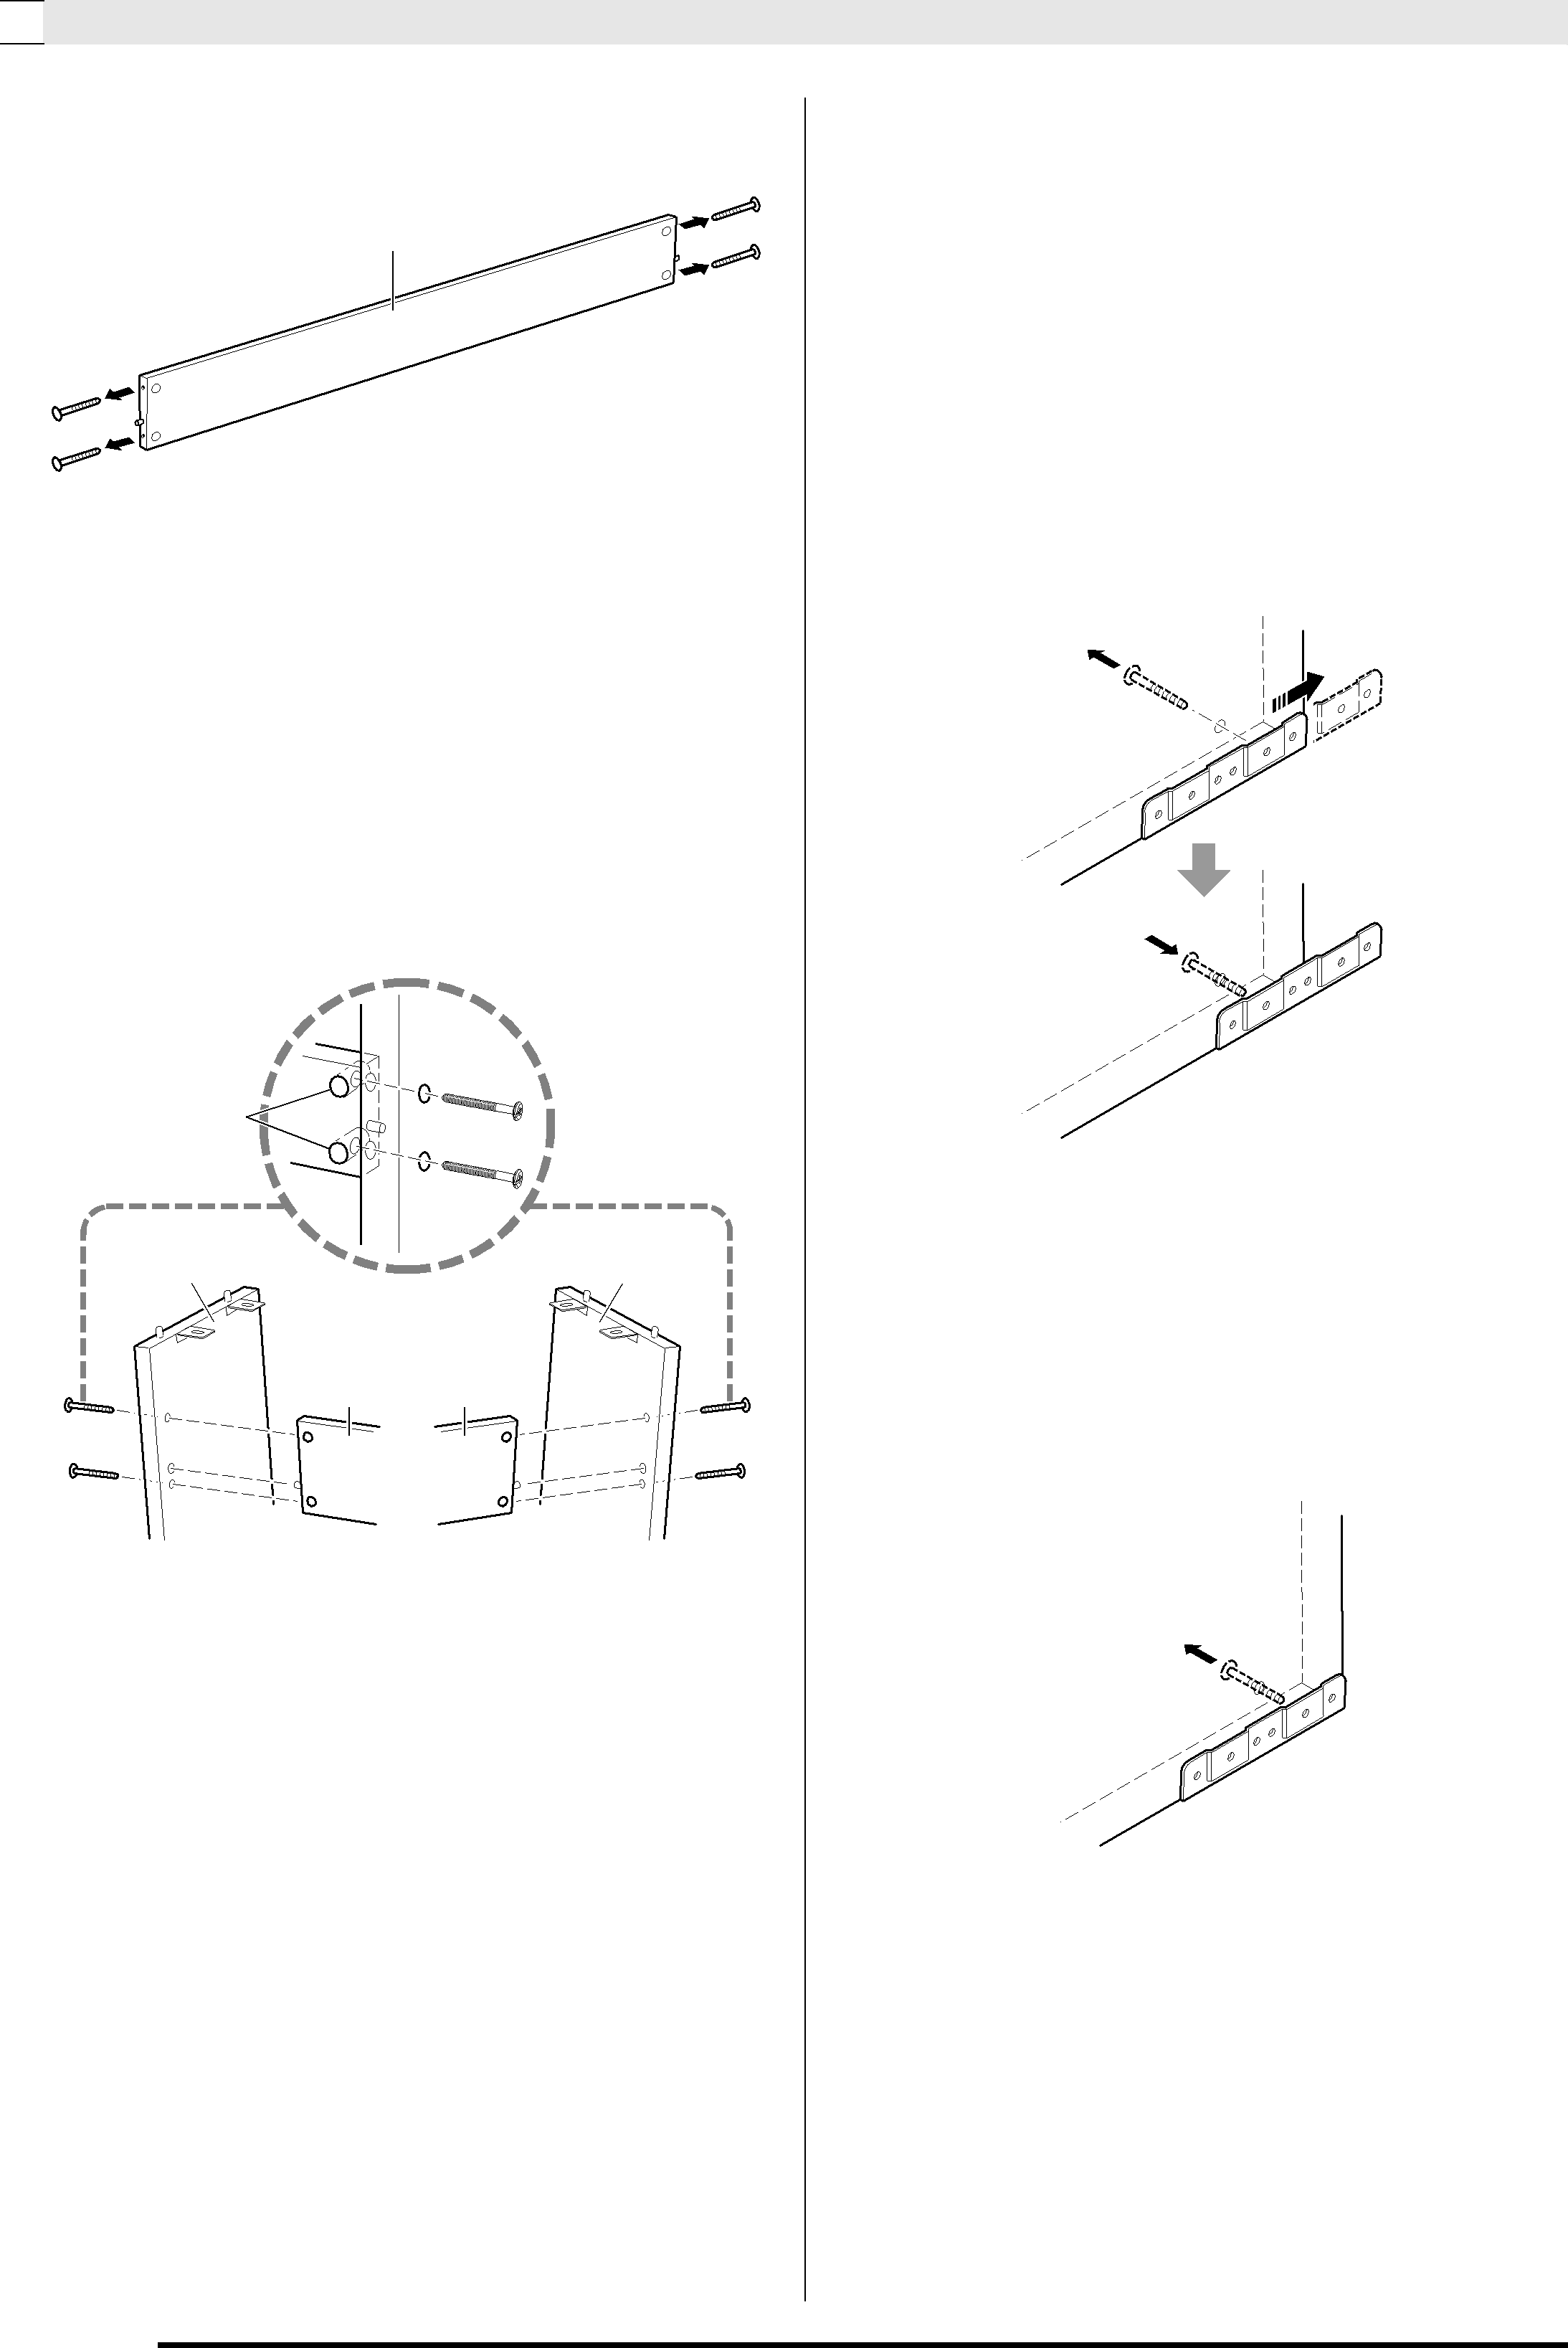
Getting Ready

1. Remove the four screws (two on each end) from back board C.

C

2. Attach side panels A and B to back board C. Secure side panels A and B to the back board C using the screws you removed in step 1.

Attach the side panels so the side of the back board C where the joint connectors are inserted is facing towards the back of the stand.

If you have trouble inserting a screw into a joint connector screw hole, use a screwdriver to adjust the joint connector by rotating it.

Joint connectors

BA

C C

3-1.If you plan to locate the piano and stand where it is not against a wall, you need to extend the anti-tip brackets at the base of side panels A and B. Remove the two screws (one on the outside of each side panel) that hold the brackets, and then slide the brackets as shown in the illustration. After extending the anti-tip brackets, reinstall the screws that secure them in place, but do not tighten the screws fully at this time.

[Inside of side panels]

3-2.If you plan to locate the piano and stand against a wall, loosen the two screws (one on the outside of each side panel) that secure the brackets. You do not need to remove the screws in this case.

In this case, you do not need to remove the screws. Just loosen them.

E-40