Bicycle with quick-release axle
Remove the existing quick-release. Loosen the nut of the Chariot quick-release.
Push the quick-release axle through the hitch and then through the axle of the wheel.
The opening for the hitch ball and the vertical hole for the security pin must point forward.
Fit the quick-release nut on the right-hand side. Both skewer springs must be located in such a way that the narrow side of each spring points towards the centre of the hub.
DANGER
The quick-release nut must be tightened on the axle thread by at least 5 full turns, so that adequate clamping force is ensured. A thread which is too short can lead to accidental loosening of the rear wheel, with damage and accidents as a result.
If in doubt ask your specialist retailer!
Close the quick-release lever with the end of the lever pointing upwards. In this position there is enough space to insert the security pin.
In order to ensure that the hub is clamped suffi ciently in the dropouts, the quick-release lever must begin gripping as it moves from the open to the middle position, and approaching the closed position you should clearly feel resistance as you tighten.
If it is too easy or too diffi cult to move the quick-release, tighten or loosen the lock nut on the other side of the hub to adjust.
If you don’t feel confident operating the quick-release, please ask your specialist retailer for assistance.
DANGER
Always make sure that the quick-release is correctly atta- ched. An incorrectly tensioned quick-release may result in the rear wheel coming loose and lead to accidents.
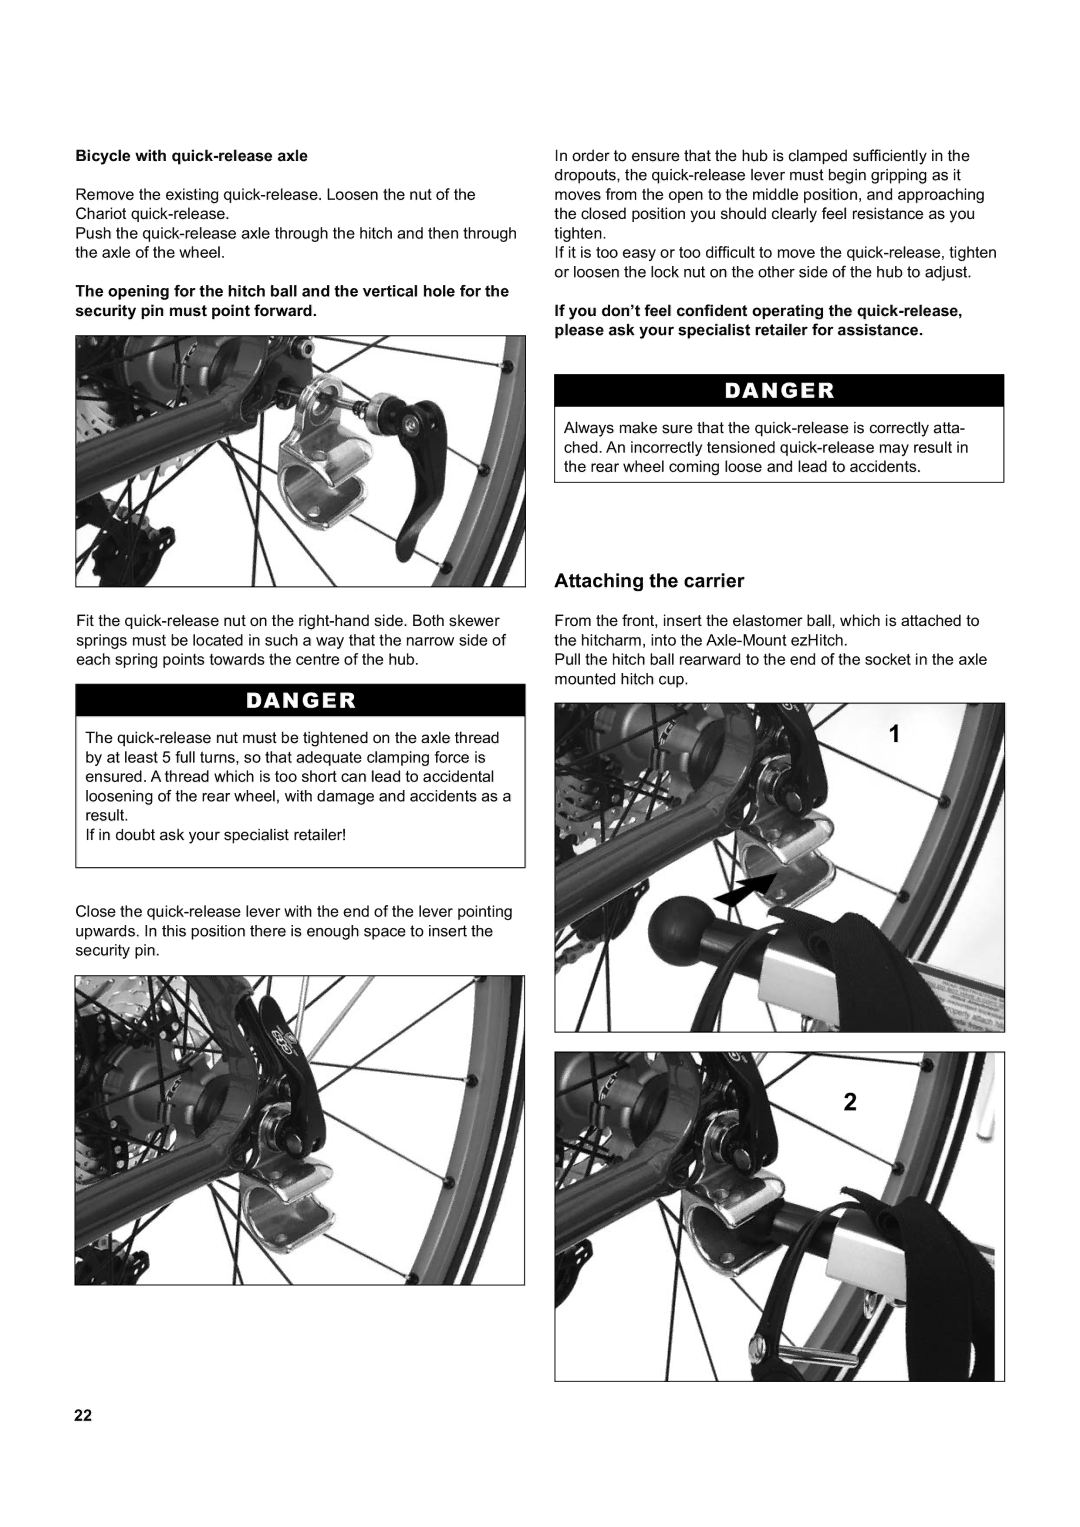
Attaching the carrier
From the front, insert the elastomer ball, which is attached to the hitcharm, into the Axle-Mount ezHitch.
Pull the hitch ball rearward to the end of the socket in the axle mounted hitch cup.
1