OPERATING INSTRUCTIONS
Setup
SET T ING U P T H E SY ST EM
1)Place the
2)Plug the AC to DC power supply to the system back panel and to the mains outlet.
3)Plug in your DMX cable(s) to your intelligent lighting“DMX Primeras described” sectionininthefixturAppendixs respectof thisve manual. For a quick Primer on DMX see the
manual.
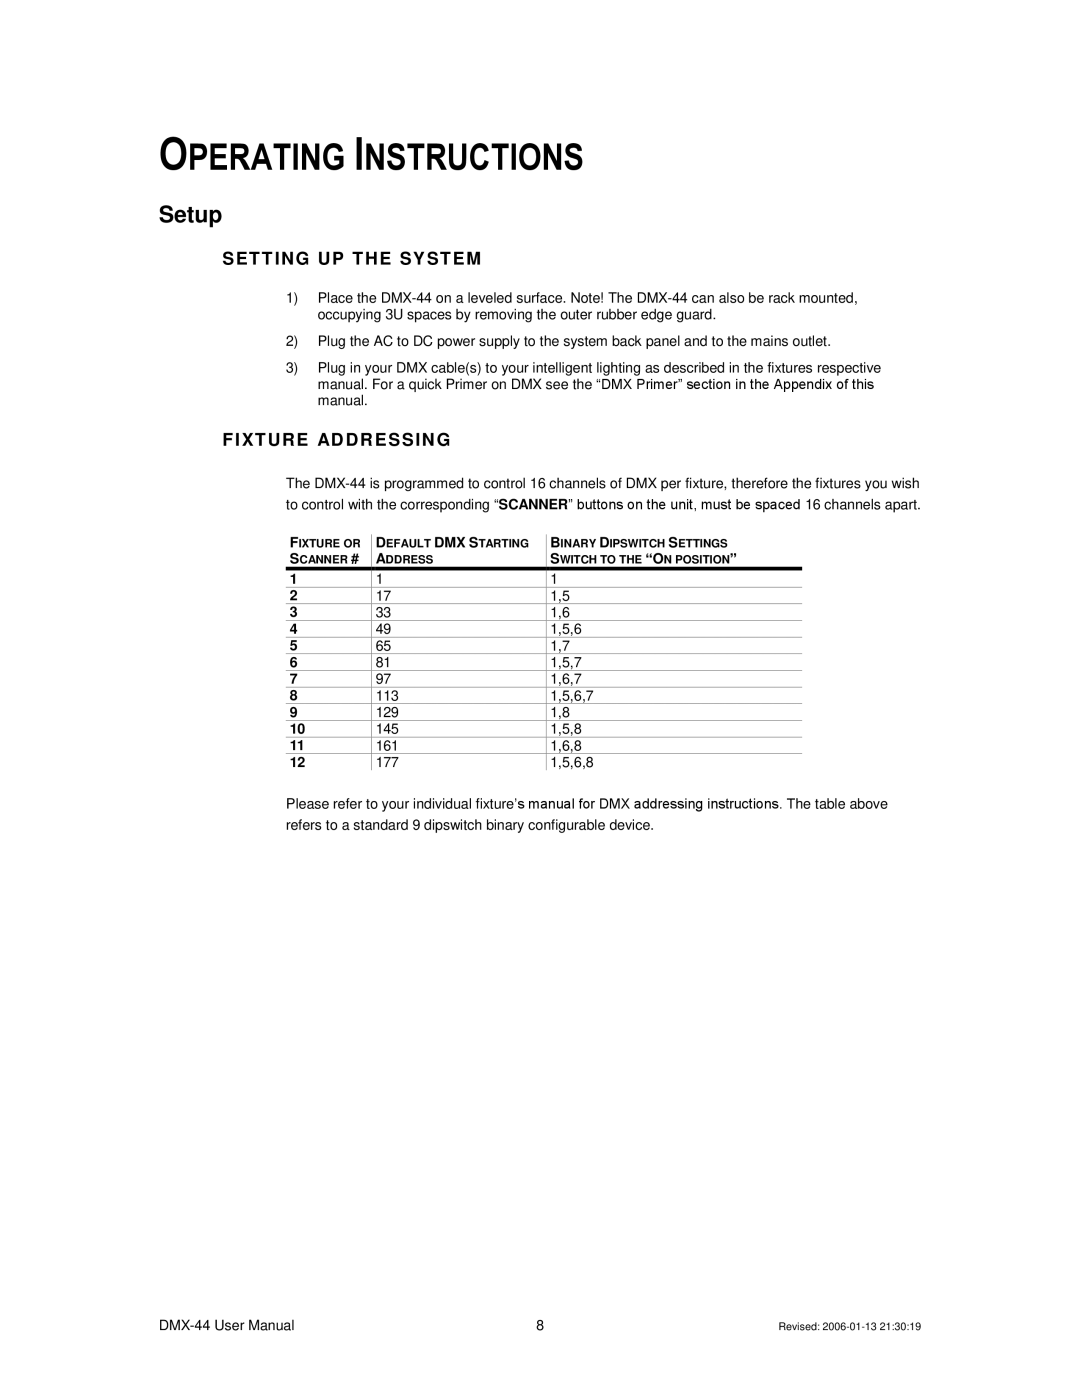
FI XT UR E AD D R ESSIN G
The
FIXTURE OR SCANNER #
1
2
3
4
5
6
7
8
9
10
11
12
DEFAULT DMX STARTING ADDRESS
1
17
33
49
65
81
97
113
129
145
161
177
BINARY DIPSWITCH“ SETTINGS ” SWITCH TO THE ON POSITION
1
1,5
1,6
1,5,6
1,7
1,5,7
1,6,7
1,5,6,7
1,8
1,5,8
1,6,8
1,5,6,8
Please refer to your individual fixture’s manual for DMX addressing instructions. The table above
refers to a standard 9 dipswitch binary configurable device.
8 | Revised: |