Setup - Before Use:
Read the ENTIRE IMPORTANT SAFETY INFORMATION section at the beginning of this manual including all text under subheadings therein before set up or use of this product.
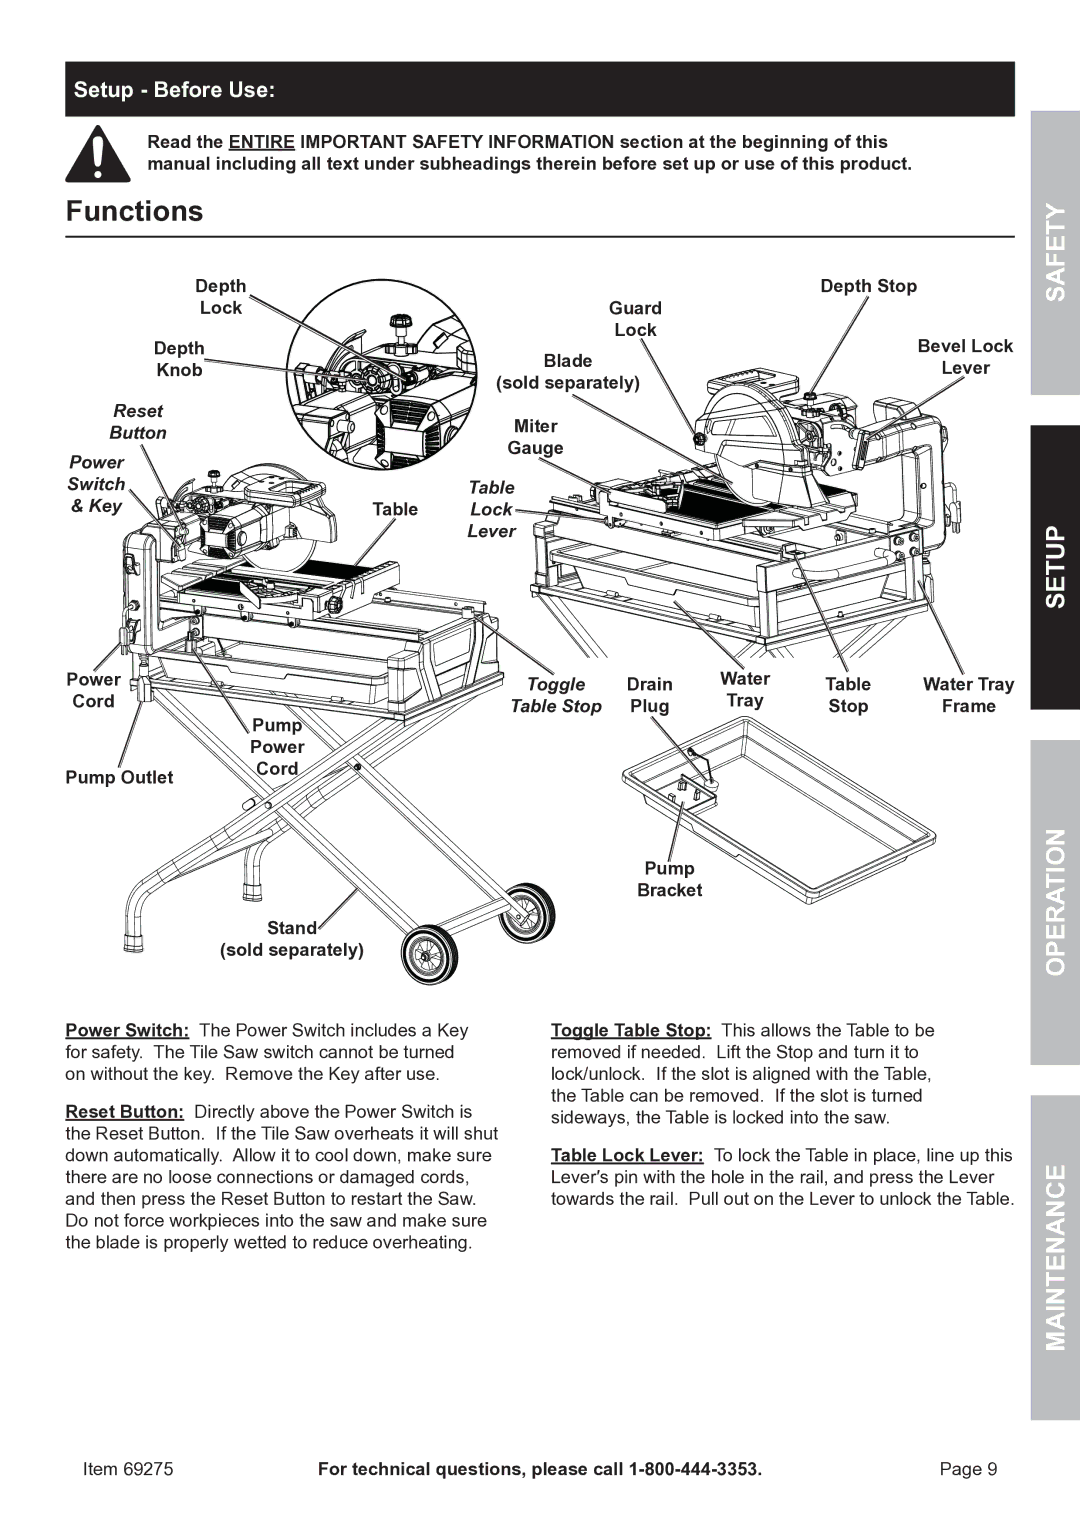
Functions
SAFETY
Depth
Lock
Depth
Knob![]()
![]()
Reset
Button
Power
Switch
& Key ![]()
![]()
![]()
![]()
![]()
![]()
![]()
![]()
![]()
![]()
![]()
![]()
![]()
![]()
![]()
![]()
![]()
![]()
![]()
![]()
![]()
![]()
![]()
![]()
![]()
![]()
![]()
![]()
![]()
![]()
![]()
![]()
![]()
![]()
![]()
![]()
![]()
![]()
![]()
![]()
![]()
![]()
![]()
Guard
Lock
![]()
![]()
![]()
![]()
![]()
![]()
![]()
![]()
![]()
![]()
![]()
![]()
![]()
![]()
![]()
![]() Blade
Blade
(sold separately)
| Miter |
| Gauge |
Table | Table |
Lock | |
| Lever |
Depth Stop
Bevel Lock
Lever
SETUP
Power | Toggle | Drain | Water | Table | Water Tray |
Cord | Table Stop | Plug | Tray | Stop | Frame |
| Pump |
|
|
|
|
| Power |
|
|
|
|
Pump Outlet | Cord |
|
|
|
|
|
|
|
|
|
Stand (sold separately)
Power Switch: The Power Switch includes a Key for safety. The Tile Saw switch cannot be turned on without the key. Remove the Key after use.
Reset Button: Directly above the Power Switch is the Reset Button. If the Tile Saw overheats it will shut down automatically. Allow it to cool down, make sure there are no loose connections or damaged cords, and then press the Reset Button to restart the Saw. Do not force workpieces into the saw and make sure the blade is properly wetted to reduce overheating.
Pump | OPERATION | |
Bracket | ||
| ||
Toggle Table Stop: This allows the Table to be |
| |
removed if needed. Lift the Stop and turn it to |
| |
lock/unlock. If the slot is aligned with the Table, |
| |
the Table can be removed. If the slot is turned |
| |
sideways, the Table is locked into the saw. |
| |
Table Lock Lever: To lock the Table in place, line up this | MAINTENANCE | |
Lever′s pin with the hole in the rail, and press the Lever | ||
| ||
towards the rail. Pull out on the Lever to unlock the Table. |
|
Item 69275 | For technical questions, please call | Page 9 |