ASSEMBLY AND OPERATING INSTRUCTIONS
Note: For additional references to the parts listed in the following pages, refer to the
Assembly Diagram on page 24.
To Replace And Install A Saw Blade:
1.![]() WARNING! Prior to performing any assembly and/or adjustment procedures, make sure the Power Cord (102) of the Miter Saw is unplugged from its electrical outlet. Make sure the unit has completely cooled, and wear
WARNING! Prior to performing any assembly and/or adjustment procedures, make sure the Power Cord (102) of the Miter Saw is unplugged from its electrical outlet. Make sure the unit has completely cooled, and wear
2.When replacing the Saw Blade (56), make sure the new Saw Blade has a diameter of 10”, an RPM rating of at least 7000, and an arbor hole of 5/8” diameter.
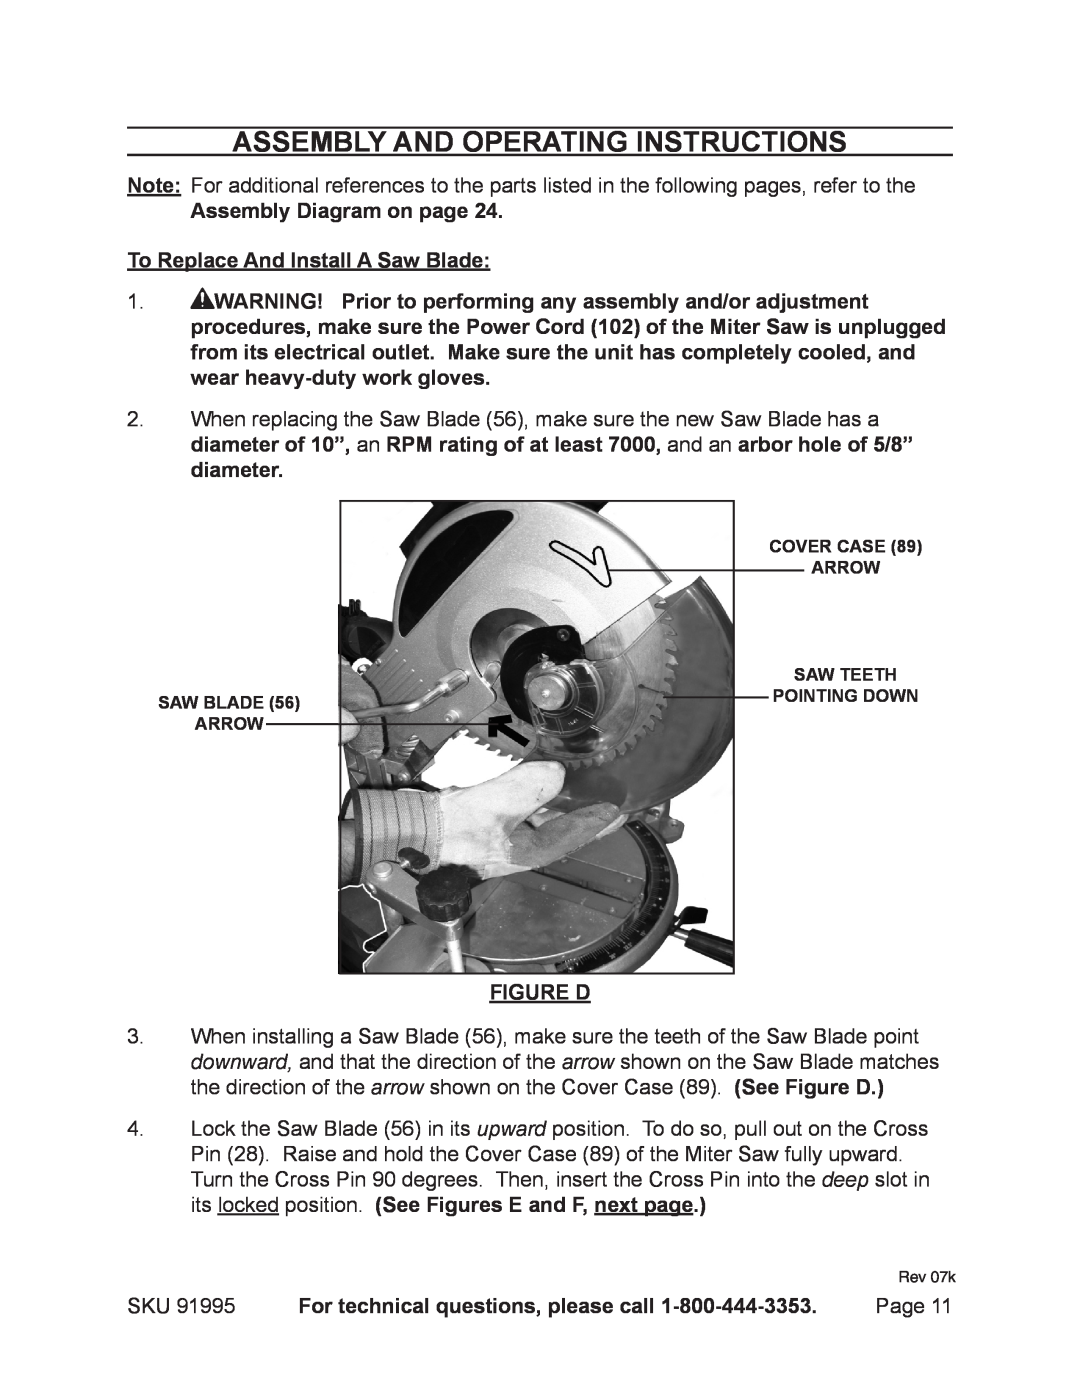
SAW BLADE (56)
ARROW
COVER CASE (89)
ARROW
SAW TEETH
POINTING DOWN
FIGURE D
3.When installing a Saw Blade (56), make sure the teeth of the Saw Blade point downward, and that the direction of the arrow shown on the Saw Blade matches the direction of the arrow shown on the Cover Case (89). (See Figure D.)
4.Lock the Saw Blade (56) in its upward position. To do so, pull out on the Cross Pin (28). Raise and hold the Cover Case (89) of the Miter Saw fully upward. Turn the Cross Pin 90 degrees. Then, insert the Cross Pin into the deep slot in its locked position. (See Figures E and F, next page.)
Rev 07k
SKU 91995 | For technical questions, please call | Page 11 |