Stacking Frame Installation Instructions
1.If the projector is inverted retract the adjustable feet to prevent the hoisting hardware from becoming snagged.
WARNING
|
|
| Always use at least two safety cables when hoisting. | |||||
| When hoisting a | |||||||
| front and rear threaded holes on the top of the projector. Ensure the eyebolts are | |||||||
|
|
|
|
| RELEASED | |||
| rated adequately for the load. Secure safety cabling to both eyebolts. | |||||||
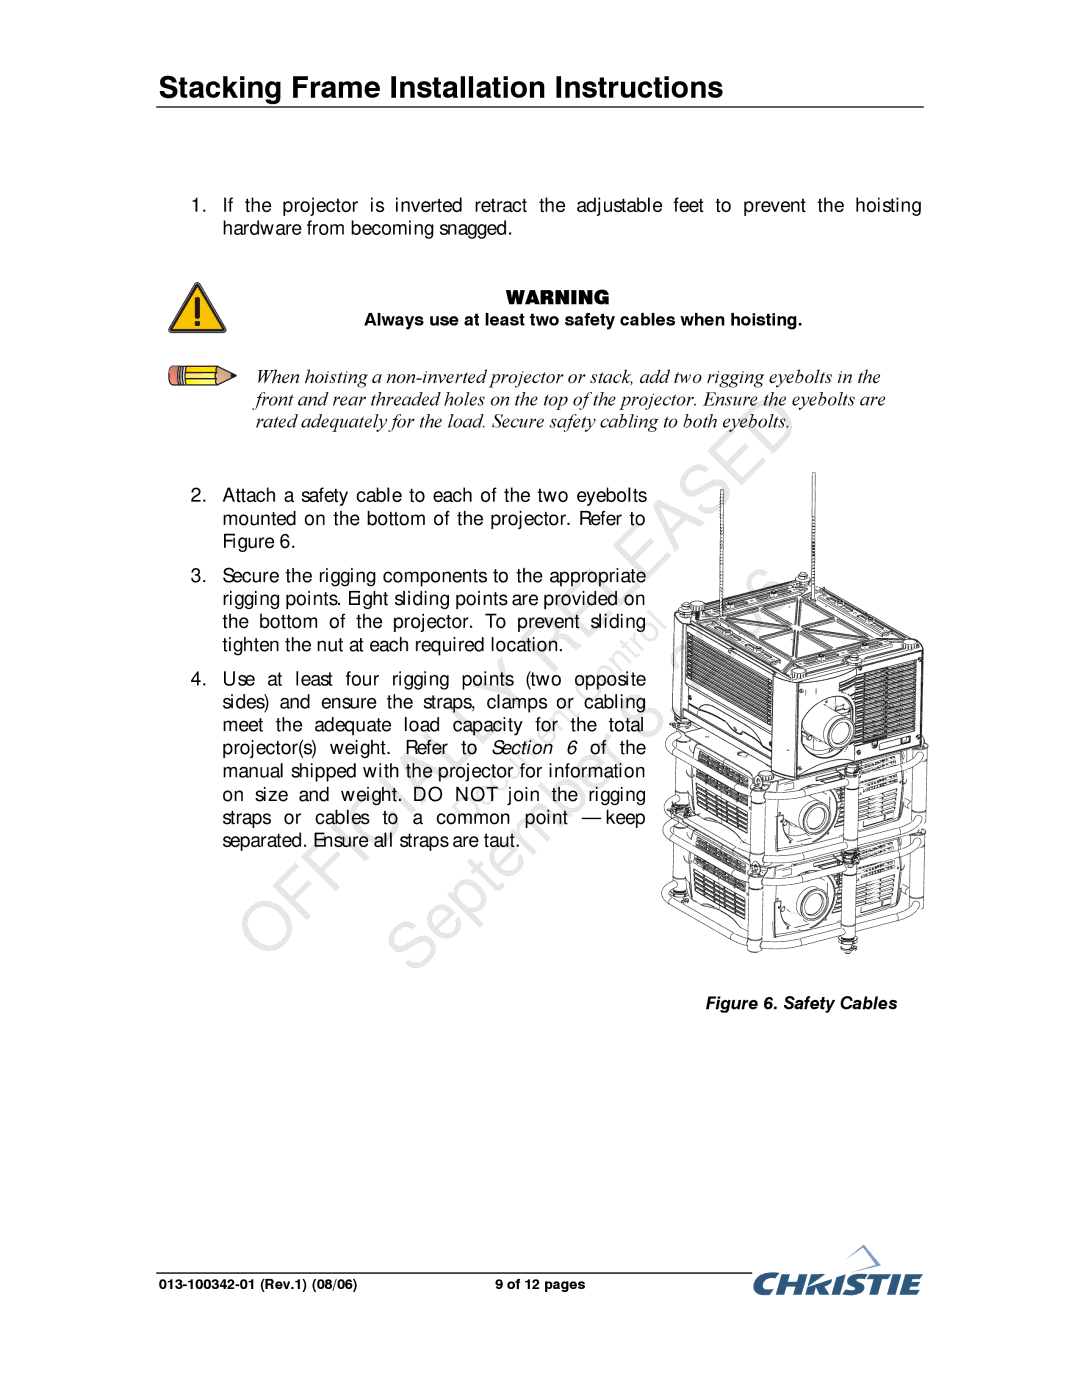
2. Attach a safety cable to each of the two eyebolts |
| |||||||
| mounted on the bottom of the projector. Refer to |
| ||||||
| Figure 6. |
|
|
|
|
|
|
|
3. Secure the rigging components to the appropriate | 2006 | |||||||
| rigging points. Eight sliding points are provided on | |||||||
| the bottom of | the | projector. To prevent sliding | |||||
| tighten the nut at each required location. | Control | ||||||
|
|
| ||||||
4. | OFFICIALLY | (two opp | site | |||||
Use at least | four | rigging points | ||||||
| sides) and | ensure | the straps, clamps or |
| 8, | |||
| cabling | |||||||
| meet the |
|
| Document |
|
|
| |
| adequate load capacity | for the total |
| |||||
|
|
|
| September | the |
| ||
| projector(s) weight. Refer to Section 6 | of |
| |||||
| manual shipped with the projector for information |
| ||||||
| on size and weight. DO NOT join the rigging |
| ||||||
| straps or cables to a common point — keep |
| ||||||
| separated. Ensure all straps are taut. |
|
|
|
| |||
9 of 12 pages |
