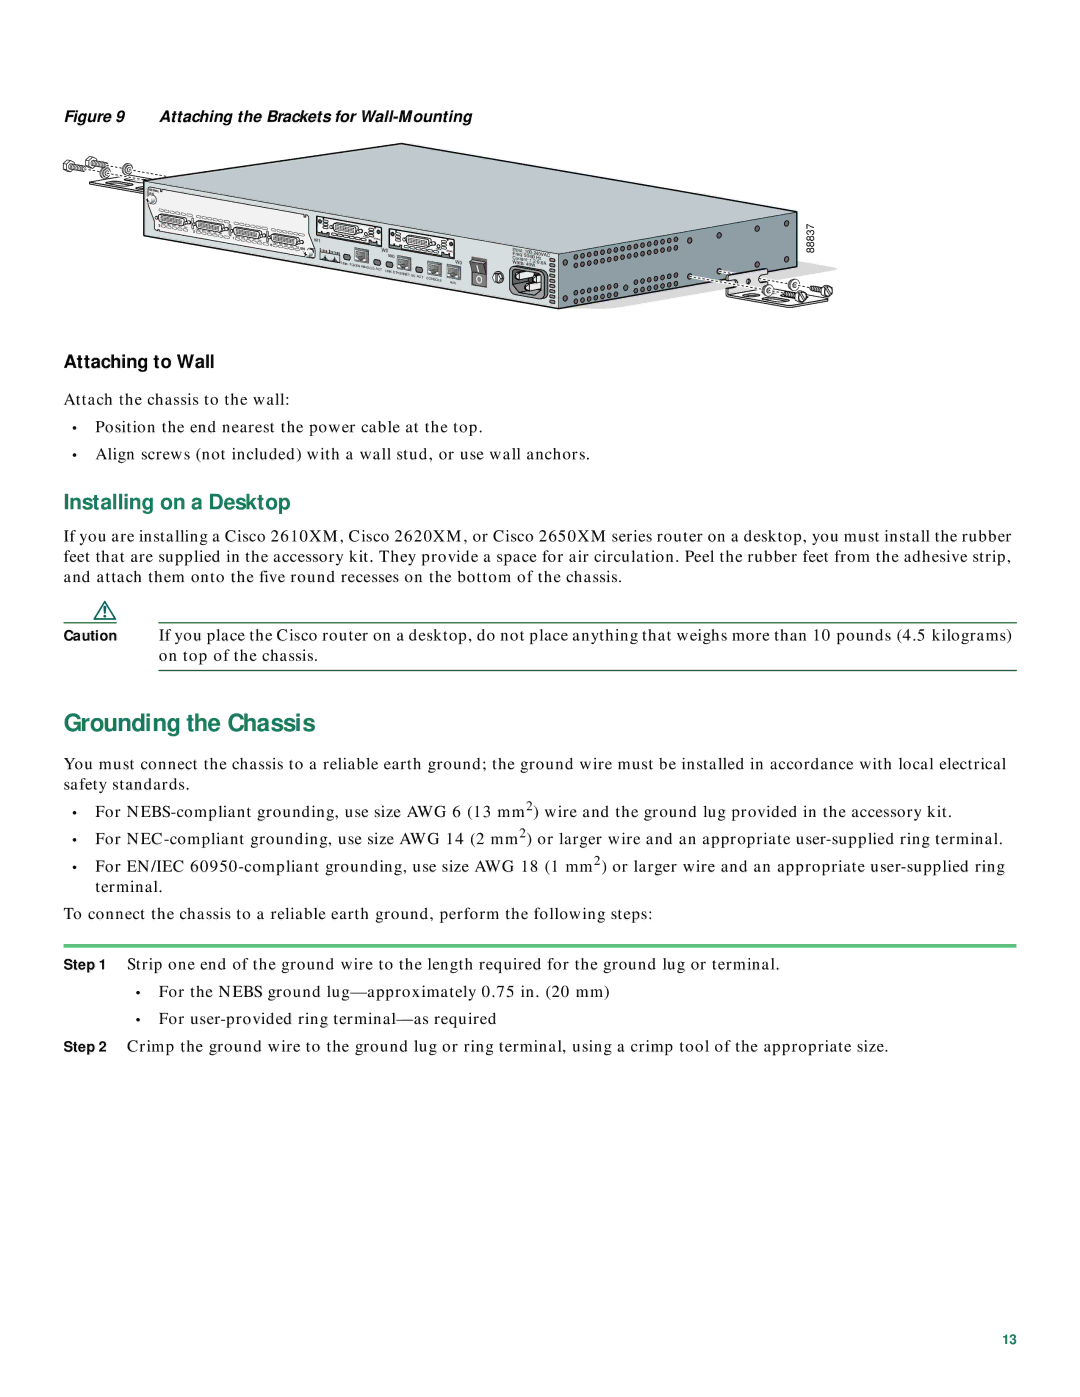
Figure 9 Attaching the Brackets for Wall-Mounting
SERIAL |
|
|
A/S |
|
|
3 | CN/LP RXC | RXD TXC TXD |
|
2 | CN/LP | RXC | RXD TXC TXD |
|
|
1 | CN/LP RXC | RXD TXC |
|
| W1 | CONN | SERIAL |
|
|
|
| TXD |
|
|
|
|
| ||||
|
|
| 0 | CN/LP RXC | RXD TXC TXD |
|
|
|
|
|
|
|
|
|
|
|
|
|
| ||
|
|
|
|
| EN |
| W0 | CONN | SERIAL | |
|
|
|
|
|
|
|
| W0 |
|
|
|
|
|
|
| LINK | TOKEN RING |
|
| W0 | |
|
|
|
|
|
|
|
|
| ||
|
|
|
|
|
|
| 0/0 ACT | LINK |
|
|
|
|
|
|
|
|
|
| ETHERNET |
|
|
|
|
|
|
|
|
|
| 0/0 ACT | CONSOLE |
|
|
|
|
|
|
|
|
|
| AUX | |
Input: | |||
Freq: | |||
| 50/60 | Hz | |
Current: 1.2- | 0.6A | ||
Watts: | 40W | ||
88837
Attaching to Wall
Attach the chassis to the wall:
•Position the end nearest the power cable at the top.
•Align screws (not included) with a wall stud, or use wall anchors.
Installing on a Desktop
If you are installing a Cisco 2610XM, Cisco 2620XM, or Cisco 2650XM series router on a desktop, you must install the rubber feet that are supplied in the accessory kit. They provide a space for air circulation. Peel the rubber feet from the adhesive strip, and attach them onto the five round recesses on the bottom of the chassis.
Caution If you place the Cisco router on a desktop, do not place anything that weighs more than 10 pounds (4.5 kilograms) on top of the chassis.
Grounding the Chassis
You must connect the chassis to a reliable earth ground; the ground wire must be installed in accordance with local electrical safety standards.
•For
•For
•For EN/IEC
To connect the chassis to a reliable earth ground, perform the following steps:
Step 1 Strip one end of the ground wire to the length required for the ground lug or terminal.
•For the NEBS ground
•For
Step 2 Crimp the ground wire to the ground lug or ring terminal, using a crimp tool of the appropriate size.
13