Connect the Hub to Other Network Devices (continued)
RATING | |
/ | |
2A /1A | 50 / 60 Hz |
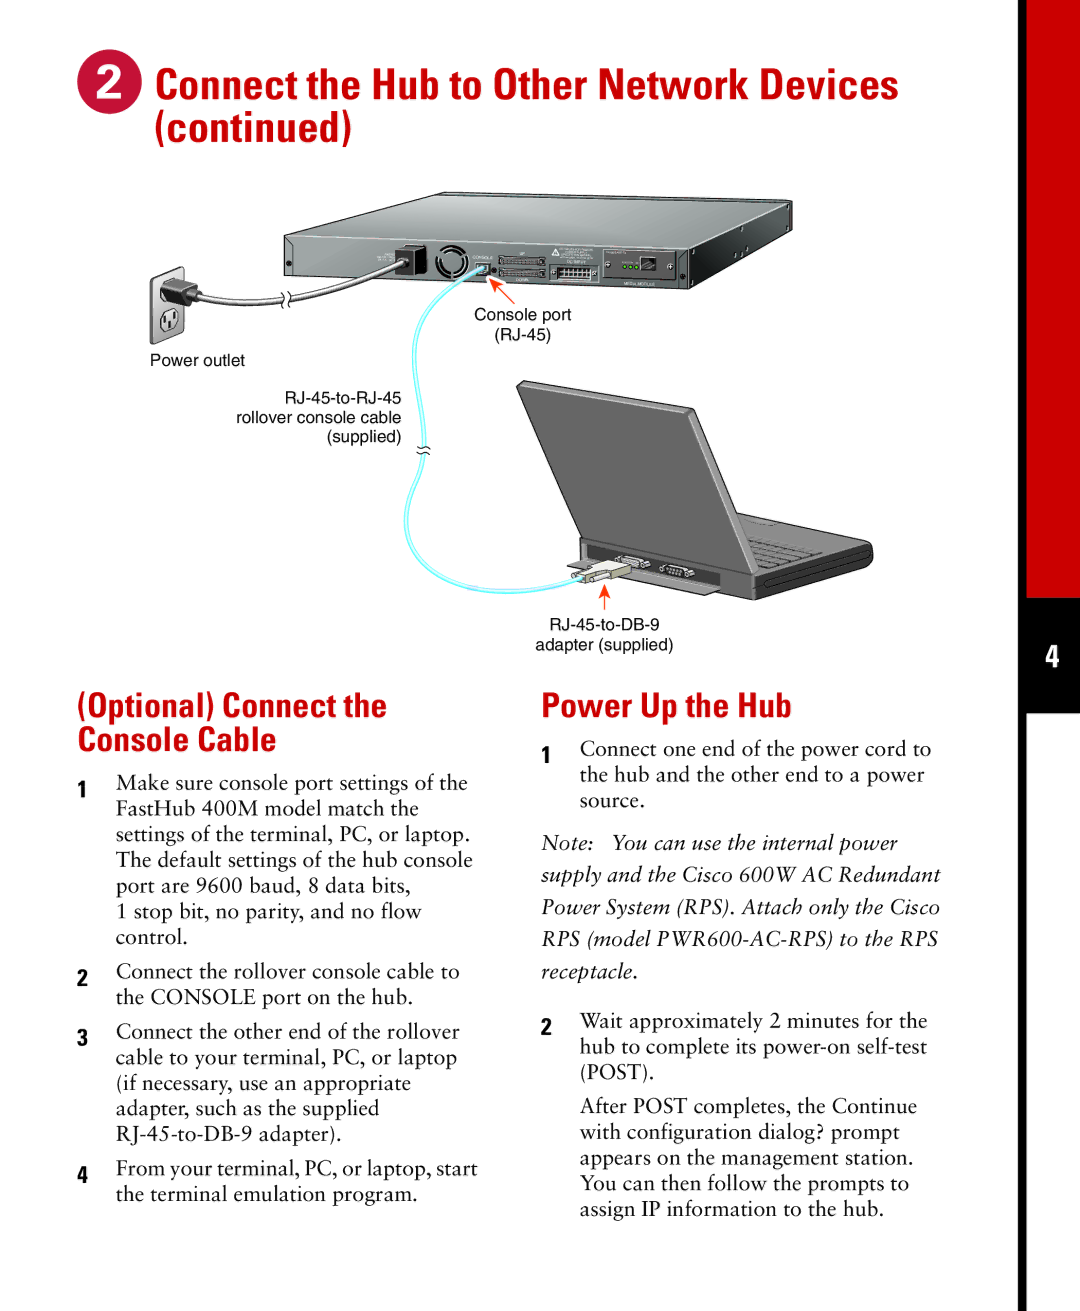
Power outlet
| DC INPUTS FOR REMOTE |
UP | POWER SUPPLY |
SPECIFIED IN MANUAL | |
CONSOLE | +5V @6A, +12V @1A |
| DC INPUT |
DOWN |
|
Console port
10/100
STAT DUP 100
MEDIA MODULE
(Optional) Connect the Console Cable
1Make sure console port settings of the FastHub 400M model match the settings of the terminal, PC, or laptop. The default settings of the hub console port are 9600 baud, 8 data bits,
1 stop bit, no parity, and no flow control.
2Connect the rollover console cable to the CONSOLE port on the hub.
3Connect the other end of the rollover cable to your terminal, PC, or laptop (if necessary, use an appropriate adapter, such as the supplied
4From your terminal, PC, or laptop, start the terminal emulation program.
adapter (supplied)
Power Up the Hub
1Connect one end of the power cord to the hub and the other end to a power source.
Note: You can use the internal power supply and the Cisco 600W AC Redundant Power System (RPS). Attach only the Cisco RPS (model
2Wait approximately 2 minutes for the hub to complete its
After POST completes, the Continue with configuration dialog? prompt appears on the management station. You can then follow the prompts to assign IP information to the hub.
4