Welcome
Thank you for choosing the Cisco ISA500 Series Integrated Security Appliance. This guide describes how to physically install the device and how to launch the ISA500 Series Configuration Utility to configure it.
1 Before You Begin
Before you begin the installation, make sure that you have the following:
•An active Internet account.
•Mounting hardware and related tools. The mounting kit included with the device contains four rubber feet for desktop placement, two
•
•A computer with Microsoft Internet Explorer 8 or 9, or Mozilla Firefox 3.6.x, 5, or 6 for using the
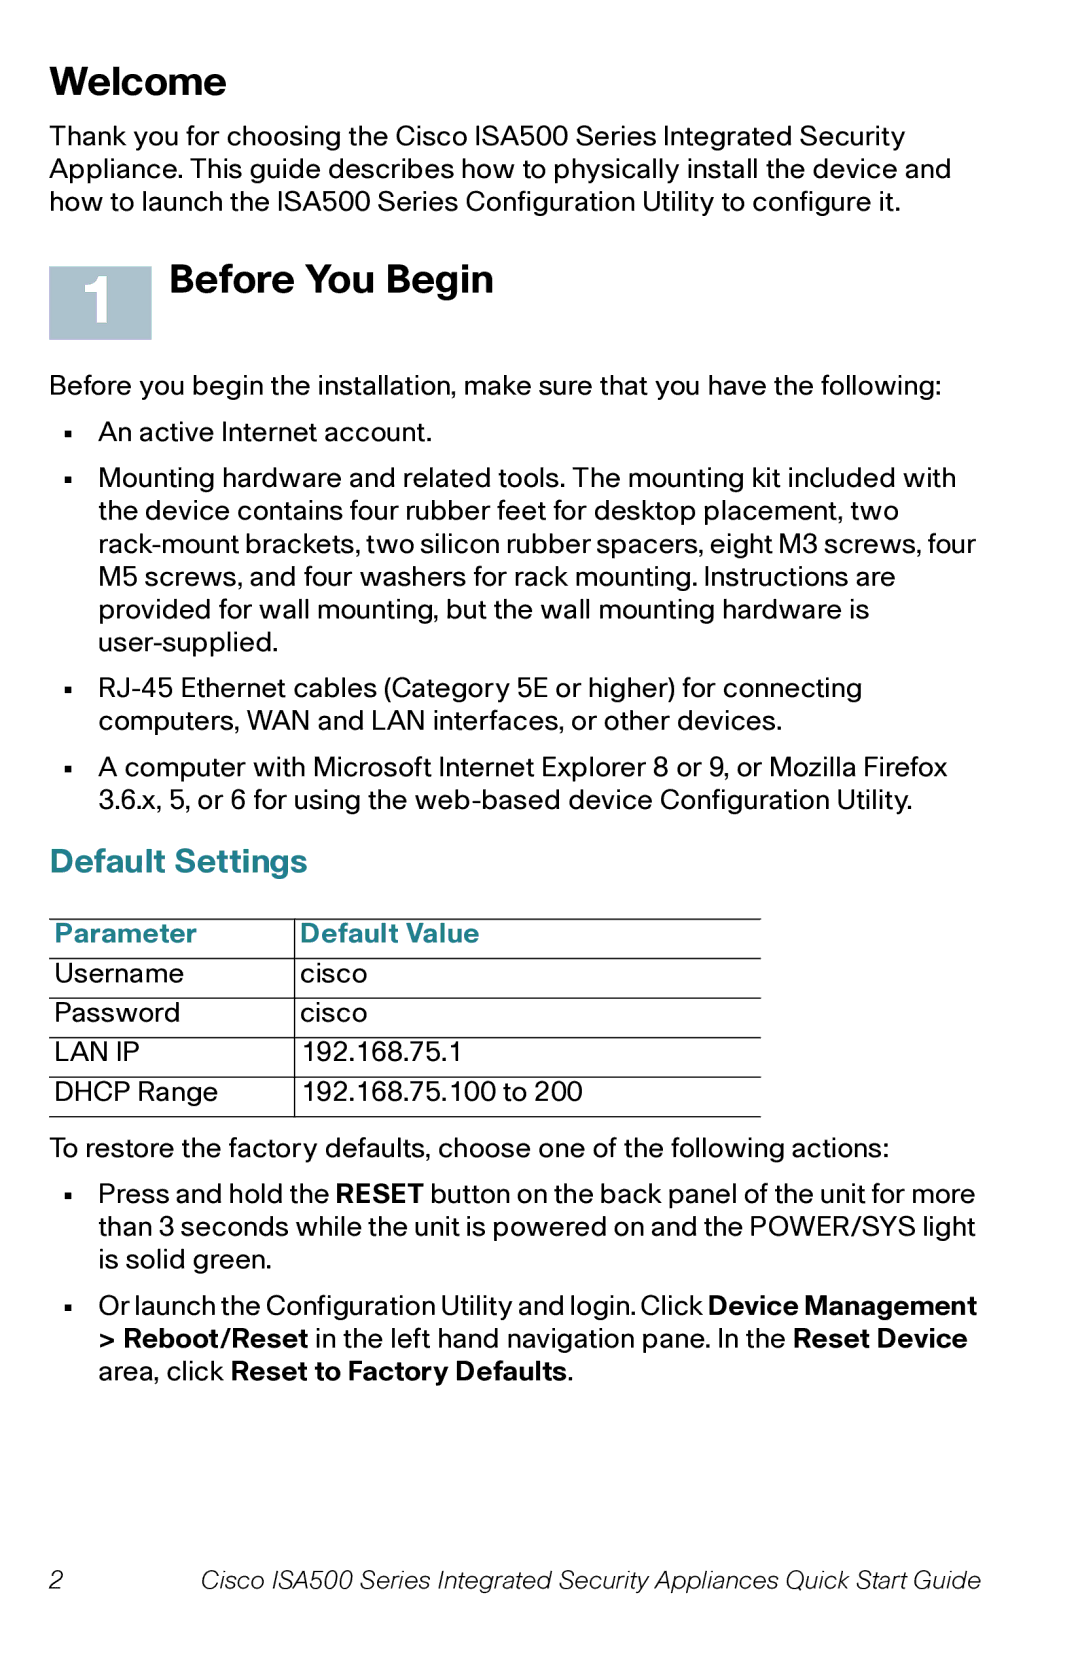
Default Settings
Parameter | Default Value |
Username | cisco |
Password | cisco |
LAN IP | 192.168.75.1 |
DHCP Range | 192.168.75.100 to 200 |
To restore the factory defaults, choose one of the following actions:
•Press and hold the RESET button on the back panel of the unit for more than 3 seconds while the unit is powered on and the POWER/SYS light is solid green.
•Or launch the Configuration Utility and login. Click Device Management > Reboot/Reset in the left hand navigation pane. In the Reset Device area, click Reset to Factory Defaults.
2 | Cisco ISA500 Series Integrated Security Appliances Quick Start Guide |