•Mechanical Loading: Be sure that the security appliance is level and stable to avoid any hazardous conditions.
To place your security appliance on a desktop, install the supplied four rubber feet on the bottom of the security appliance. Place the security appliance on a flat surface.
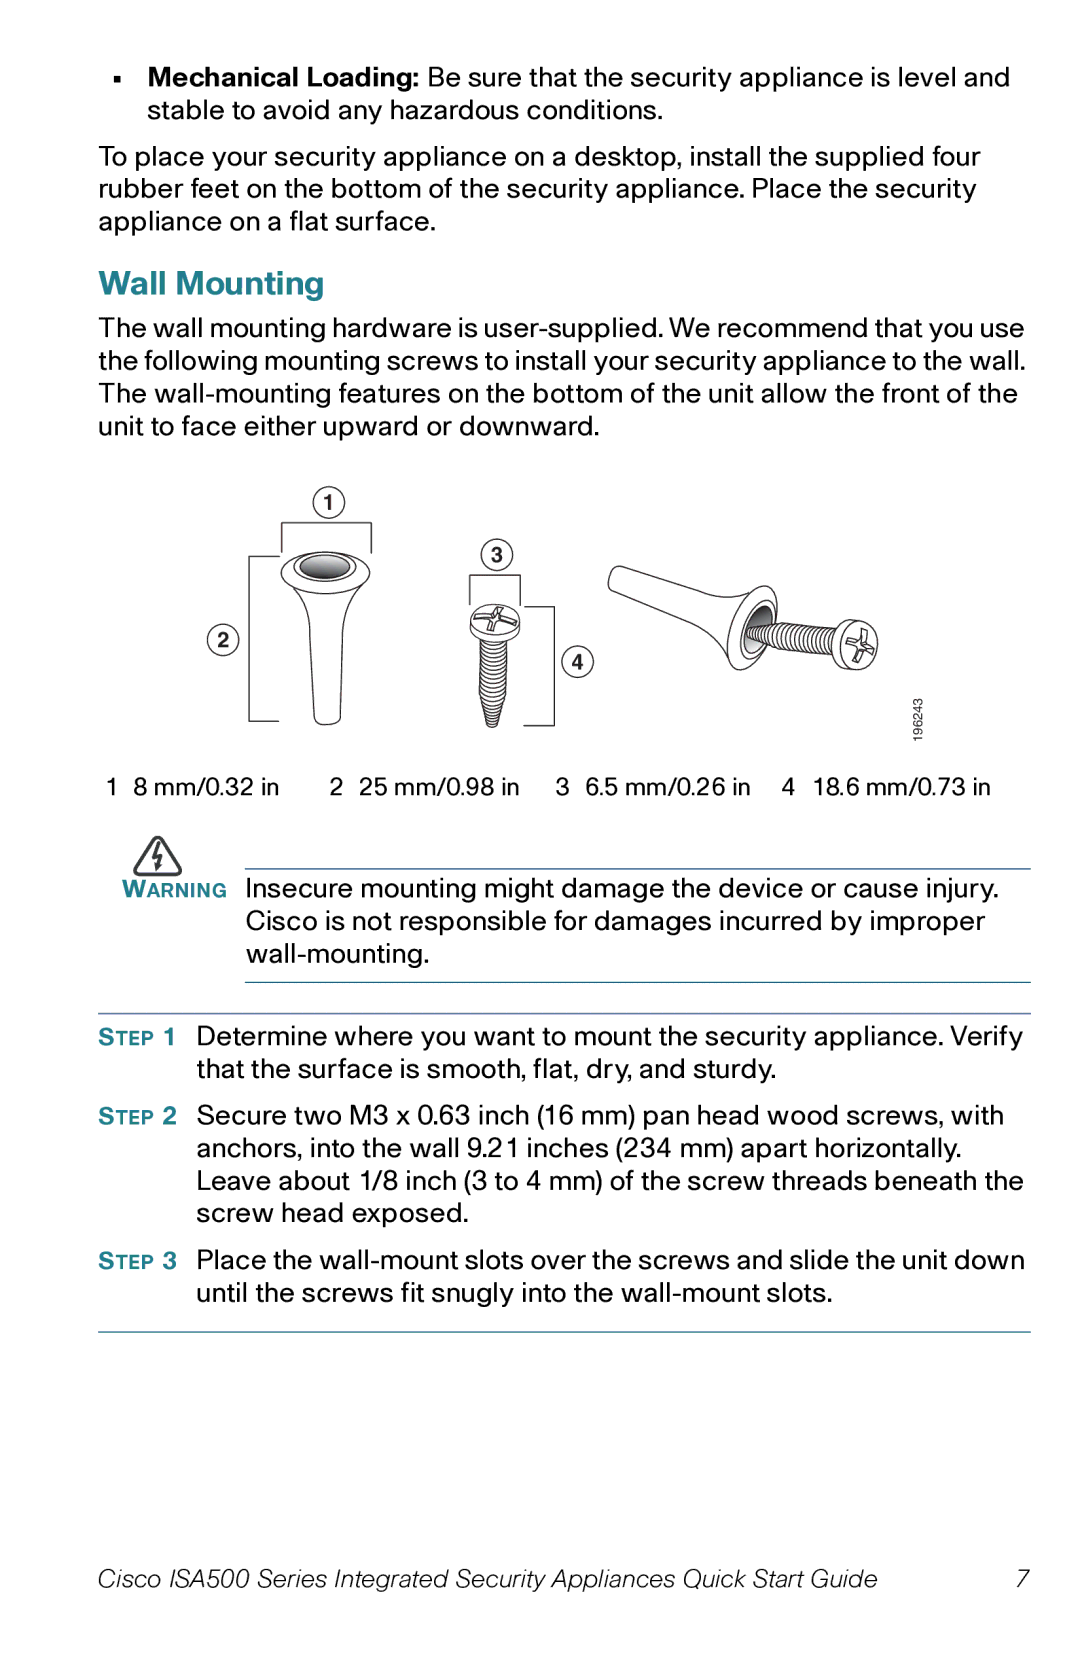
Wall Mounting
The wall mounting hardware is
2
1
3
4
196243
1 8 mm/0.32 in | 2 25 mm/0.98 in 3 6.5 mm/0.26 in 4 18.6 mm/0.73 in |
WARNING Insecure mounting might damage the device or cause injury. Cisco is not responsible for damages incurred by improper
STEP 1 Determine where you want to mount the security appliance. Verify that the surface is smooth, flat, dry, and sturdy.
STEP 2 Secure two M3 x 0.63 inch (16 mm) pan head wood screws, with anchors, into the wall 9.21 inches (234 mm) apart horizontally. Leave about 1/8 inch (3 to 4 mm) of the screw threads beneath the screw head exposed.
STEP 3 Place the
Cisco ISA500 Series Integrated Security Appliances Quick Start Guide | 7 |